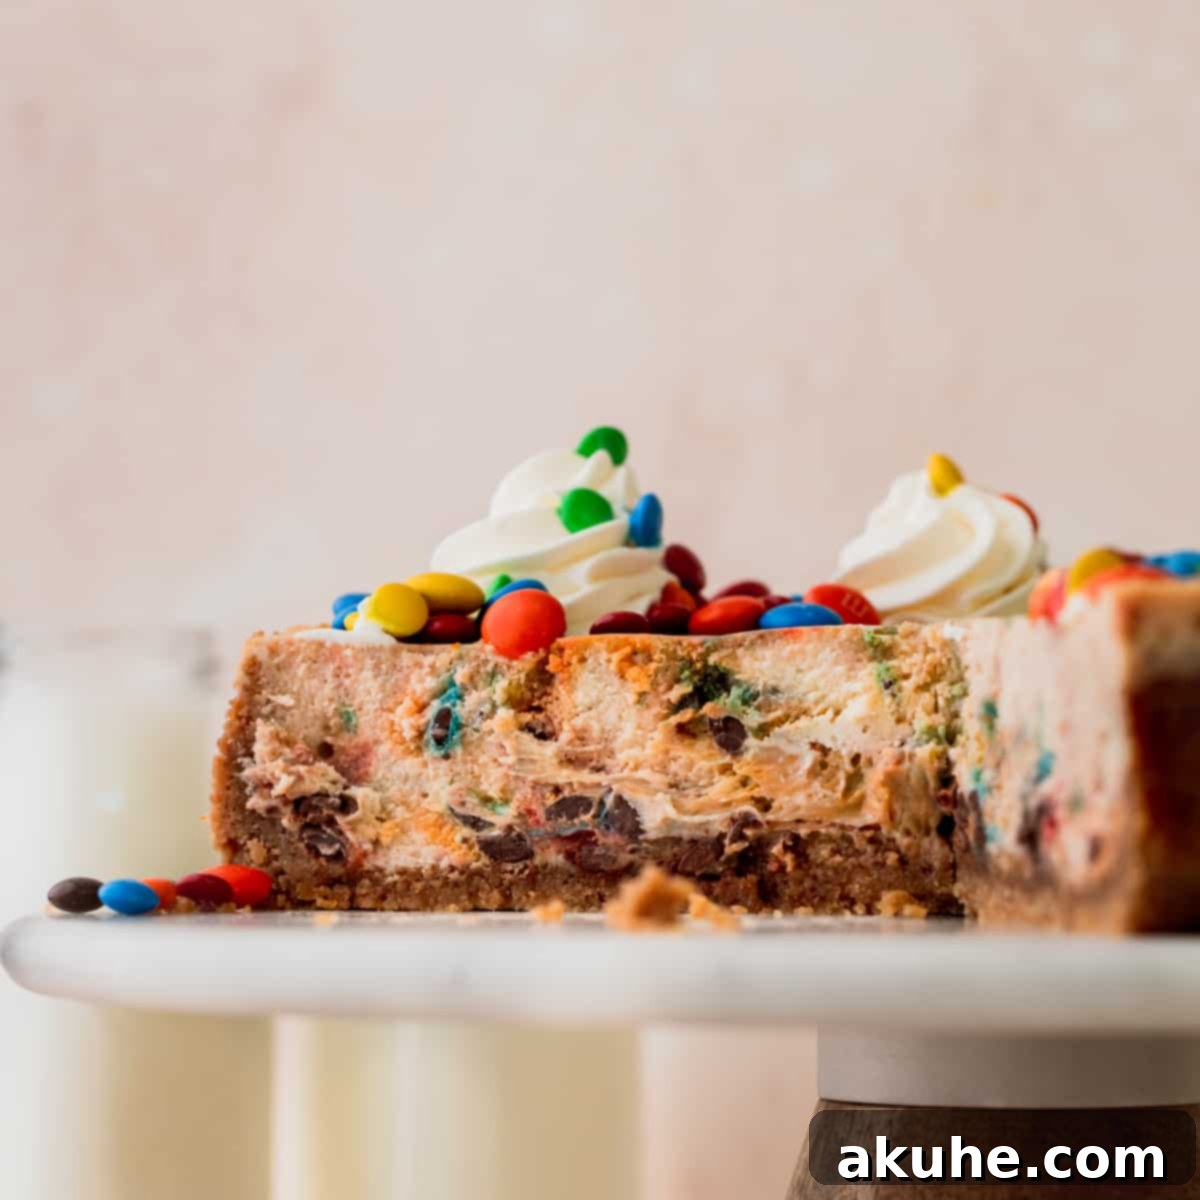
Ultimate M&M Cheesecake: A Creamy, No-Crack Baked Delight
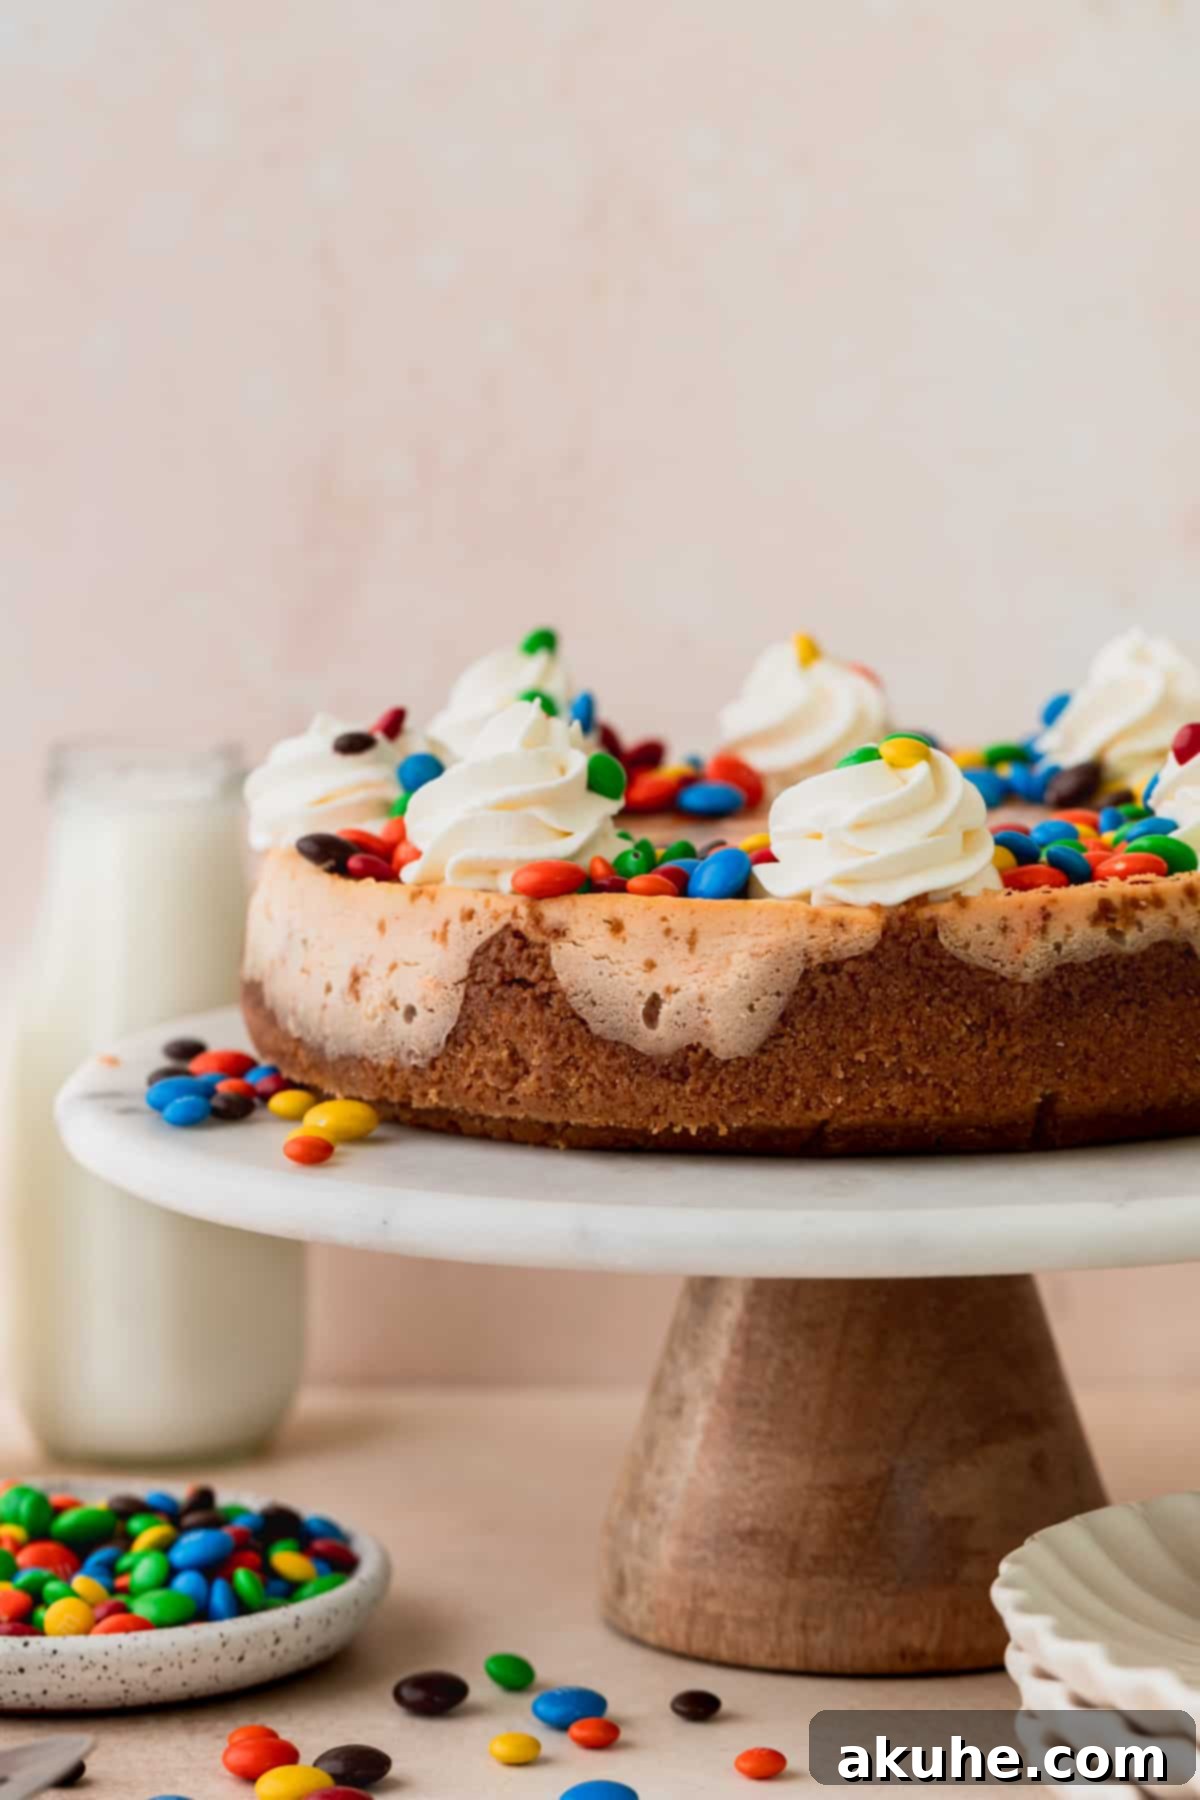
Prepare to be enchanted by this show-stopping M&M cheesecake – a truly delightful baked cheesecake brimming with vibrant, colorful M&M’s! This dessert features a classic, buttery graham cracker crust, a luxuriously creamy cheesecake center, and is generously crowned with homemade whipped cream, further adorned with both miniature and regular M&M’s for an irresistible finish. It’s more than just a dessert; it’s a celebration in every slice, guaranteed to bring smiles to any occasion.
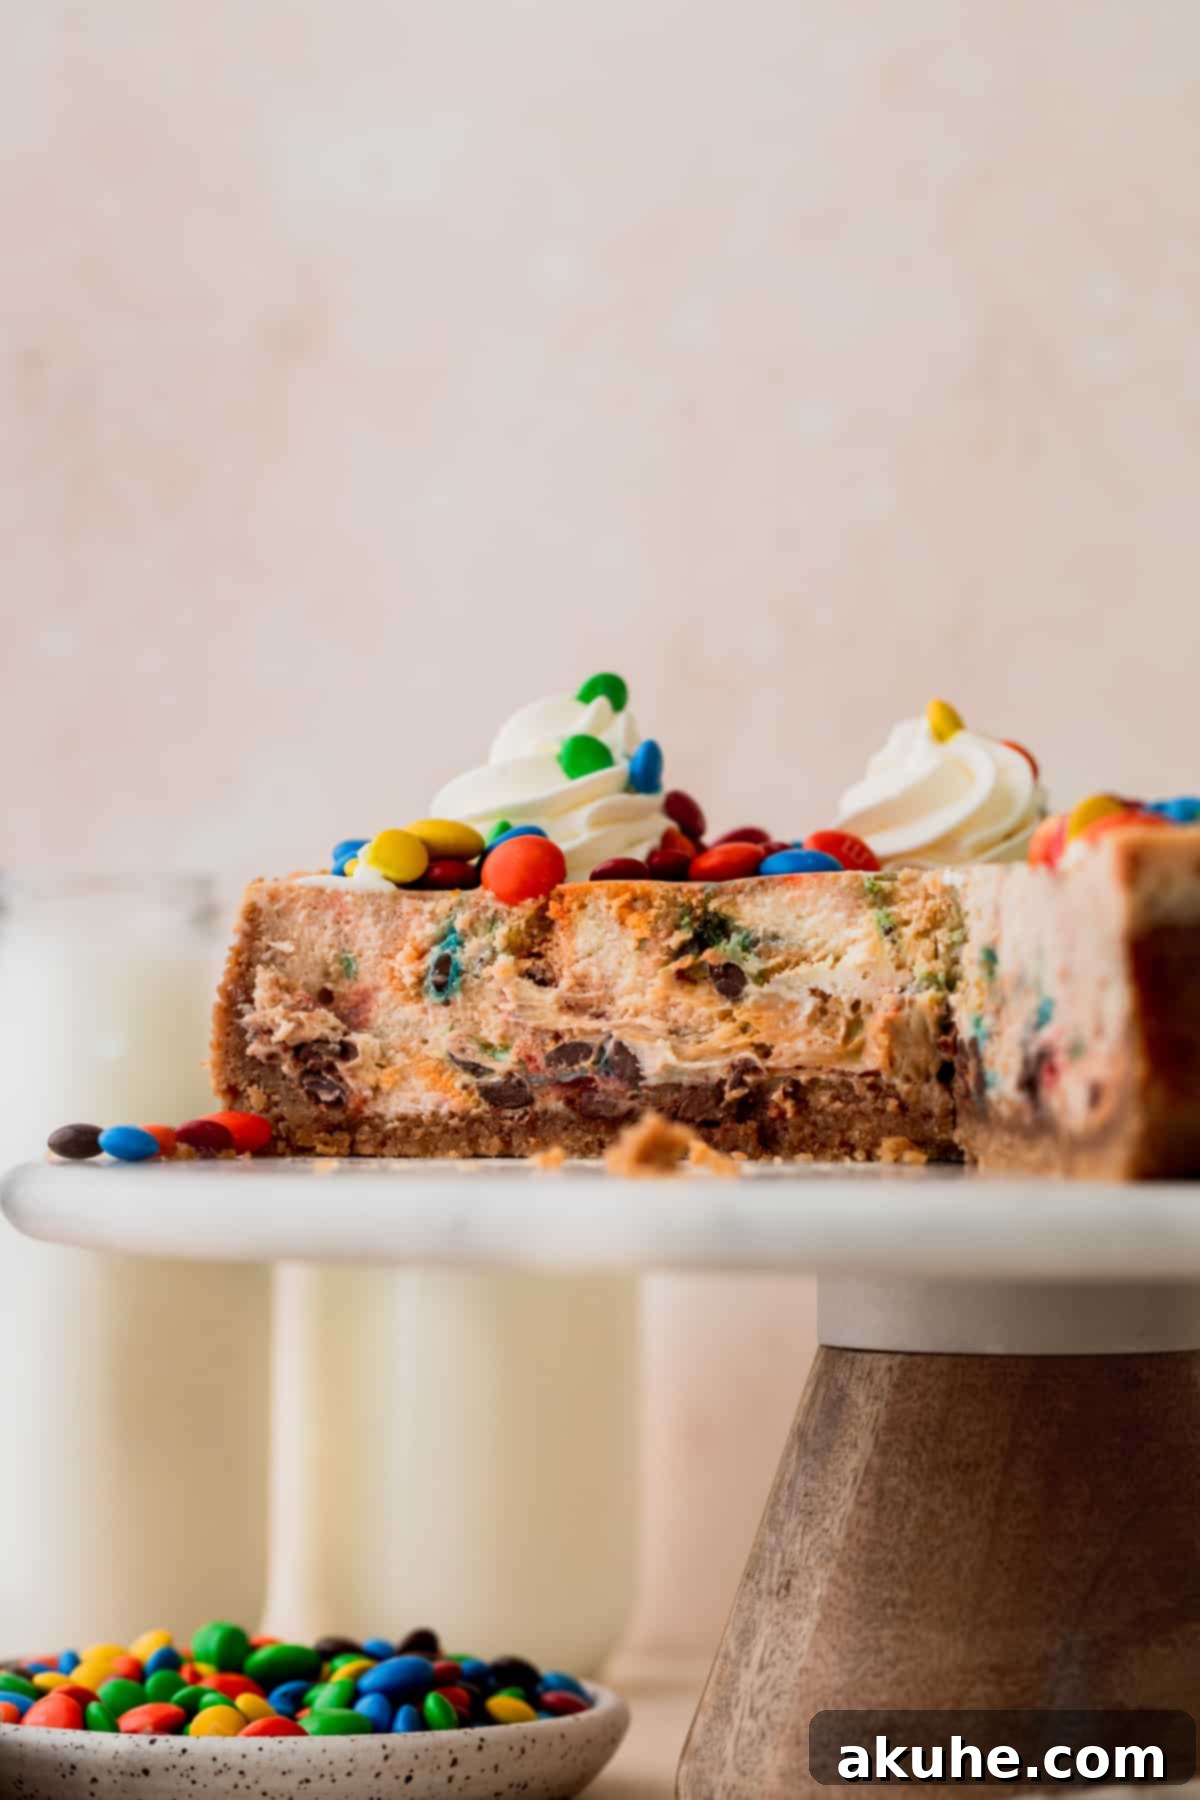
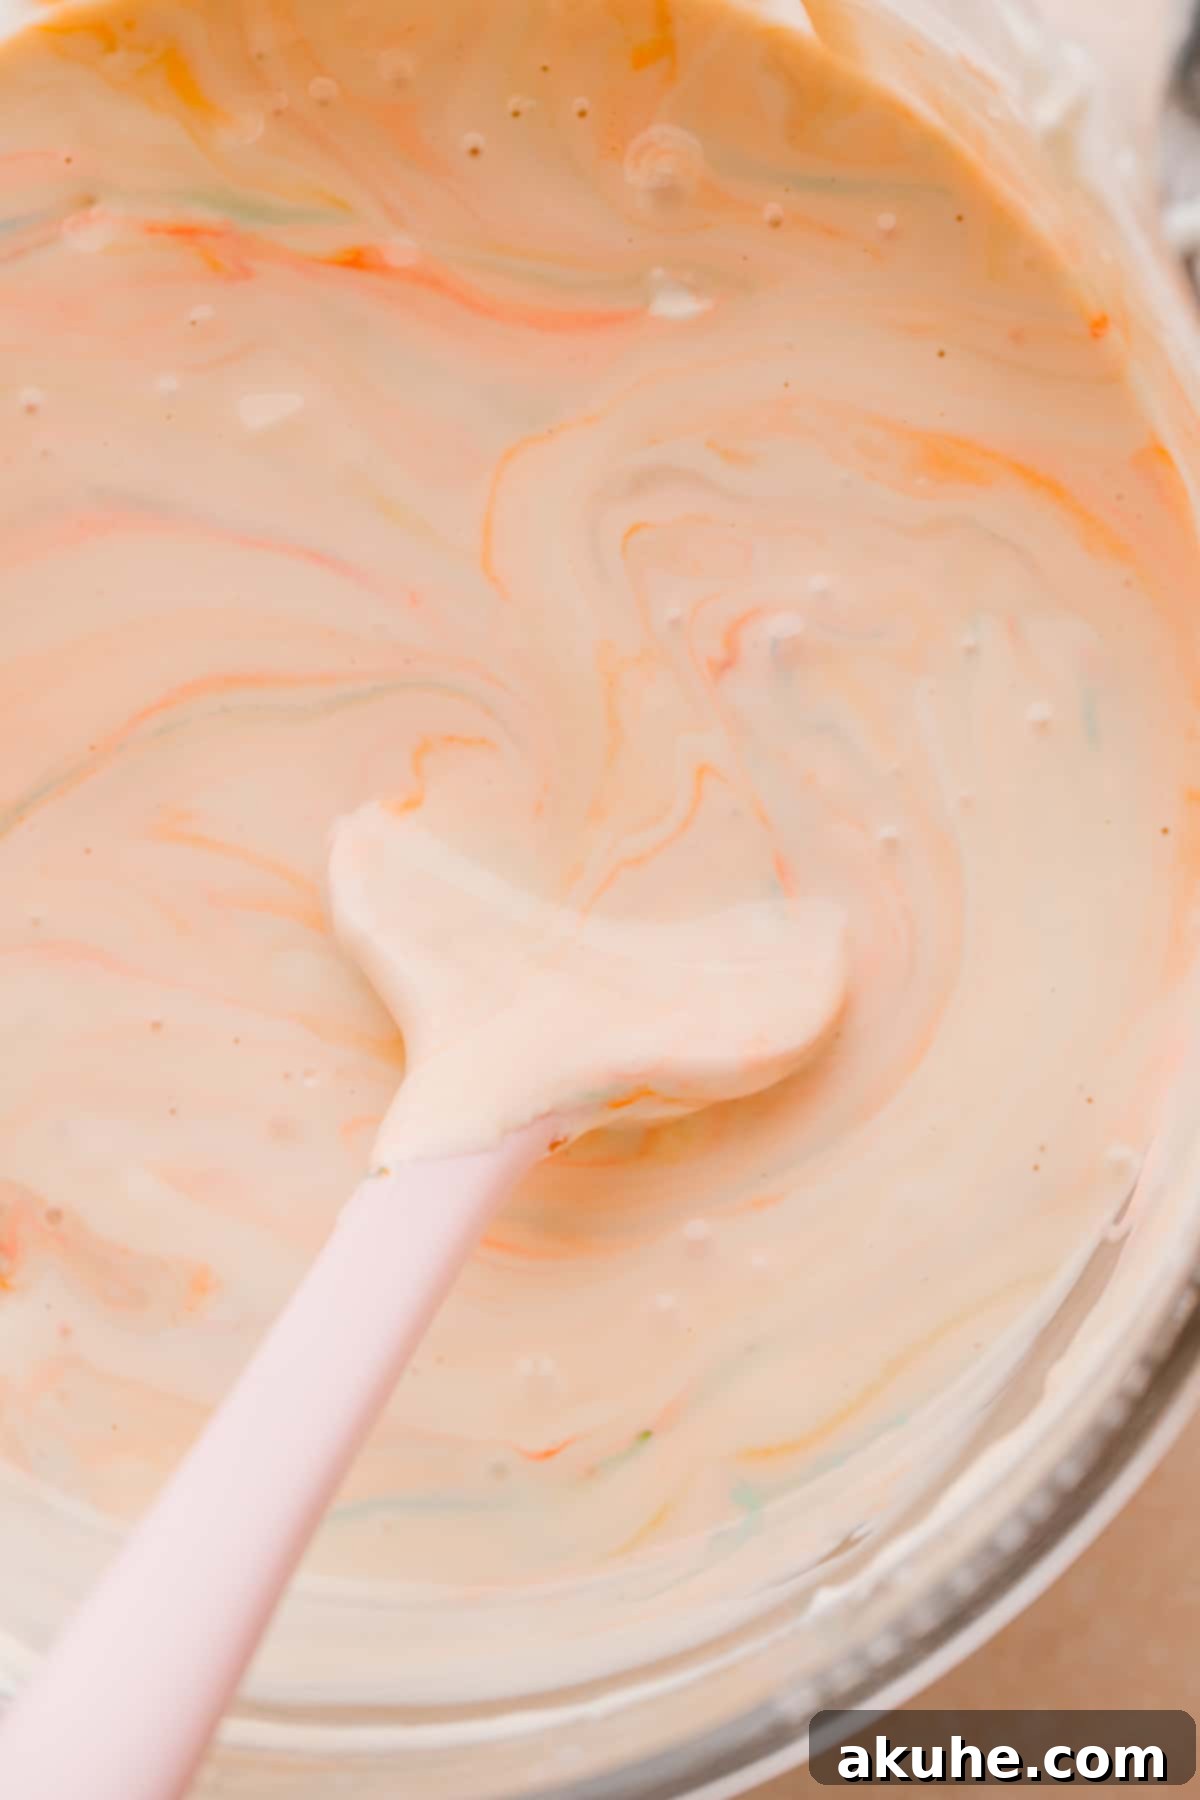
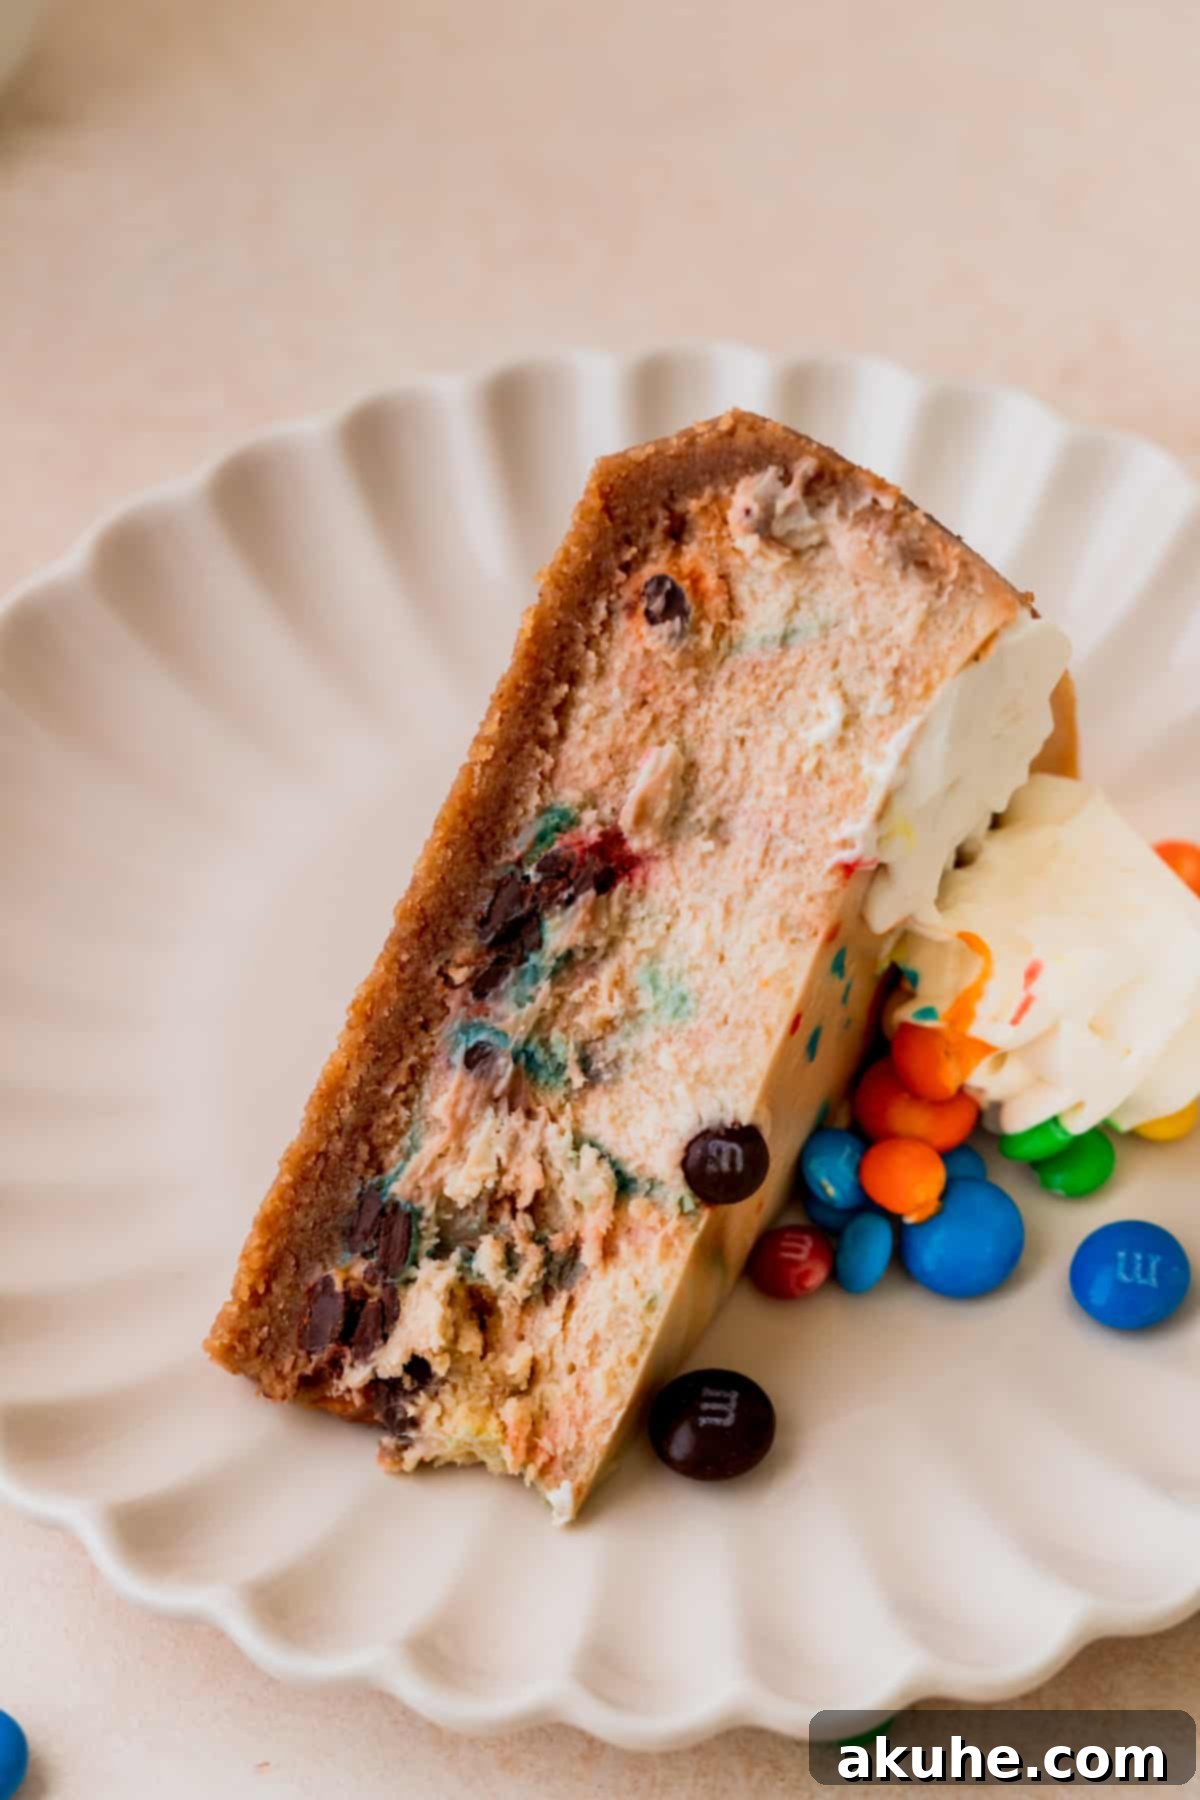
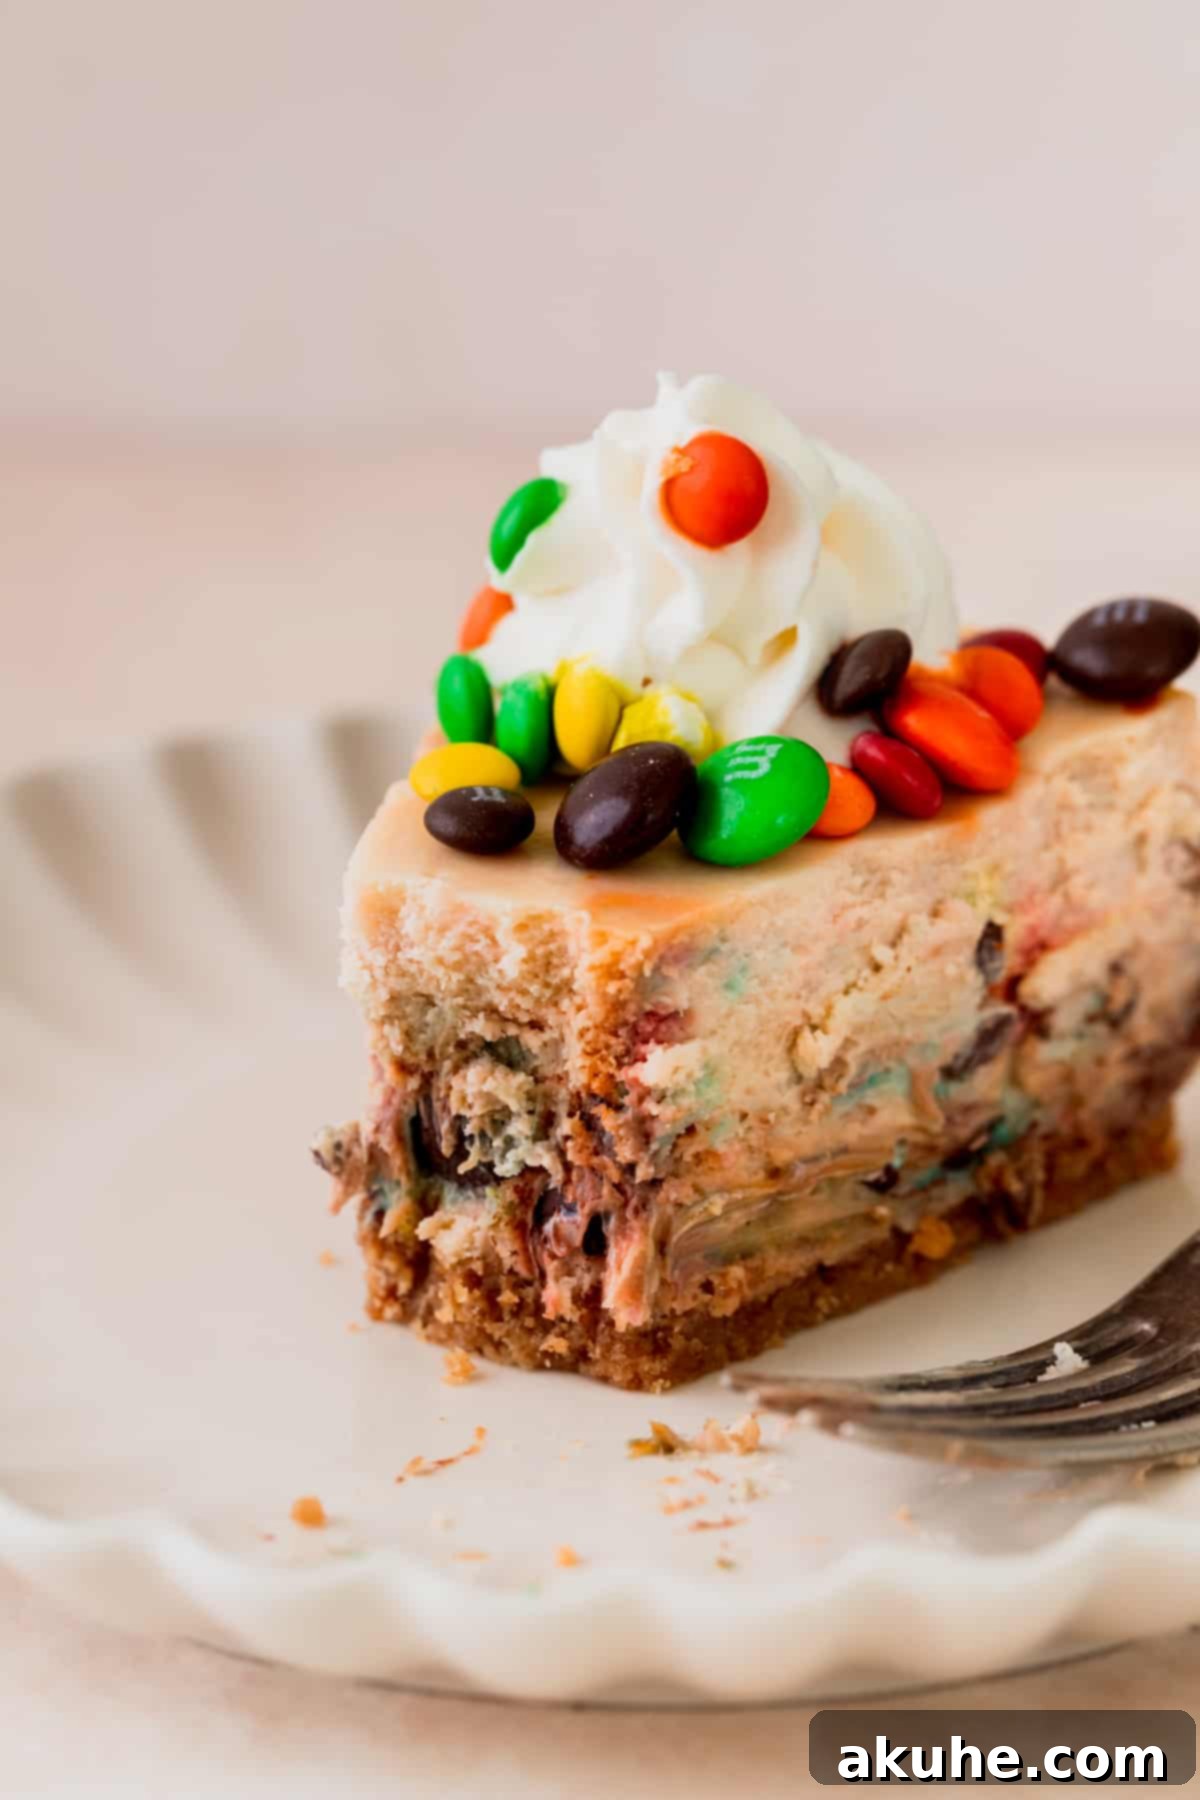
This M&M cheesecake brings an immediate burst of joy with its festive appearance and the rich, comforting taste of milk chocolate M&M’s. The magic truly happens when you cut into the cheesecake, revealing a spectacular mosaic of colors. As the M&M’s are gently folded into the batter, their vibrant shells subtly bleed, creating beautiful, unique swirls throughout the creamy filling. The result is a stunning, almost rainbow-like interior that makes each slice a work of art and a delight to behold.
For those who love the playful crunch and chocolatey goodness of M&M’s, we have more delightful recipes for you to explore. Indulge in our Monster Cookie Cheesecake, whip up a batch of chewy Mini M&M Cookies, or cool down with our fun M&M Cookie Ice Cream Sandwiches.
Why This M&M Cheesecake Recipe Stands Out
This recipe isn’t just another cheesecake; it’s designed for perfection and maximum enjoyment. Here’s why this M&M cheesecake will become your new favorite:
- Perfectly Baked Graham Cracker Crust: Say goodbye to rock-hard or soggy crusts! Our graham cracker crust bakes to a delightful tenderness that offers a gentle bite, perfectly complementing the creamy cheesecake without overpowering it. It’s soft enough to blend seamlessly with each forkful, providing a harmonious texture in every decadent mouthful.
- Classic Baked Cheesecake Perfection: This cheesecake is baked to achieve that signature rich, dense, and incredibly smooth texture that only a traditional baked cheesecake can deliver. It then undergoes an essential overnight chilling period, allowing all the flavors to meld and the cheesecake to set beautifully, resulting in a truly luxurious dessert.
- Decadent Whipped Cream Topping: While you can opt for a convenient whipped topping, making your own homemade whipped cream elevates this cheesecake to new heights. It’s light, airy, and perfectly sweet, providing a beautiful contrast to the rich cheesecake. For an extra touch of indulgence, consider a silky chocolate ganache topping.
- Double the M&M Fun: We incorporate both mini M&M’s and regular-sized M&M’s into the cheesecake batter and for topping. This thoughtful combination adds varying textures and an enhanced visual appeal, making each bite an exciting experience. Feel free to customize with your favorite M&M varieties or other chocolate candies!
Essential Ingredient Notes for Your M&M Cheesecake
Success in cheesecake baking often comes down to quality ingredients and proper preparation. Here are some key notes on the ingredients needed for this spectacular M&M cheesecake. A comprehensive list of measurements can be found in the recipe card below.
- Graham Crackers: We recommend using two standard packages of graham crackers to achieve the perfect amount of fine crumbs for the crust. For a different flavor profile, feel free to substitute with vanilla wafers, Oreo cookies (for a chocolate crust), Nutter Butters, or even digestive biscuits.
- Brown Sugar: Light brown sugar is specified for the crust, adding a subtle molasses note and helping to create that perfect “wet sand” texture when combined with butter. You can also use dark brown sugar for a richer, deeper flavor.
- Unsalted Butter: Melted unsalted butter is crucial for binding the crust ingredients together, ensuring it holds its shape without becoming greasy. Using unsalted butter allows you to control the overall saltiness of the dessert.
- Full-Fat Cream Cheese: This is a non-negotiable for a truly rich and creamy cheesecake. Low-fat cream cheese contains more water, which can affect the texture and lead to cracks. Ensure your cream cheese is at room temperature by pulling it out of the refrigerator at least 2 hours before you plan to start baking. This ensures a smooth, lump-free batter.
- Full-Fat Sour Cream (or Plain Greek Yogurt): Sour cream adds a delightful tang and contributes to the cheesecake’s incredibly smooth texture. Like cream cheese, it should be at room temperature for optimal blending. Plain full-fat Greek yogurt can be used as an excellent alternative, offering a similar tang and richness.
- Heavy Cream: For the cheesecake batter, room temperature heavy cream blends smoothly into the mixture. However, if you’re making homemade whipped cream for the topping, ensure your heavy cream is cold – this is critical for achieving stiff peaks.
- Large Eggs: Eggs provide structure and richness to the cheesecake. It is vital that they are at room temperature to incorporate smoothly into the batter without curdling or creating a lumpy consistency. Take them out of the fridge at least 2 hours before baking.
- M&M’s: Our recipe calls for both mini M&M’s and regular M&M’s to provide varied texture and visual interest. Purchase larger bags to ensure you have enough for both mixing into the batter and for generous decoration on top. Don’t be shy with these colorful chocolates!
Step-by-Step Instructions: Crafting Your M&M Cheesecake
Making this M&M cheesecake is a straightforward process when you follow these steps carefully. Before you begin, gather your essential tools: a 9-inch parchment paper circle, a 9-inch springform pan, a hand mixer or a stand mixer with a paddle attachment, and a trusty rubber spatula.
M&M Cheesecake Recipe
Author: Stephanie Rutherford
This M&M cheesecake is a baked creamy cheesecake with a graham cracker crust, generously filled with mini and regular M&M’s, and topped with homemade whipped cream and more M&M’s!
Prep Time: 45 mins | Cook Time: 1 hr 20 mins | Chilling Time: 6 hrs | Total Time: 8 hrs 5 mins
Servings: 16 slices
Ingredients
Graham Cracker Crust
- 2 1/2 cups Graham cracker crumbs (from 2 packages of graham crackers, finely crushed)
- 1/4 cup Brown sugar (packed, light or dark)
- 10 TBSP Unsalted butter (melted)
Cheesecake Filling
- 24 oz Cream cheese (full-fat, room temperature)
- 3/4 cup White granulated sugar
- 1/2 cup Sour cream (full-fat, room temperature)
- 1/4 cup Heavy cream (room temperature)
- 1/2 tsp Salt
- 1 tsp Pure vanilla extract
- 3 Large eggs (room temperature)
- 3/4 cup Mini M&M’s
- 1/2 cup M&M’s (regular size)
Whipped Cream Topping
- 1 cup Heavy cream (cold)
- 2 TBSP Powdered sugar
- 1/2 tsp Pure vanilla extract
- Extra M&M’s, for decoration
Instructions
Graham Cracker Crust
- Prepare the Pan: Preheat your oven to 325°F (160°C). Lightly spray a 9-inch springform pan with nonstick baking spray. Line the bottom with a 9-inch parchment paper circle, then spray the parchment paper again. This ensures easy removal.
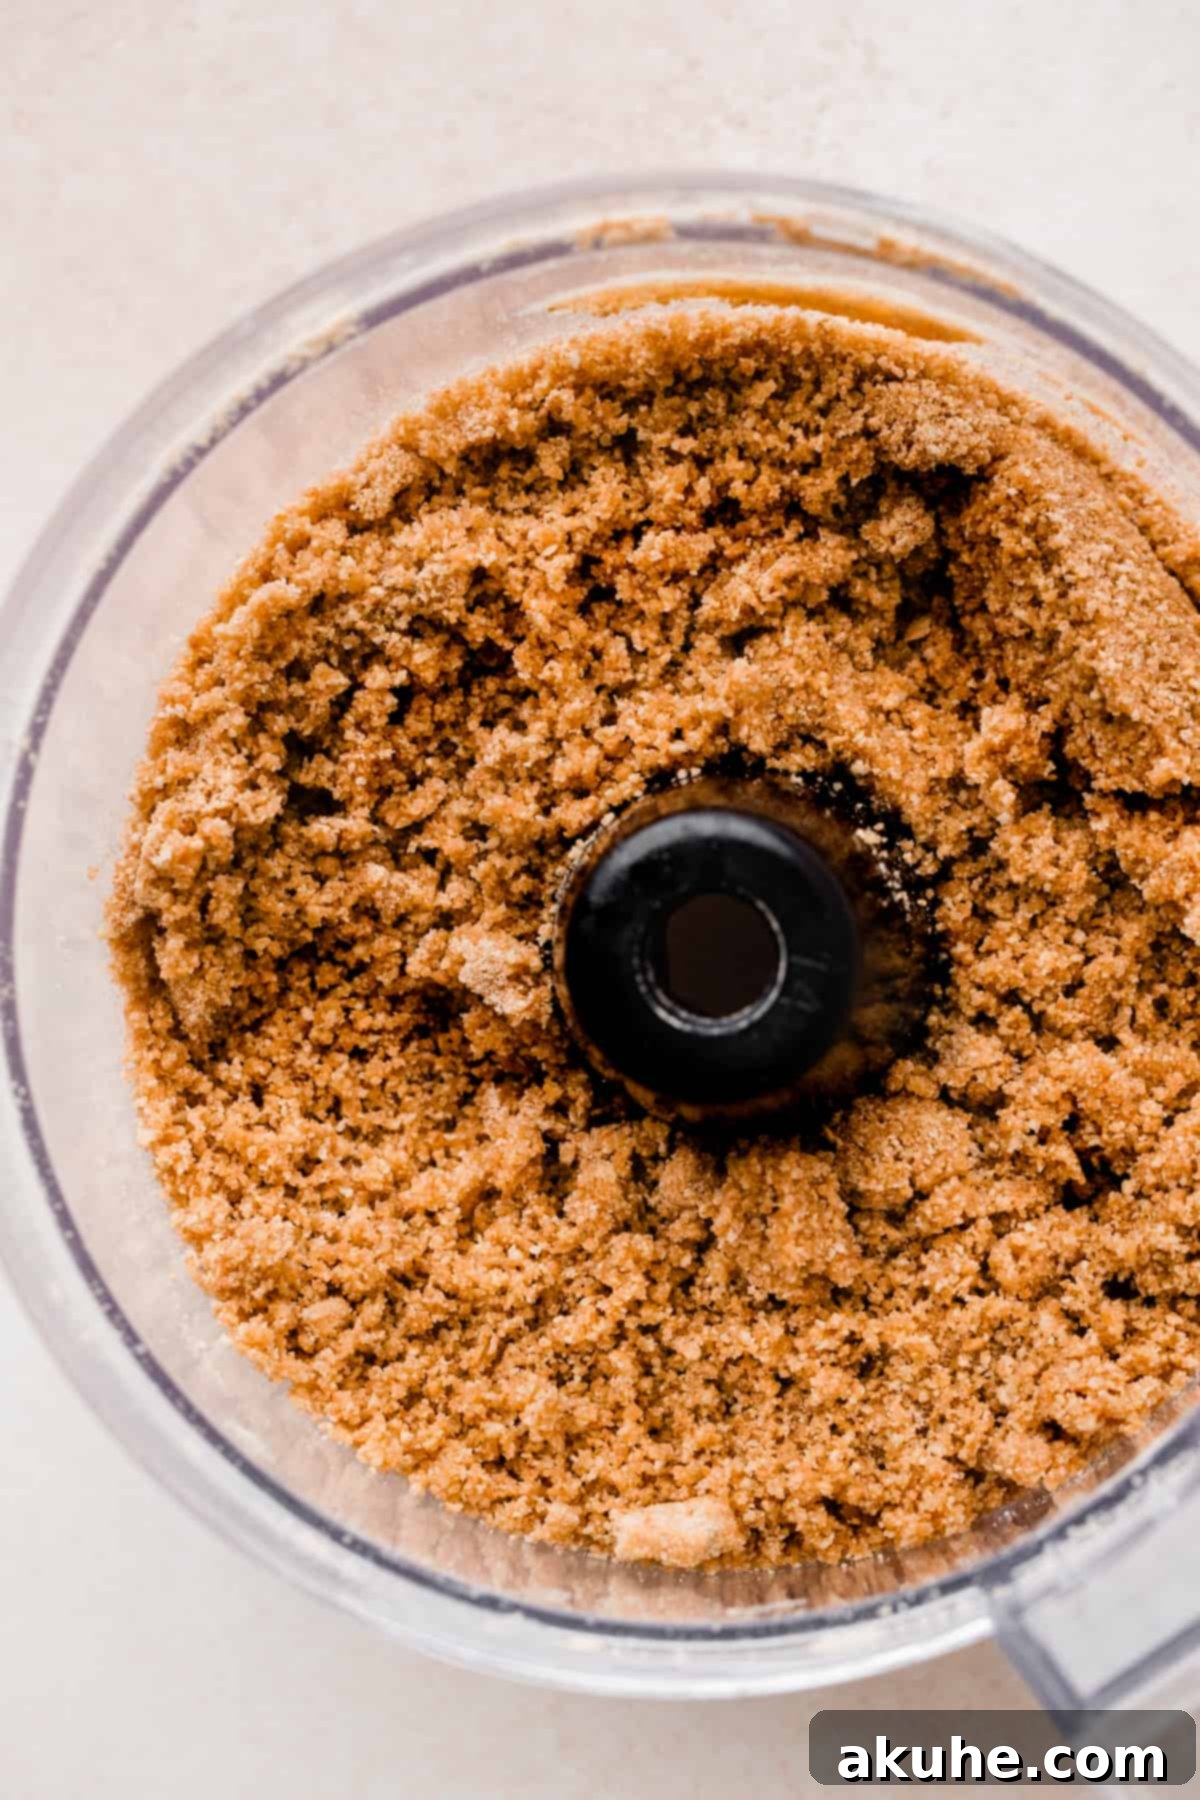
- Make the Crumbs: In a food processor, blend the graham crackers until they form very fine crumbs. If you don’t have a food processor, you can place them in a ziplock bag and crush them with a rolling pin.
- Combine Crust Ingredients: Add the brown sugar and melted butter to the graham cracker crumbs in the food processor (or a mixing bowl). Pulse or mix until the mixture resembles wet sand and is evenly combined.
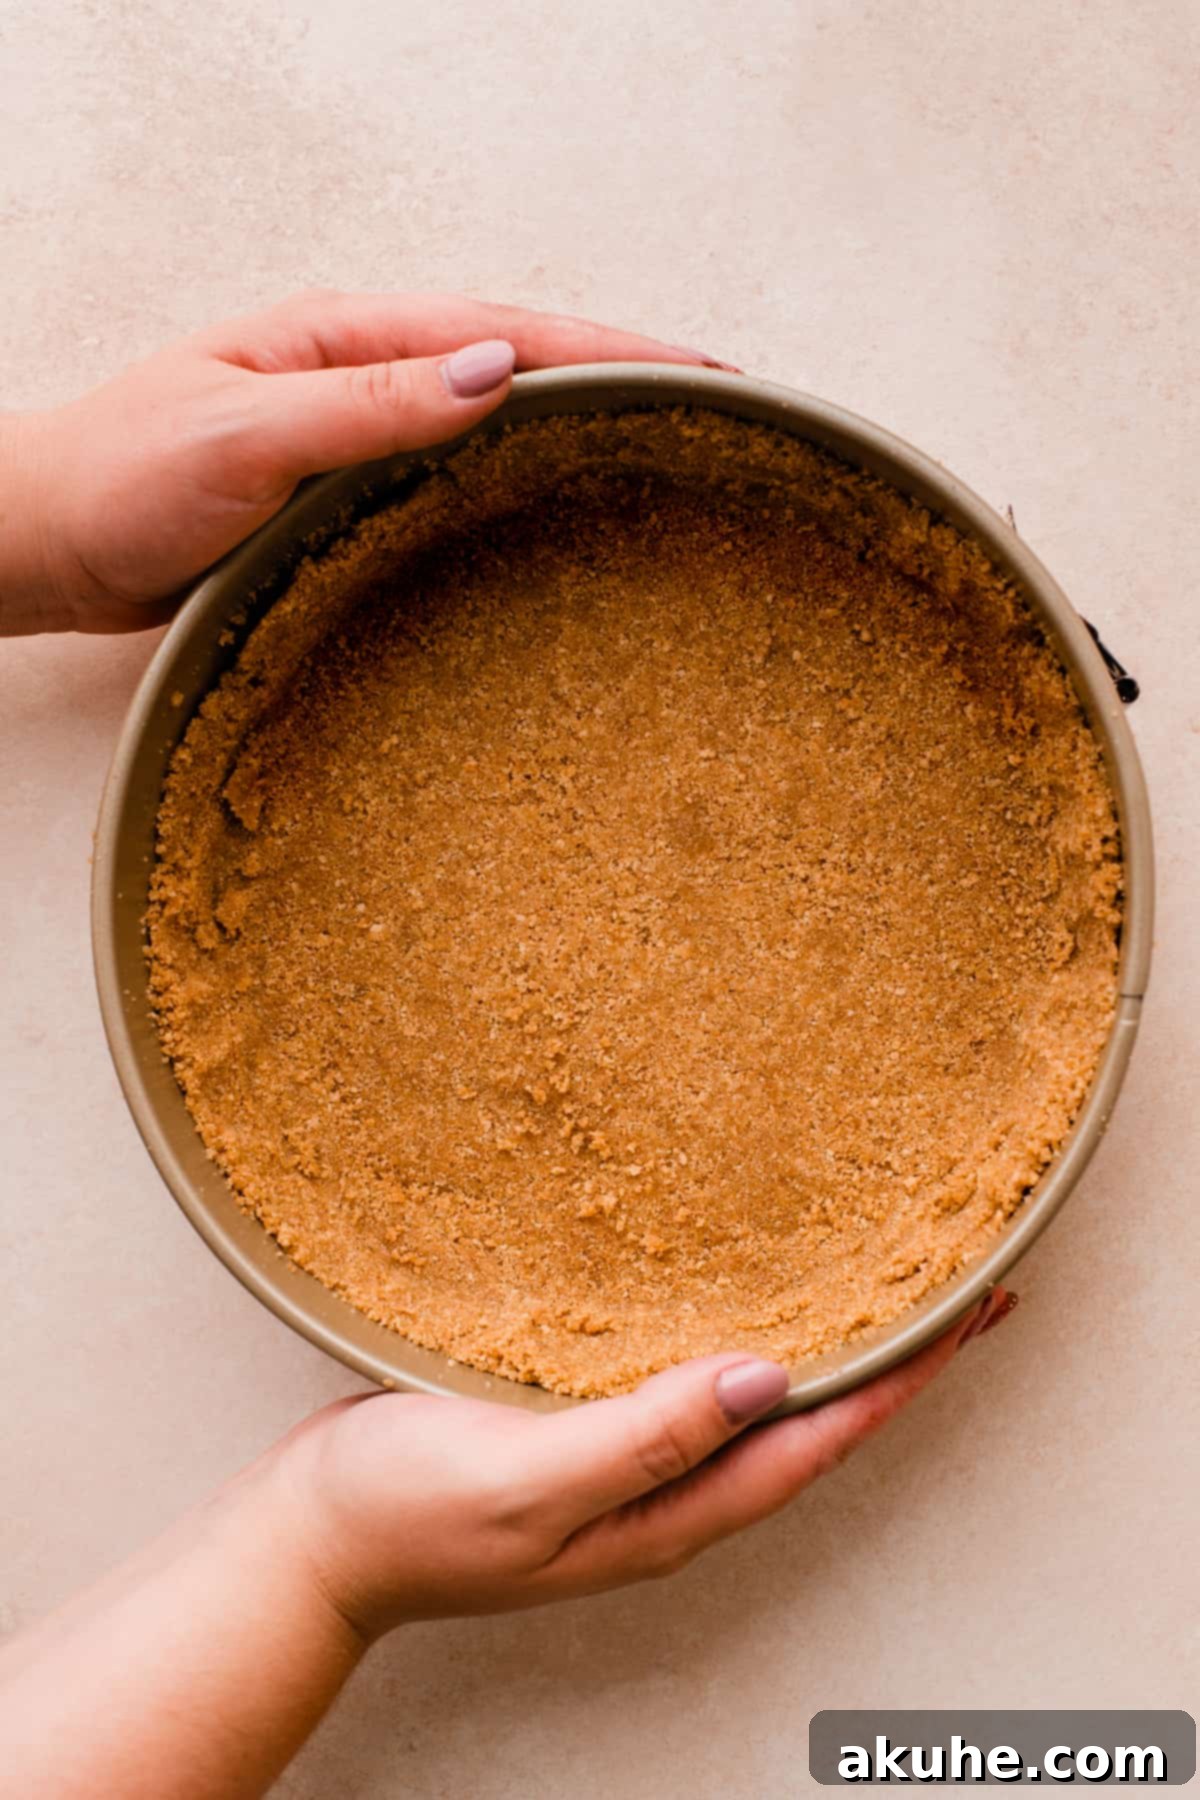
- Form the Crust: Pour the crumb mixture into your prepared springform pan. Use your hands to firmly press the crumbs about halfway up the sides of the pan. Then, use the flat bottom of a measuring cup or a glass to thoroughly compact the crust, especially on the bottom, ensuring it is even and dense.
- Pre-Bake the Crust: Bake the compacted crust for 11 minutes. This step helps to set the crust and prevents it from becoming soggy later. Remove from oven and set aside while you prepare the filling.
Cheesecake Filling
- Initial Preparation: Begin preparing the cheesecake filling once the crust is pre-baking. Start heating water for your water bath setup.
- Beat Cream Cheese and Sugar: In a large mixing bowl (using a stand mixer with a paddle attachment or a hand mixer), beat the softened cream cheese on high speed for 1 minute until smooth and creamy. Scrape down the sides of the bowl. Add in the white granulated sugar and beat again on high speed for another minute, until well combined and fluffy.
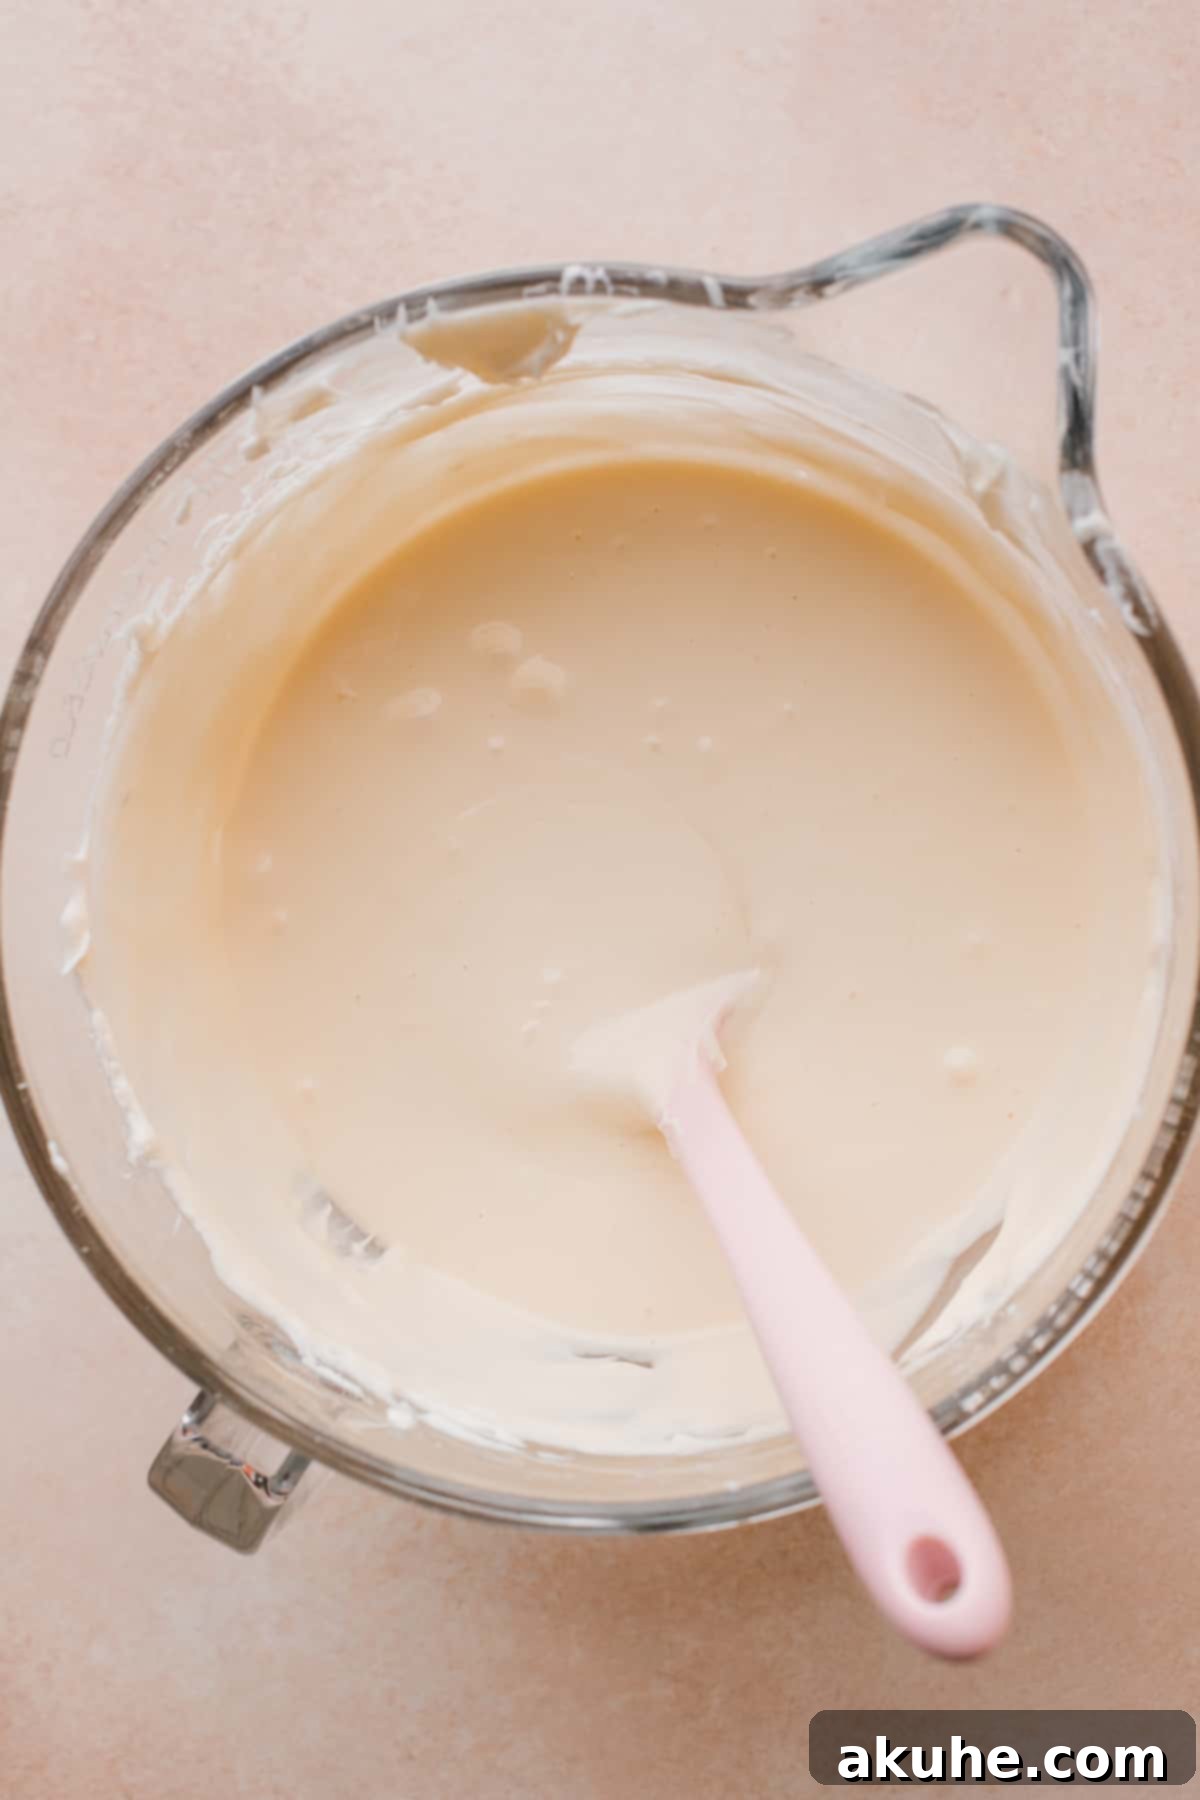
- Add Wet Ingredients (Except Eggs): Scrape down the bowl once more. Add the room temperature sour cream, heavy cream, vanilla extract, and salt. Mix on medium speed until the mixture is completely smooth and no lumps remain.
- Incorporate Eggs Carefully: Crack the large eggs into a separate small bowl first. Then, add the eggs into the cream cheese mixture one at a time, mixing on low speed after each addition just until combined. Avoid overmixing the eggs, as this can incorporate too much air, leading to cracks in the finished cheesecake. Scrape the bowl after each egg.
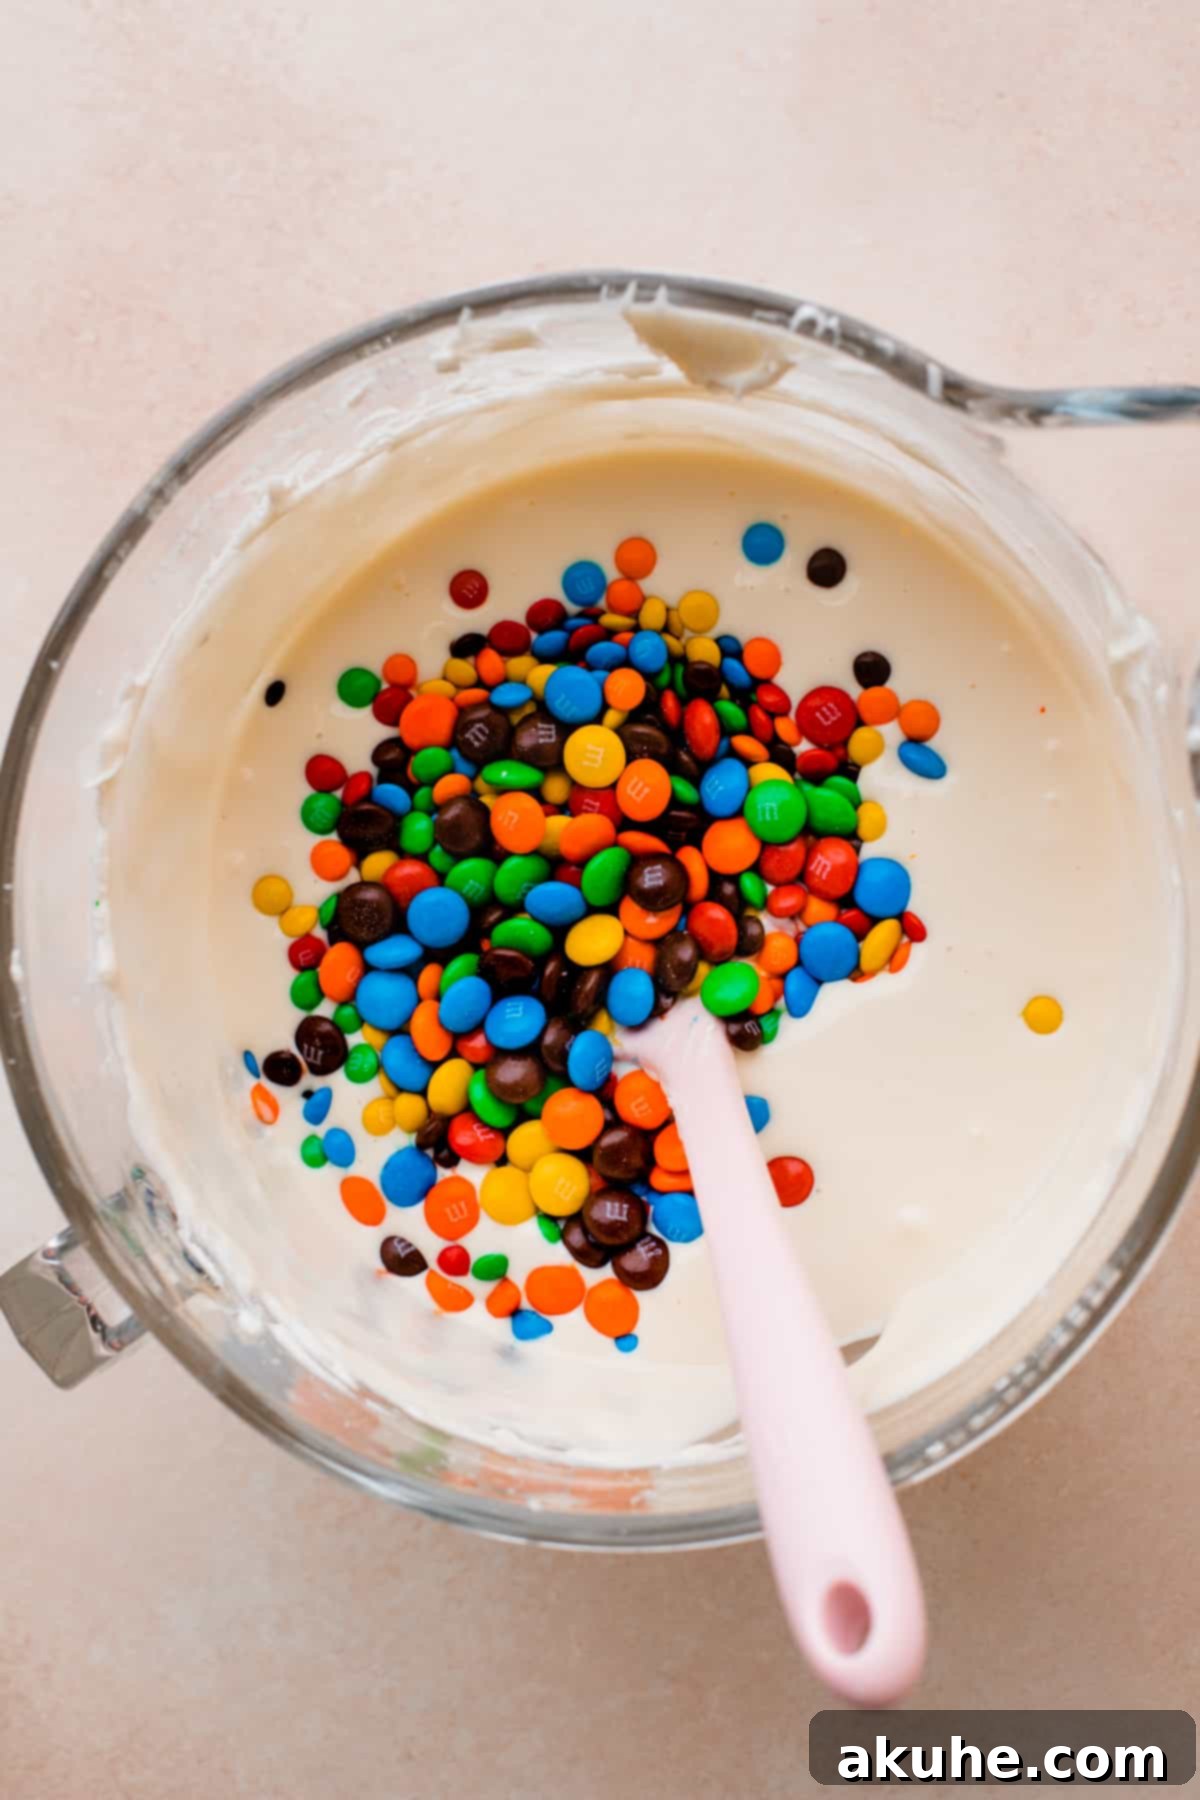
- Fold in M&M’s: Remove the bowl from the mixer. Gently add both the mini and regular M&M’s into the cheesecake batter. Using a rubber spatula, carefully fold the M&M’s into the batter until evenly distributed. You’ll notice the colors starting to bleed slightly, creating beautiful, vibrant swirls throughout the batter – this is perfectly normal and desired!
- Pour the Batter: Pour the colorful cheesecake filling evenly over the pre-baked graham cracker crust in the springform pan.
- Prepare the Water Bath: This step is crucial for a perfectly creamy, crack-free cheesecake. Follow one of the methods below for your water bath, using a large roasting pan and hot, steaming water.
- Method 1 (Recommended for no leaks): Place your 9-inch springform pan inside a slightly larger 10-inch cake pan. Then, place this cake pan (with the springform inside) into your large roasting pan. Carefully fill the roasting pan with hot water, ensuring the water comes about halfway up the sides of the 10-inch cake pan. This method completely protects your springform pan from any water leakage.
- Method 2 (Direct Wrap): Wrap your 9-inch springform pan tightly twice over with heavy-duty aluminum foil, ensuring no seams are exposed to water. Place the wrapped springform pan directly into the large roasting pan. Carefully fill the roasting pan with hot water, bringing it halfway up the sides of the springform pan. While effective, there’s a slight chance of water seeping through if the foil isn’t perfectly sealed.
- Bake the Cheesecake: Carefully transfer the roasting pan with the cheesecake to the preheated 325°F (160°C) oven. Bake for 70-85 minutes. The cheesecake is done when the edges are set, but the very center still has a slight, gentle jiggle when the pan is lightly tapped.
- Slow Cooling in Oven: Once baked, turn off the oven but leave the cheesecake inside. Prop the oven door open slightly (about 2-3 inches) and let the cheesecake cool slowly in the gradually decreasing heat for 30 minutes. This slow cooling process is essential for preventing cracks.
- Complete Cooling and Chilling: After 30 minutes in the oven, carefully remove the cheesecake (still in its water bath) and transfer the springform pan to a wire cooling rack. Let it cool completely at room temperature. Once entirely cooled, cover the cheesecake loosely with plastic wrap or aluminum foil and transfer it to the refrigerator. Chill for a minimum of 6 hours, but ideally overnight, for the best flavor and firmest texture.
Whipped Cream Topping
- Prepare Equipment: For best results with homemade whipped cream, place a metal mixing bowl and the whisk attachment in the freezer for about 10-15 minutes to chill thoroughly.
- Whip Ingredients: Once chilled, add the cold heavy cream, powdered sugar, and vanilla extract to the cold bowl. Using a mixer, beat on high speed until stiff peaks form. Be careful not to overbeat, or you’ll end up with butter!
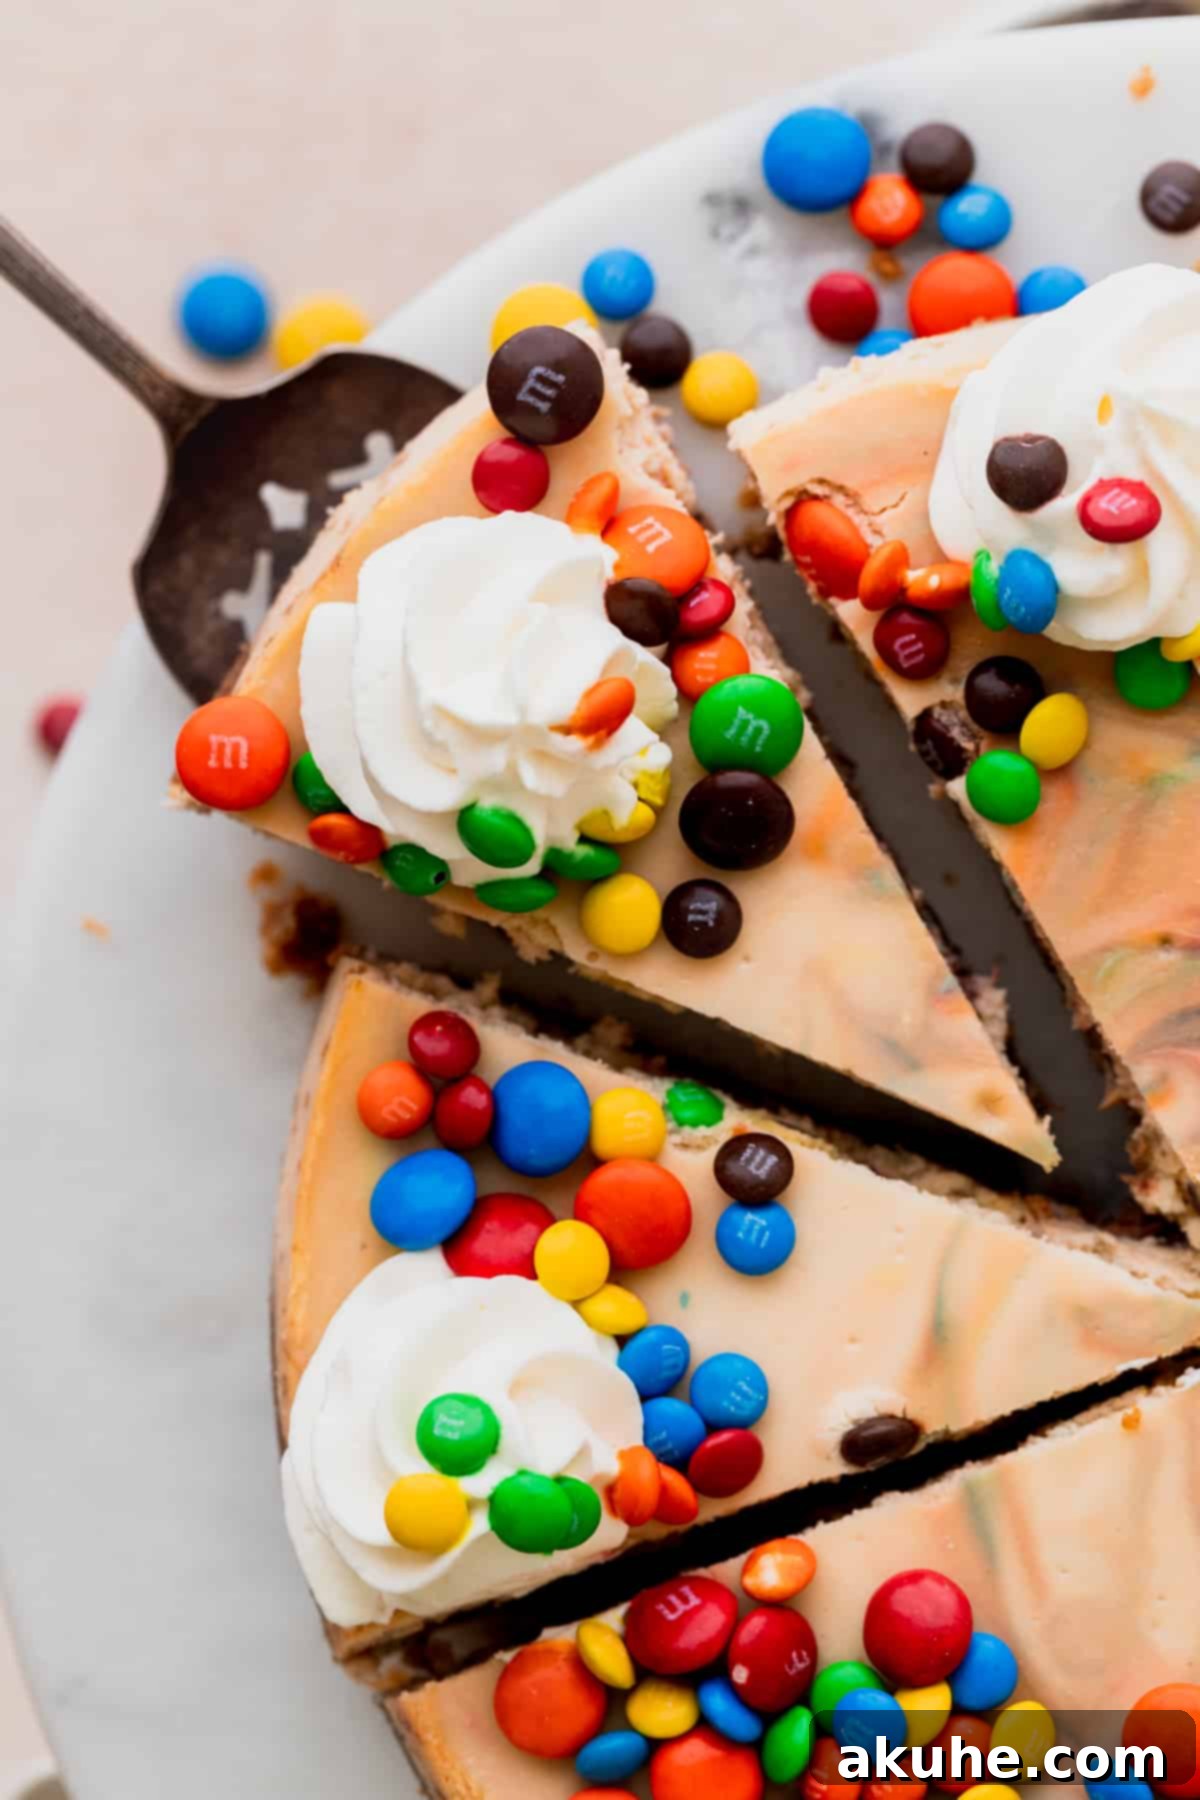
- Decorate and Serve: Once the cheesecake is fully chilled, carefully remove it from the springform pan. Tilt it gently on its side to peel off the parchment paper circle from the bottom. Transfer the cheesecake to a serving plate or cake stand. Using a piping bag fitted with a large star tip (like Wilton 1M) or simply an offset spatula, pipe or spread dollops of the freshly whipped cream artistically around the top edge or over the entire surface of the cheesecake. Finish by generously scattering extra M&M’s over the whipped cream for a final, festive flourish!
Notes
- For the creamiest, lump-free cheesecake batter, remember to pull out all dairy ingredients (cream cheese, sour cream, heavy cream, eggs) from the refrigerator at least 2 hours before you plan to start baking. This allows them to reach room temperature, ensuring they blend seamlessly.
Nutrition Information (per serving, estimated for 16 slices)
Calories: 395kcal, Carbohydrates: 27g, Protein: 4g, Fat: 31g, Saturated Fat: 18g, Polyunsaturated Fat: 1g, Monounsaturated Fat: 8g, Trans Fat: 0.3g, Cholesterol: 87mg, Sodium: 302mg, Potassium: 113mg, Fiber: 0.4g, Sugar: 18g, Vitamin A: 1108IU, Vitamin C: 0.2mg, Calcium: 76mg, Iron: 1mg
Decorating Your M&M Cheesecake to Perfection
Once your magnificent M&M cheesecake has chilled overnight, it’s time for the grand finale – decorating! First, carefully remove the cheesecake from the springform pan. A gentle tilt can help separate the parchment paper circle from the bottom, leaving you with a perfectly intact cheesecake. Next, prepare your homemade whipped cream (or use your favorite store-bought whipped topping). For an elegant touch, pipe the whipped cream in pretty dollops around the edge or over the top surface. I often use a piping bag fitted with a Wilton 1M star tip for a professional look. Finally, pour a generous amount of M&M’s all over the whipped cream. The more, the merrier, for an explosion of color and crunch!
Mastering the Water Bath for Flawless Cheesecake
The water bath, also known as a bain-marie, is a baker’s secret weapon for achieving a perfectly smooth, creamy, and crack-free cheesecake. It works by providing a consistently moist and gentle cooking environment through the steam it generates. Without this humid atmosphere, the dry heat of the oven can cause the cheesecake to bake too quickly around the edges while the center remains undercooked, leading to unsightly cracks as it cools.
Here are two proven techniques to set up your water bath, both utilizing a large roasting pan and hot, steaming water:
- The Double Pan Method (Highly Recommended): This is my preferred method for absolute peace of mind against leaks. Place your 9-inch springform pan containing the cheesecake inside a larger 10-inch cake pan. Then, carefully place this entire 10-inch cake pan into your much larger roasting pan. Finally, fill the roasting pan with hot, steaming water, ensuring the water level comes about halfway up the sides of the 10-inch cake pan. This method completely protects your springform pan, guaranteeing no water seeps into your crust. It makes baking cheesecake incredibly easy and stress-free!
- The Foil Wrap Method: For this technique, tightly wrap the outside of your springform pan with two layers of heavy-duty aluminum foil. Ensure the foil extends well above the bottom seam of the pan and is sealed securely to prevent any water from entering. Place this foil-wrapped springform pan directly into the roasting pan, then fill the roasting pan halfway up with hot water. While this method generally works well, there’s always a slight risk of water finding its way through if the foil isn’t perfectly applied, potentially leading to a soggy crust.
Choosing the first method ensures your crust remains crisp and dry, giving you a flawless cheesecake every time.
Preventing Cheesecake Cracks: Expert Tips for a Smooth Finish
A beautiful, smooth surface is the hallmark of a perfectly baked cheesecake. Cracks, while common, can be easily avoided with a few key techniques. Here’s how to ensure your M&M cheesecake emerges from the oven without a single flaw:
- Achieve a Super Creamy Batter: Before adding the eggs, ensure your cream cheese and sugar mixture, along with the sour cream and heavy cream, are beaten on high speed until incredibly creamy and smooth. Any small chunks of cream cheese can create inconsistencies in the batter, leading to tension and cracks during baking.
- Incorporate Eggs Gently: This is a critical step! Add your room temperature eggs one at a time, and mix them into the batter on the absolute lowest speed of your mixer, just until they are barely combined. The goal is to incorporate as little air as possible. Too much air introduced into the batter can create large air bubbles that cause the cheesecake to rise rapidly and then fall too quickly during baking and cooling, which is a primary cause of cracks.
- Utilize a Water Bath: As discussed above, a water bath is absolutely essential for creating a moist, steamy environment that allows the cheesecake to bake evenly and slowly. This gentle cooking prevents the edges from setting and drying out too quickly compared to the center, thereby minimizing stress on the cheesecake structure.
- Implement Slow, Gradual Cooling: Once your cheesecake is done baking, resist the urge to pull it out of the oven immediately. Instead, turn off the oven, crack the door open (about 2-3 inches), and let the cheesecake sit inside for 30 minutes. This allows the cheesecake to cool down very slowly and gradually. A sudden change in temperature, such as moving it directly from a hot oven to a cool countertop, causes rapid contraction and almost guarantees cracks. After the oven cooling period, transfer it to a wire rack to cool completely at room temperature before chilling in the refrigerator.
Frequently Asked Questions About M&M Cheesecake
Absolutely! To adapt this recipe for mini cheesecakes, simply divide the batter into thirds, which should yield about 12 individual mini cheesecakes. Bake them in a muffin pan (lined with paper liners) for a shorter duration, typically 18-20 minutes, or until the centers are just set. For detailed instructions on baking mini cheesecakes, you can refer to our Mini Oreo Cheesecakes recipe.
This recipe is quite versatile! You can halve the recipe to make delicious cheesecake bars using an 8×8 or 9×9 inch baking pan (you would use 16 oz of cream cheese for this variation). Alternatively, this full recipe can be baked in an 8-inch springform pan if you prefer a slightly taller cheesecake with a smaller diameter. If you want to use a 6-inch springform pan, you should half the recipe, but still use 16 oz of cream cheese for optimal height and creaminess.
Yes, you absolutely can! A rich chocolate ganache would be a fantastic, decadent topping for this M&M cheesecake, offering a different flavor and texture profile. If you’re looking for inspiration or a recipe for chocolate ganache, our Chocolate Chip Cookie Dough Cheesecake uses a wonderful chocolate ganache that would work perfectly here.
Storing and Freezing Your M&M Cheesecake
Proper storage is key to maintaining the freshness and deliciousness of your M&M cheesecake. Once cooled and chilled, store the cheesecake in an airtight container, such as a specialized cake carrier, to protect it from odors and drying out. It will stay fresh and delicious in the refrigerator for up to 5 days.
Freezing for Future Enjoyment
This M&M cheesecake is also freezer-friendly, allowing you to enjoy slices whenever a craving strikes!
- Freezing Individual Slices: For convenient single servings, cut the cheesecake into individual slices. Place them on a baking sheet and freeze for about an hour until firm. Then, wrap each slice tightly in plastic wrap, followed by a layer of aluminum foil, and store them in an airtight freezer-safe container. They will keep well in the freezer for up to 30 days. To enjoy, thaw a slice in the refrigerator for 1-2 hours before eating.
- Freezing the Whole Cheesecake (Undecorated): If you plan to make the cheesecake ahead for a future event, you can freeze it before decorating. Ensure the cheesecake has fully chilled in the refrigerator overnight first. Once firm, wrap the entire cooled cheesecake (still on its bottom parchment paper and springform base, or just the cheesecake if fully removed) tightly in several layers of plastic wrap, then an outer layer of aluminum foil. Freeze for up to 30 days. When ready to serve, thaw the cheesecake in the refrigerator for 1-2 hours, then proceed with decorating as desired.
Other Irresistible Cheesecake Recipes To Try
If you’ve fallen in love with the creamy indulgence of this M&M cheesecake, be sure to explore our other fantastic cheesecake creations!
If you adore this recipe, please make sure to leave a STAR REVIEW below! We’d also love to see your creations – tag me on Instagram @stephaniesweettreats. For more delicious inspiration and baking ideas, make sure to follow me on Pinterest.
