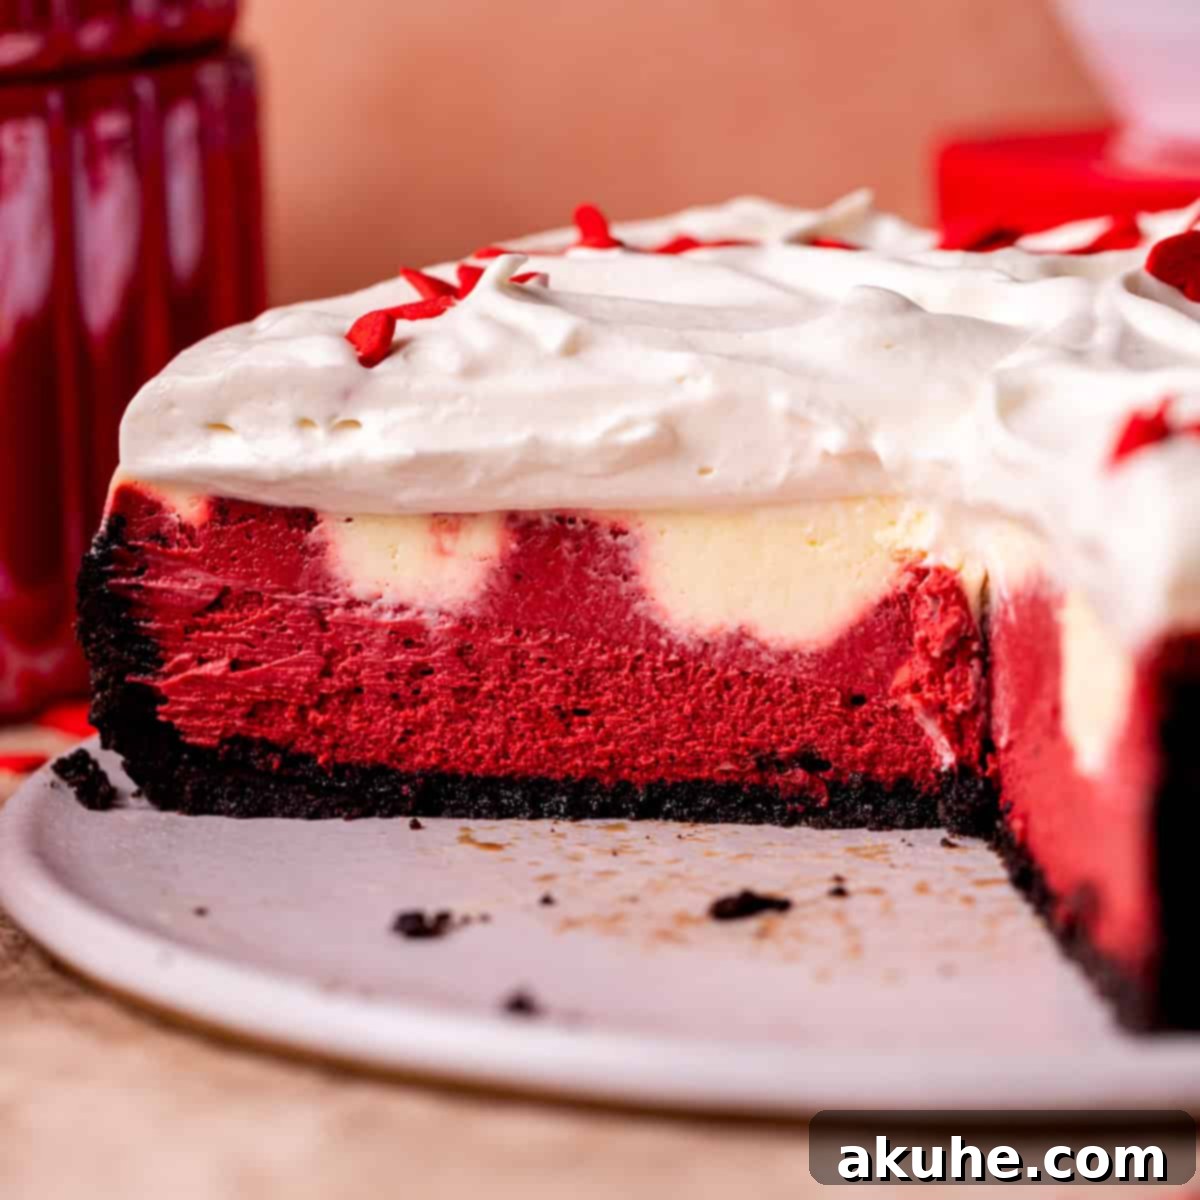
Indulge in a truly exquisite dessert with this magnificent Red Velvet Cheesecake, a perfect creation designed to capture hearts, especially for occasions like Valentine’s Day. This show-stopping treat brings together the best of both worlds: the iconic, subtle tang of red velvet cake and the rich, creamy decadence of classic cheesecake. What elevates this recipe further is its delightful foundation – a crunchy Oreo crust – topped with layers of vibrant red velvet cheesecake and a silky smooth traditional cheesecake, all crowned with a cloud of luscious whipped cream. It’s not just a dessert; it’s an experience, a delightful symphony of flavors and textures that promises to impress and satisfy even the most discerning palates.

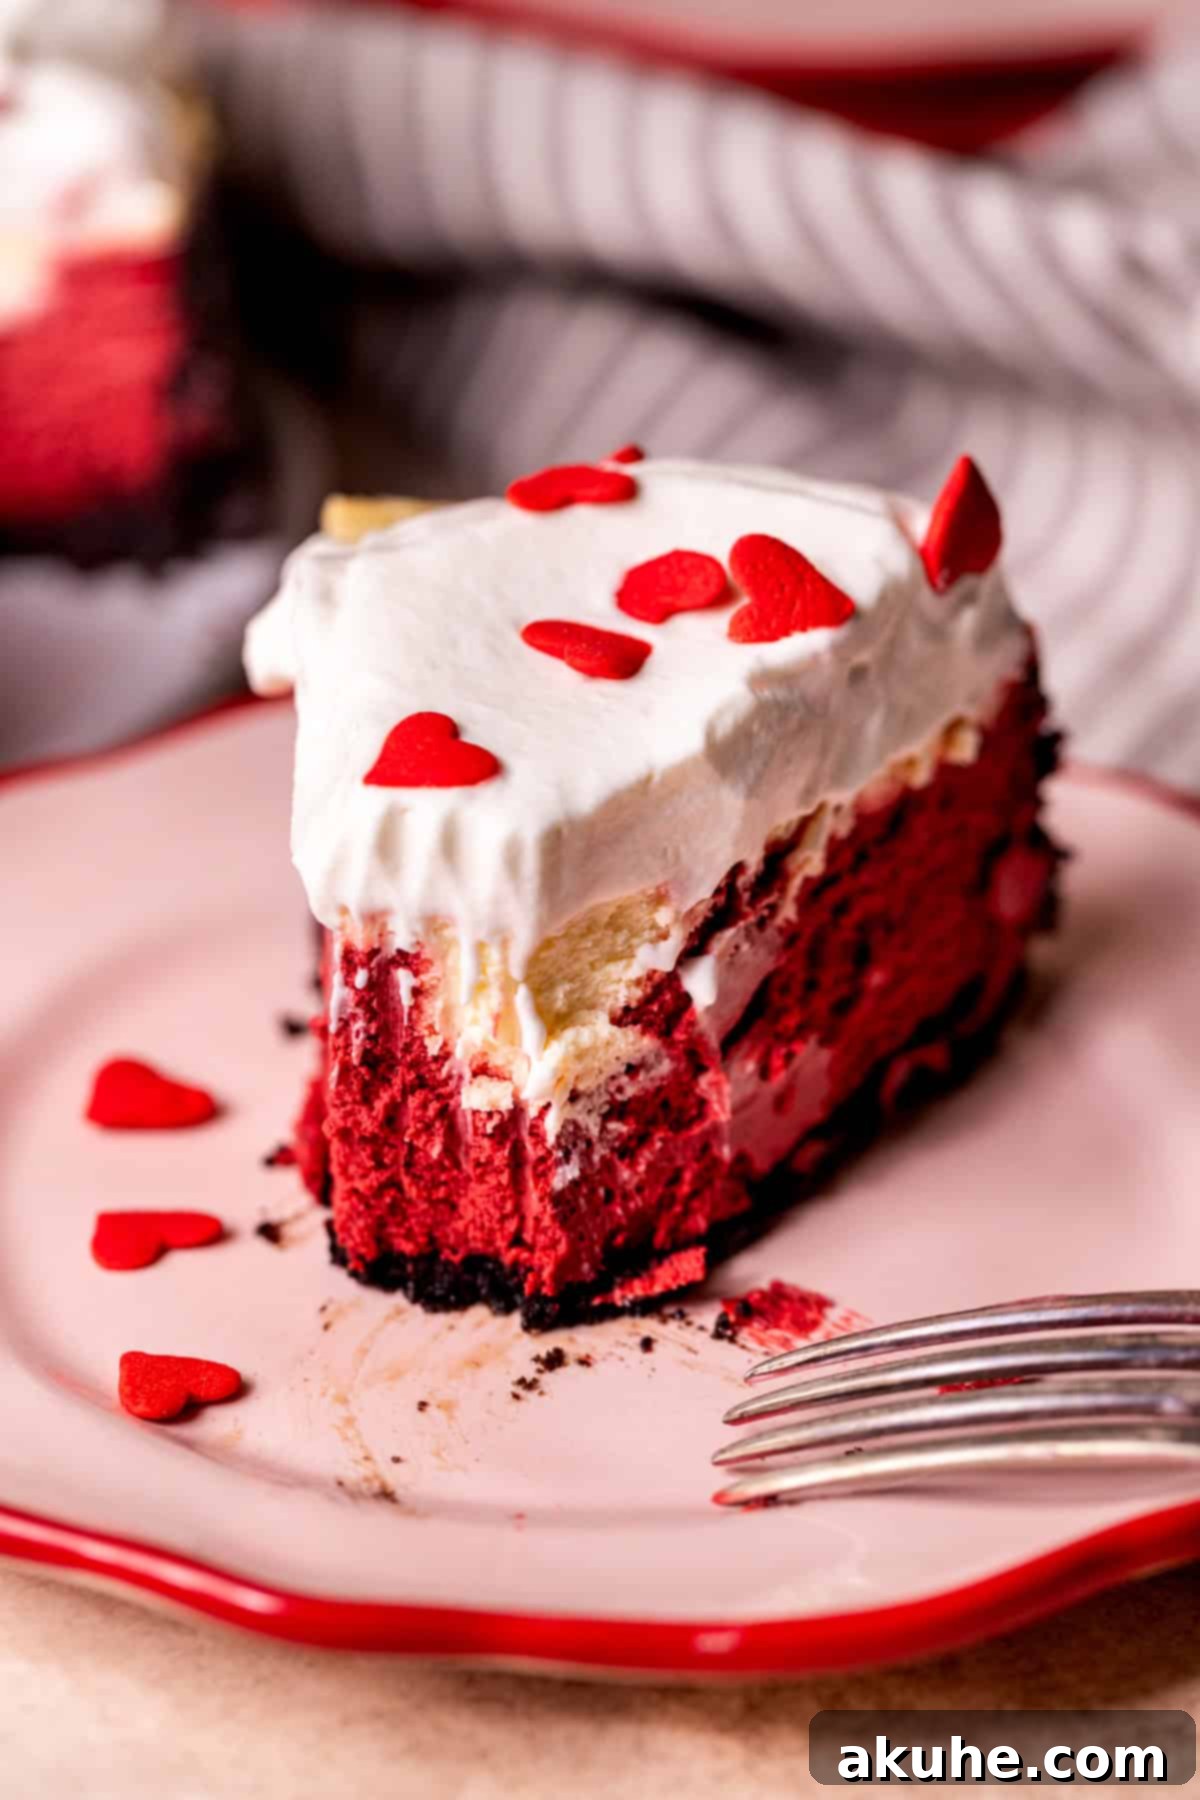
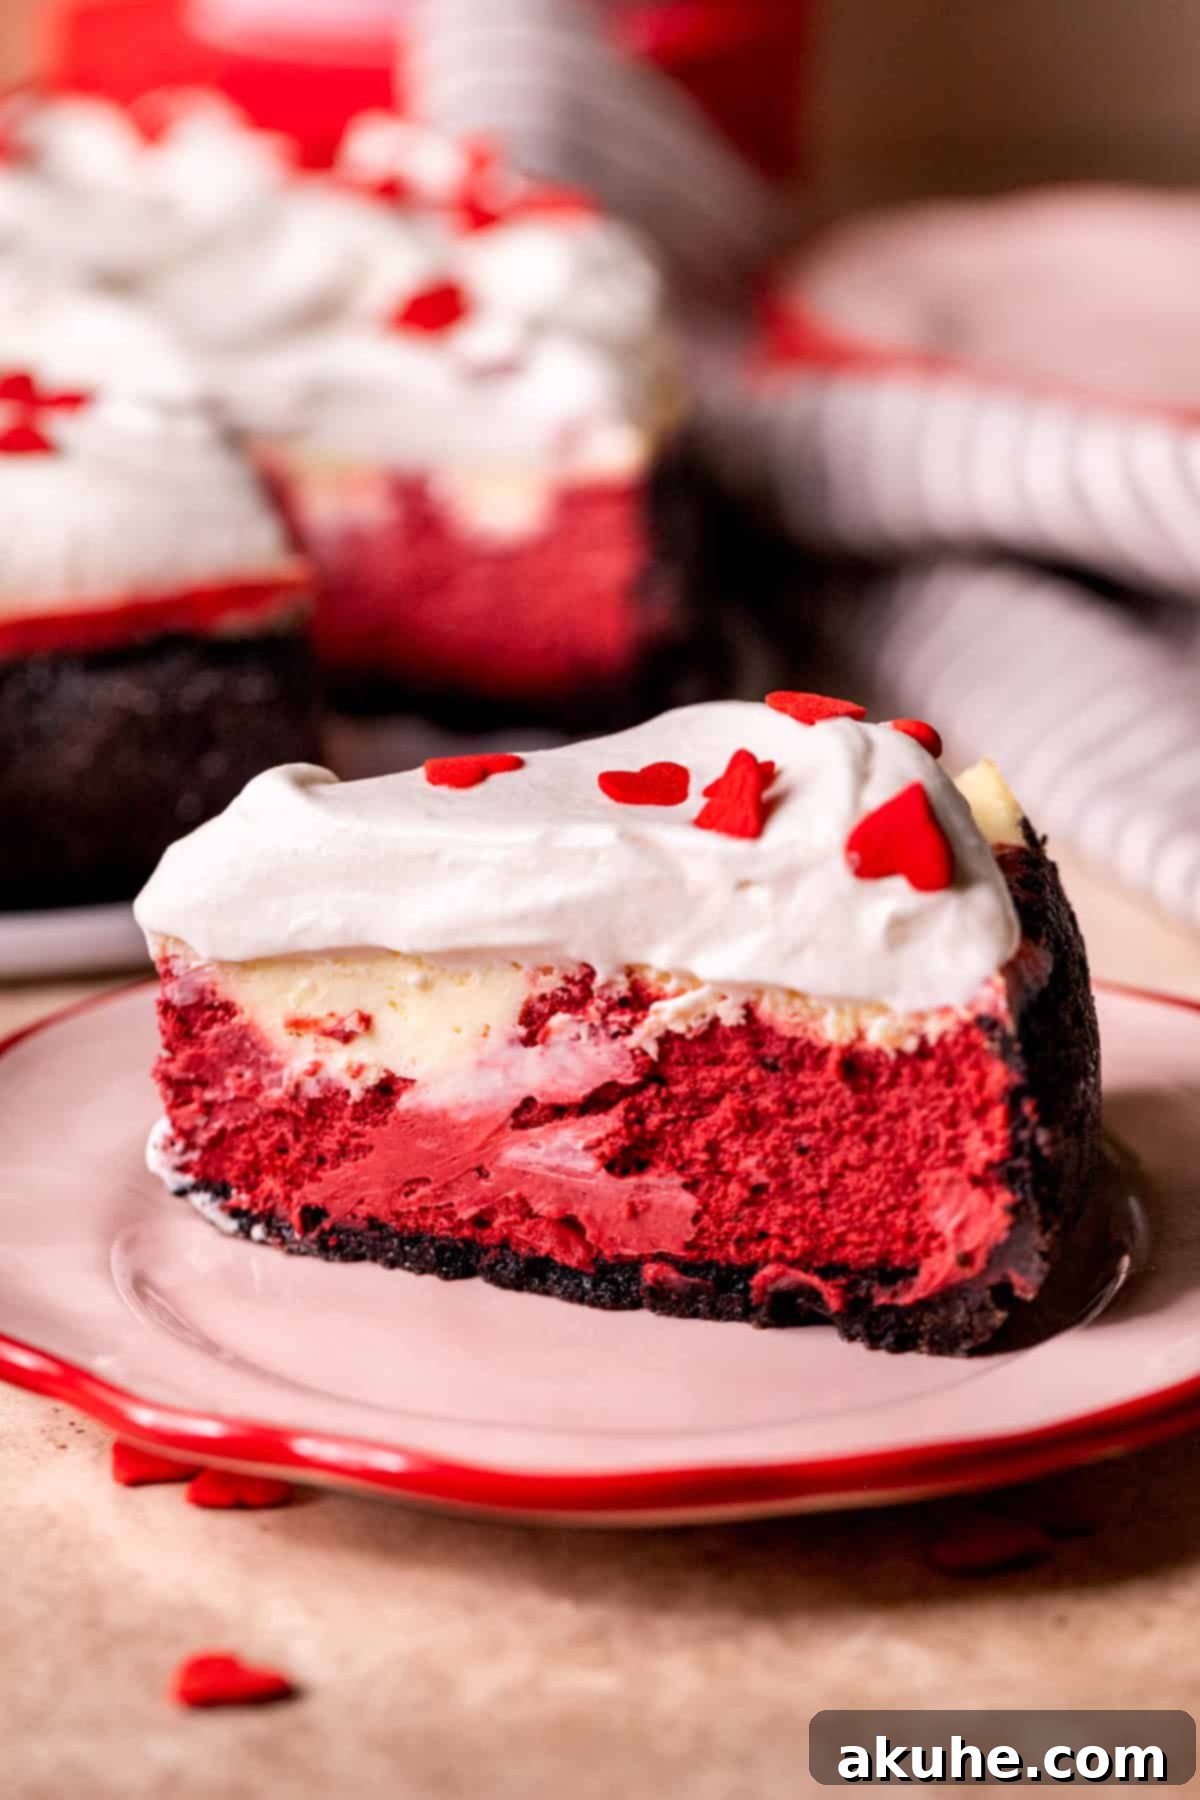
If you’re a devoted fan of red velvet cake, prepare to fall head over heels for this cheesecake interpretation. It’s a creamy, baked cheesecake infused with that distinctive red velvet essence. The ingenious addition of a classic cheesecake layer serves a crucial purpose: it expertly balances the creamy, subtly tangy notes of the red velvet with the rich, familiar taste of a traditional cheesecake. This thoughtful layering not only creates a harmonious flavor profile but also produces the visually stunning effect of beautiful red and white swirls, making it an ideal expression of love for the special people in your life.
Why This Red Velvet Cheesecake Stands Apart
This dessert isn’t just a fusion; it’s a celebration, bringing together the beloved characteristics of red velvet cake and the irresistible charm of cheesecake in one spectacular creation. Here’s why it’s truly exceptional:
- Signature Red Velvet Flavor: Red velvet is more than just a red cake; it’s a unique chocolate flavor that’s less intense than pure chocolate, often characterized by a hint of tanginess from vinegar or buttermilk. This delicate balance prevents it from being overly sweet, creating a complex and alluring taste. In this cheesecake, we capture that essence perfectly, offering a familiar yet fresh take on a classic.
- Elevated Cheesecake Experience: While red velvet is traditionally paired with cream cheese frosting, integrating it into a cheesecake takes the experience to an entirely new level. The creamy, rich cheesecake base naturally complements the red velvet, offering a depth of flavor and a luxurious texture that a mere frosting cannot replicate. It’s so good, you might find yourself enjoying the red velvet cheesecake layer on its own!
- Irresistibly Creamy Texture: The hallmark of an outstanding cheesecake is its smooth, melt-in-your-mouth texture. This recipe delivers that decadent, velvety bite that makes every forkful an absolute pleasure, leaving you craving more. The precise combination of ingredients and baking method ensures a consistently creamy result that is truly unforgettable.
- The Perfect Harmony of Layers: The interplay between the deep red velvet and the pristine classic cheesecake layers creates a beautiful visual contrast and an exquisite taste experience. Each bite offers a harmonious blend of flavors, ensuring that neither the bold red velvet nor the subtle classic cheesecake overpowers the other, resulting in a perfectly balanced dessert.
Many who previously claimed not to be fans of red velvet have been converted by this very cheesecake, proving its universal appeal and undeniable deliciousness!

Mastering Homemade Cheesecake: Essential Baking Tips
Crafting a flawless homemade cheesecake can seem daunting, but with these expert tips, your Red Velvet Cheesecake will turn out beautifully every time. Pay close attention to these details for a perfectly smooth, crack-free, and incredibly delicious dessert:
- Tip 1: Achieve Room Temperature Dairy Ingredients: This is perhaps the most crucial step. Ensure all your dairy ingredients, especially cream cheese, sour cream, and heavy cream, are at true room temperature. Cold dairy ingredients will clump when mixed, leading to a lumpy batter and a less-than-silky cheesecake texture. Plan ahead and take them out of the refrigerator at least 1-2 hours before you begin baking.
- Tip 2: Thoroughly Beat the Cream Cheese: Once at room temperature, beat your cream cheese on high speed for at least 2 minutes. This vigorously whips air into the cream cheese, making it light and fluffy, and ensuring there are absolutely no lumps. A perfectly smooth cream cheese base is key to a perfectly smooth cheesecake.
- Tip 3: Mix Eggs Gently and Briefly: Overmixing the eggs is a common pitfall that can lead to cracks in your baked cheesecake. Adding too much air into the batter, particularly after the eggs are incorporated, causes the cheesecake to rise rapidly in the oven and then collapse as it cools. Always mix the eggs in on a low speed, just until they are fully combined into the batter. Resist the urge to overmix!
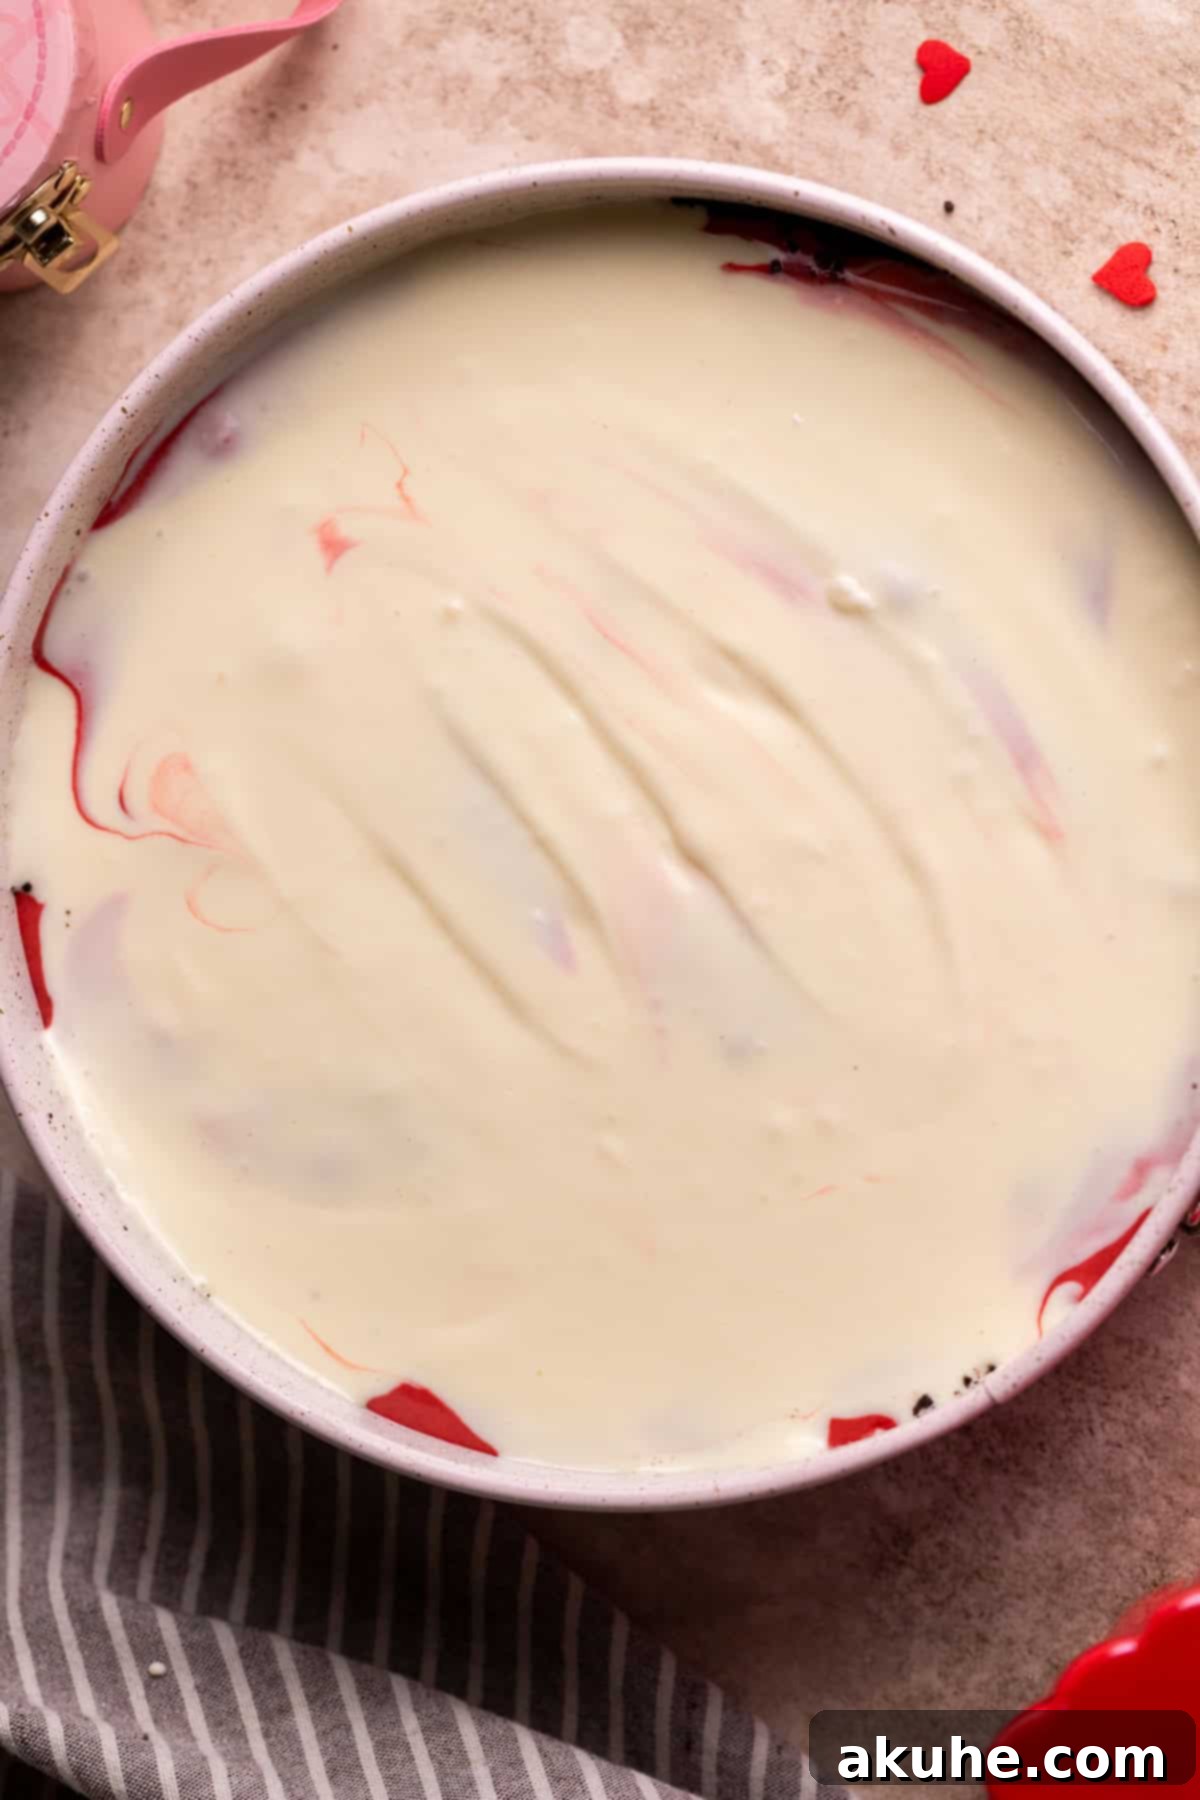
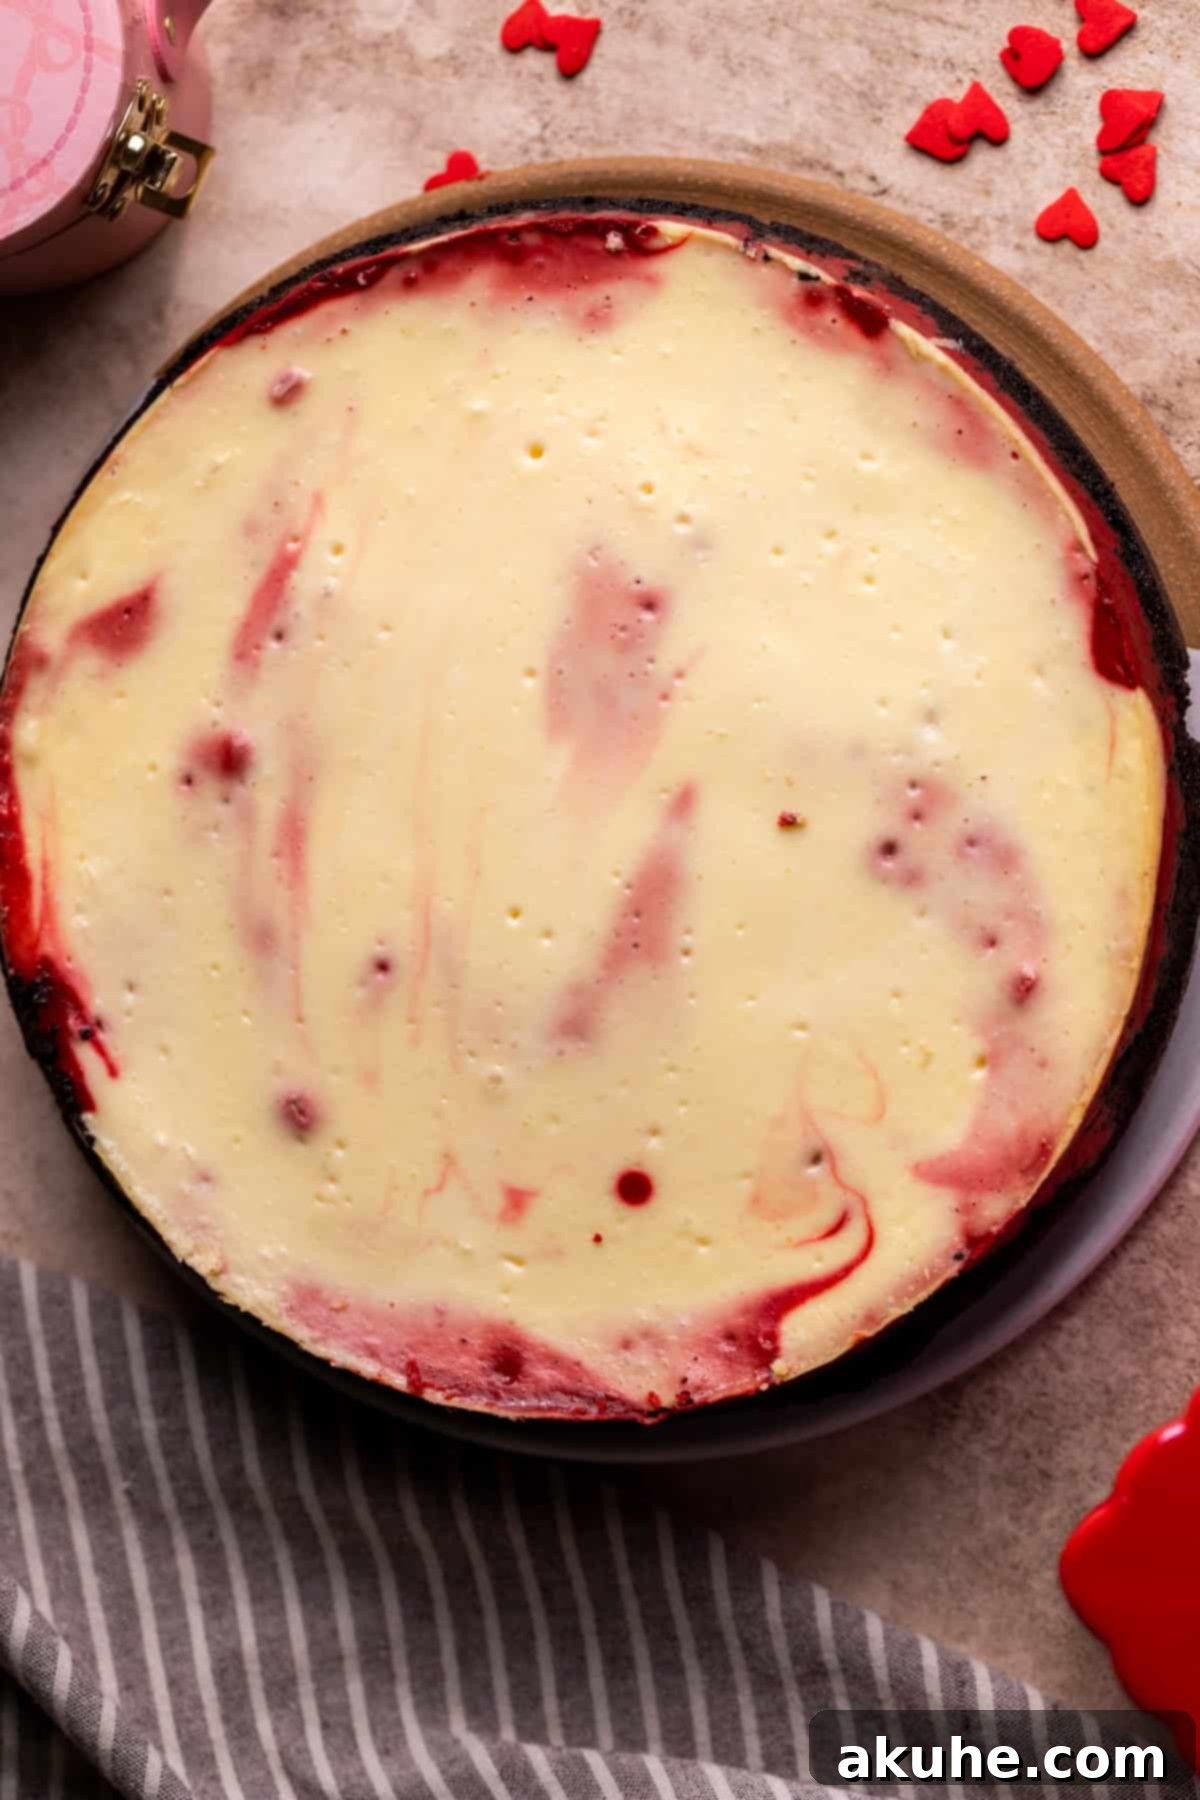
- Tip 4: The Art of Layering and Swirling: For that signature red and white swirl effect, first spread the red velvet cheesecake batter evenly over your crust. Then, use a small cookie scoop or a spoon to dollop the regular cheesecake batter on top. Distribute these dollops evenly across the surface. Gently use an offset icing spatula to lightly spread the plain batter, allowing some of the red velvet to peek through and create delicate swirls. The goal is subtle marbling, not a complete blend.
- Tip 5: Don’t Overbake Your Cheesecake: An overbaked cheesecake is a dry, cracked cheesecake. Look for the edges to be set while the very center (about a 2-3 inch circle) still has a slight, delicate jiggle. It will continue to set as it cools. Use an oven thermometer to ensure your oven temperature is accurate, as consistency is key.
- Tip 6: Patience with Chilling Time: Resist the temptation to slice into your cheesecake too soon. Proper chilling is vital for the cheesecake to firm up, develop its full flavor, and achieve that perfect sliceable texture. An overnight chill (at least 6-8 hours) in the refrigerator is highly recommended.


Understanding the Enchantment of Red Velvet
The term “red velvet” conjures images of luxurious, deep red cakes, but its flavor profile is far more nuanced than just a visual appeal. Red velvet cake is fundamentally a chocolate cake, yet it possesses a distinct character: a milder chocolate flavor accompanied by a subtle tanginess. Historically, red velvet cakes achieved their reddish hue and unique flavor from a combination of non-Dutched cocoa powder (which reacted with acidic ingredients like buttermilk and vinegar), and sometimes even from cooked beetroots, which also added moisture and sweetness.
In modern baking, the vibrant red color is typically intensified with food coloring. For this particular cheesecake, I highly recommend using a high-quality red food gel dye, such as Americolor Super Red food dye. A concentrated gel allows you to achieve a rich, striking red hue without needing to add excessive amounts of dye, which can sometimes impact the overall taste. This ensures your cheesecake looks as stunning as it tastes.
Given that this is a cheesecake and not a traditional cake, incorporating buttermilk and vinegar directly into the batter isn’t ideal for consistency. Instead, we achieve the classic red velvet flavor in the cheesecake layer by using a small amount of unsweetened cocoa powder. The inherent tanginess of the cream cheese in the cheesecake batter beautifully mimics the acidic notes found in traditional red velvet, creating an authentic and delicious flavor experience.
Mastering the Water Bath Technique for Perfect Cheesecakes
A water bath (or bain-marie) is a secret weapon for baking cheesecakes, and it’s absolutely essential for achieving that perfectly smooth, crack-free surface and creamy texture. The steam generated by the hot water creates a moist, even-temperature environment in the oven, which prevents the cheesecake from drying out, baking too quickly, or developing unsightly cracks.
Here are two effective methods for setting up a water bath, both utilizing a large roasting pan filled with hot, steaming water:
- The “Pan-in-Pan” Method (Highly Recommended): This is my preferred technique as it offers superior protection against water leakage. Place your springform pan (with the prepared crust and batter) inside a slightly larger, 10-inch round cake pan. Then, carefully place this entire cake pan assembly into your large roasting pan. Fill the roasting pan with hot water, ensuring the water level reaches about halfway up the sides of the 10-inch cake pan. This double-layer approach effectively seals off your cheesecake, guaranteeing no water seeps into your crust.
- The Foil-Wrapped Method: Begin by tightly wrapping the exterior of your springform pan twice with heavy-duty aluminum foil. Ensure there are no gaps or tears. Place the wrapped springform pan directly into the large roasting pan. Fill the roasting pan with hot water, again ensuring the water level comes about halfway up the sides of the foil-wrapped springform pan. While this method works well, there’s always a slight risk of water finding its way through the foil and potentially making the crust soggy.
For peace of mind and consistently perfect results, I always lean towards the first method. It simplifies the baking process by completely eliminating worries about a soggy crust, making homemade cheesecake baking a truly enjoyable experience.
Red Velvet Cheesecake: Frequently Asked Questions
Can I transform this recipe into mini cheesecakes?
Absolutely! To create delightful mini red velvet cheesecakes, you can divide this recipe into thirds, yielding approximately 12 individual servings. Bake these in a muffin pan lined with paper liners for 18-20 minutes. For detailed instructions and tips specific to mini cheesecakes, you can refer to my Mini Oreo Cheesecakes recipe.
Are there alternative pans I can use for this recipe?
Yes, this versatile recipe can be adapted to different pan sizes. If you prefer red velvet cheesecake bars, halve the recipe and bake it in an 8×8 or 9×9-inch square baking pan. For a smaller, yet still substantial, round cheesecake, use an 8-inch springform pan with the full recipe. If you desire a much smaller round cheesecake, halve the recipe for a 6-inch springform pan. Remember to adjust baking times accordingly when changing pan sizes; thinner cheesecakes in larger pans will bake faster, while thicker ones in smaller pans will require more time.
What’s the secret to achieving a perfect slice?
For impeccably clean and beautiful slices, two key factors are paramount. First, ensure your cheesecake is thoroughly chilled, ideally having rested in the refrigerator overnight. A cold cheesecake holds its structure much better. Second, use a very sharp knife to make each cut. For the cleanest results, wipe the knife blade clean with a damp cloth after every single slice to prevent dragging crumbs or cream between cuts.
How can I best decorate this festive cheesecake?
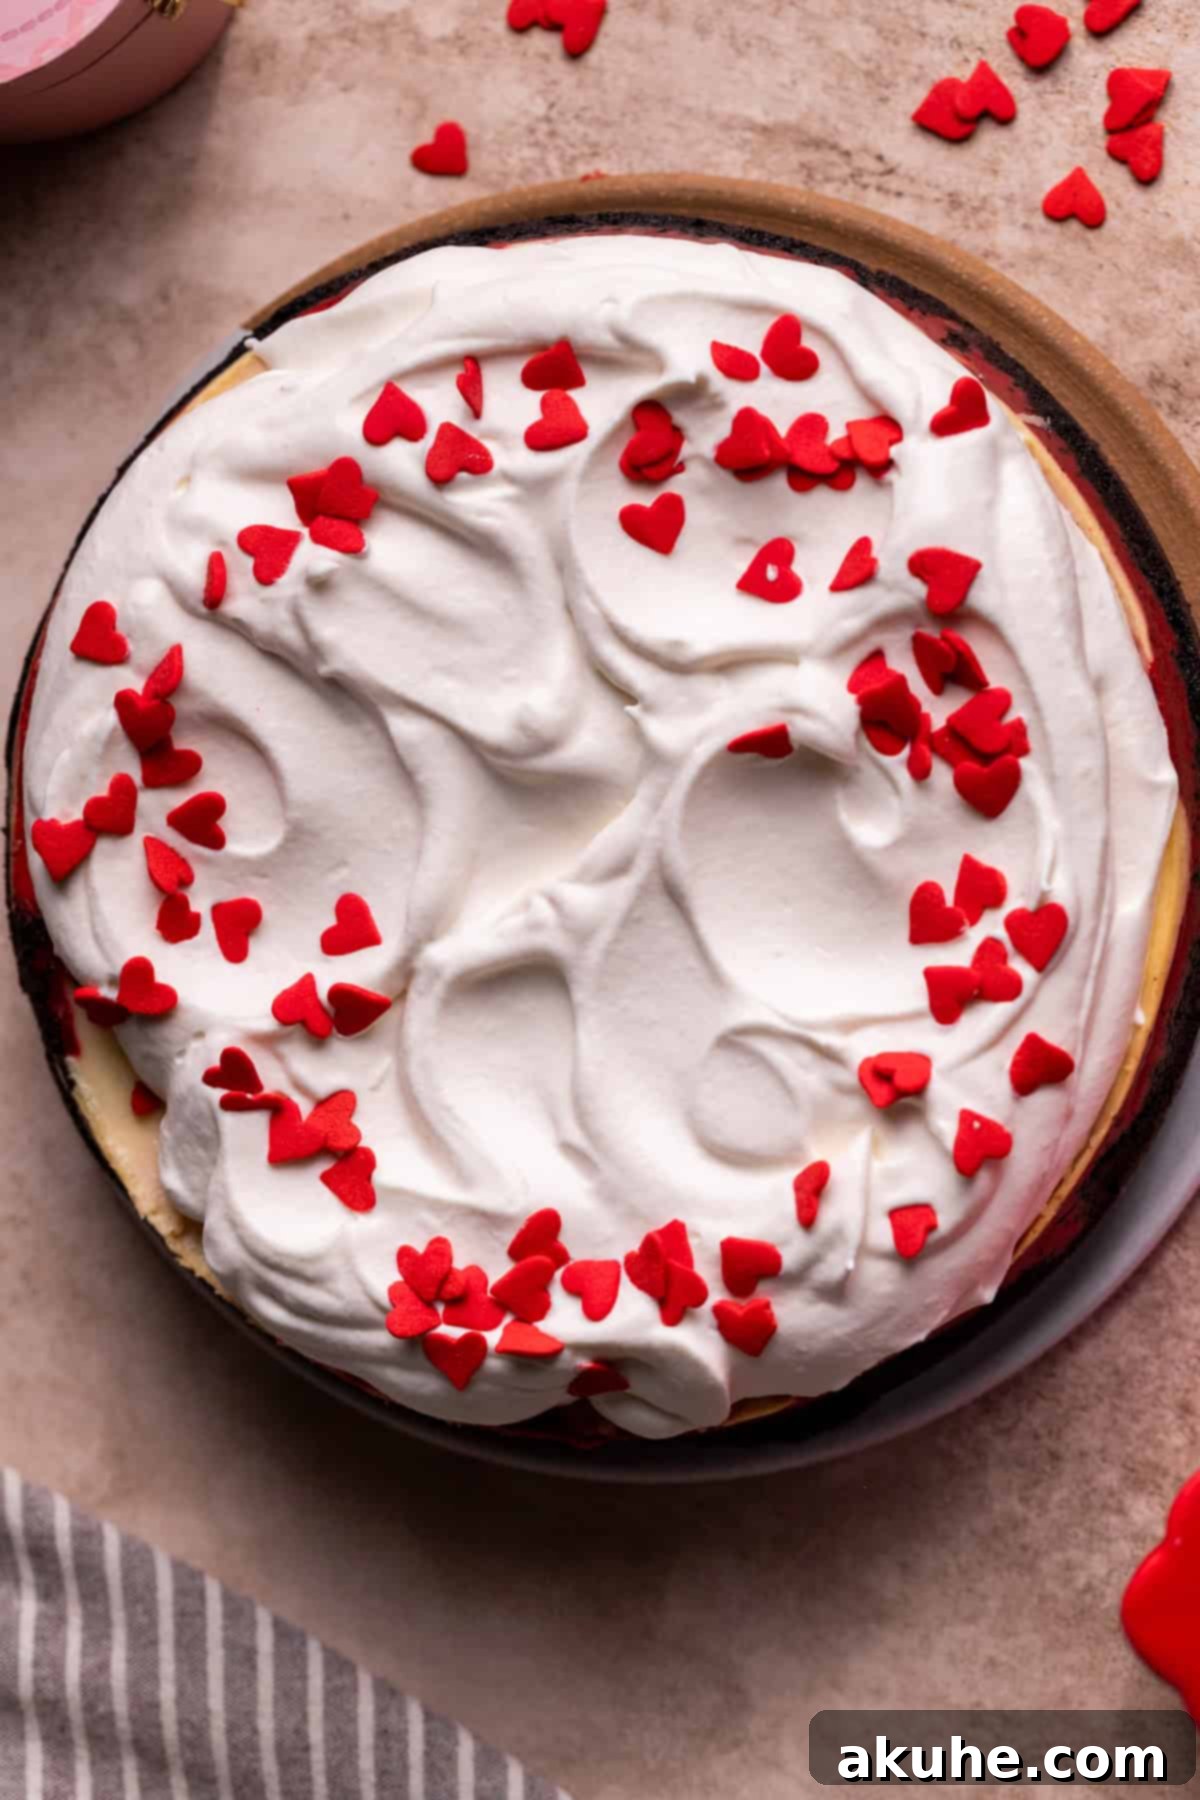
For a charming Valentine’s Day presentation, I adorned the whipped cream topping with adorable red heart sprinkles. These add a playful and festive touch that perfectly complements the red velvet theme. While any heart sprinkles will do, I particularly love these specific ones for their vibrant color and shape. You could also drizzle with chocolate ganache, sprinkle with chocolate shavings, or garnish with fresh berries for other occasions.
What are the best storage methods for this cheesecake?
Proper storage is essential to maintain the freshness and flavor of your Red Velvet Cheesecake. Store the cheesecake in the refrigerator within an airtight container, such as a cake carrier, for up to 5 days. This prevents it from absorbing odors or drying out.
For longer storage, freezing is an excellent option. You can freeze individual slices by wrapping them tightly in plastic wrap, then placing them in an airtight container. These can be stored in the freezer for up to 30 days. Thaw frozen slices in the refrigerator for 1-2 hours before serving.
Alternatively, you can freeze the entire cheesecake before decorating it. Ensure the cheesecake has thoroughly chilled in the refrigerator overnight first. Once cold, wrap it securely in multiple layers of plastic wrap, then an outer layer of aluminum foil. Freeze for up to 30 days. When ready to serve, thaw the wrapped cheesecake in the refrigerator for 1-2 hours before unwrapping and decorating.
More Decadent Desserts for Your Special Occasions
If you’ve fallen in love with this Red Velvet Cheesecake, you’ll surely enjoy exploring more of my delightful dessert recipes. Perfect for Valentine’s Day or any sweet celebration, these treats are guaranteed to satisfy your cravings:
- Luxurious Chocolate Mousse Cake
- Soft and Chewy Strawberry Crinkle Cookies
- Rich and Indulgent Chocolate Truffle Cake
- Fudgy and Fruity Strawberry Brownies
- Classic Red Velvet Cookies
I hope you cherish every bite of this Red Velvet Cheesecake. Your feedback is invaluable, so please consider leaving a star review if you loved this recipe! Don’t forget to share your creations on Instagram by tagging me @stephaniesweettreats. For endless baking inspiration and more delectable ideas, be sure to follow me on Pinterest.
Red Velvet Cheesecake Recipe
This red velvet cheesecake is the ultimate treat for any special occasion, featuring an irresistible Oreo crust, a rich red velvet cheesecake layer, and a creamy classic cheesecake topping, all finished with homemade whipped cream.
Author: Stephanie Rutherford
Prep Time: 40 mins
Cook Time: 1 hr 20 mins
Chilling Time: 6 hrs
Total Time: 8 hrs
Yields: 16 slices
Ingredients
Oreo Crust
- 3 cups Oreos, finely crushed (about 26 Oreos, with filling)
- 6 tablespoons unsalted butter, melted
Cheesecake
- 32 oz cream cheese, softened to room temperature
- 1 cup white granulated sugar
- ¾ cup sour cream, room temperature (or Greek yogurt)
- ½ cup heavy cream, room temperature
- 1 teaspoon pure vanilla extract
- 4 large eggs, room temperature
- 1 egg yolk, room temperature
- ¼ cup unsweetened cocoa powder (Dutch process recommended), sifted
- 1 teaspoon red food gel dye
Whipped Cream Topping
- 1 ½ cups heavy cream, cold
- ¼ cup powdered sugar, sifted
- 1 teaspoon pure vanilla extract
Instructions
Oreo Crust
- Preheat your oven to 325°F (160°C). Lightly spray a 9-inch springform pan with baking spray. Line the bottom with a parchment paper circle and spray again for easy release.
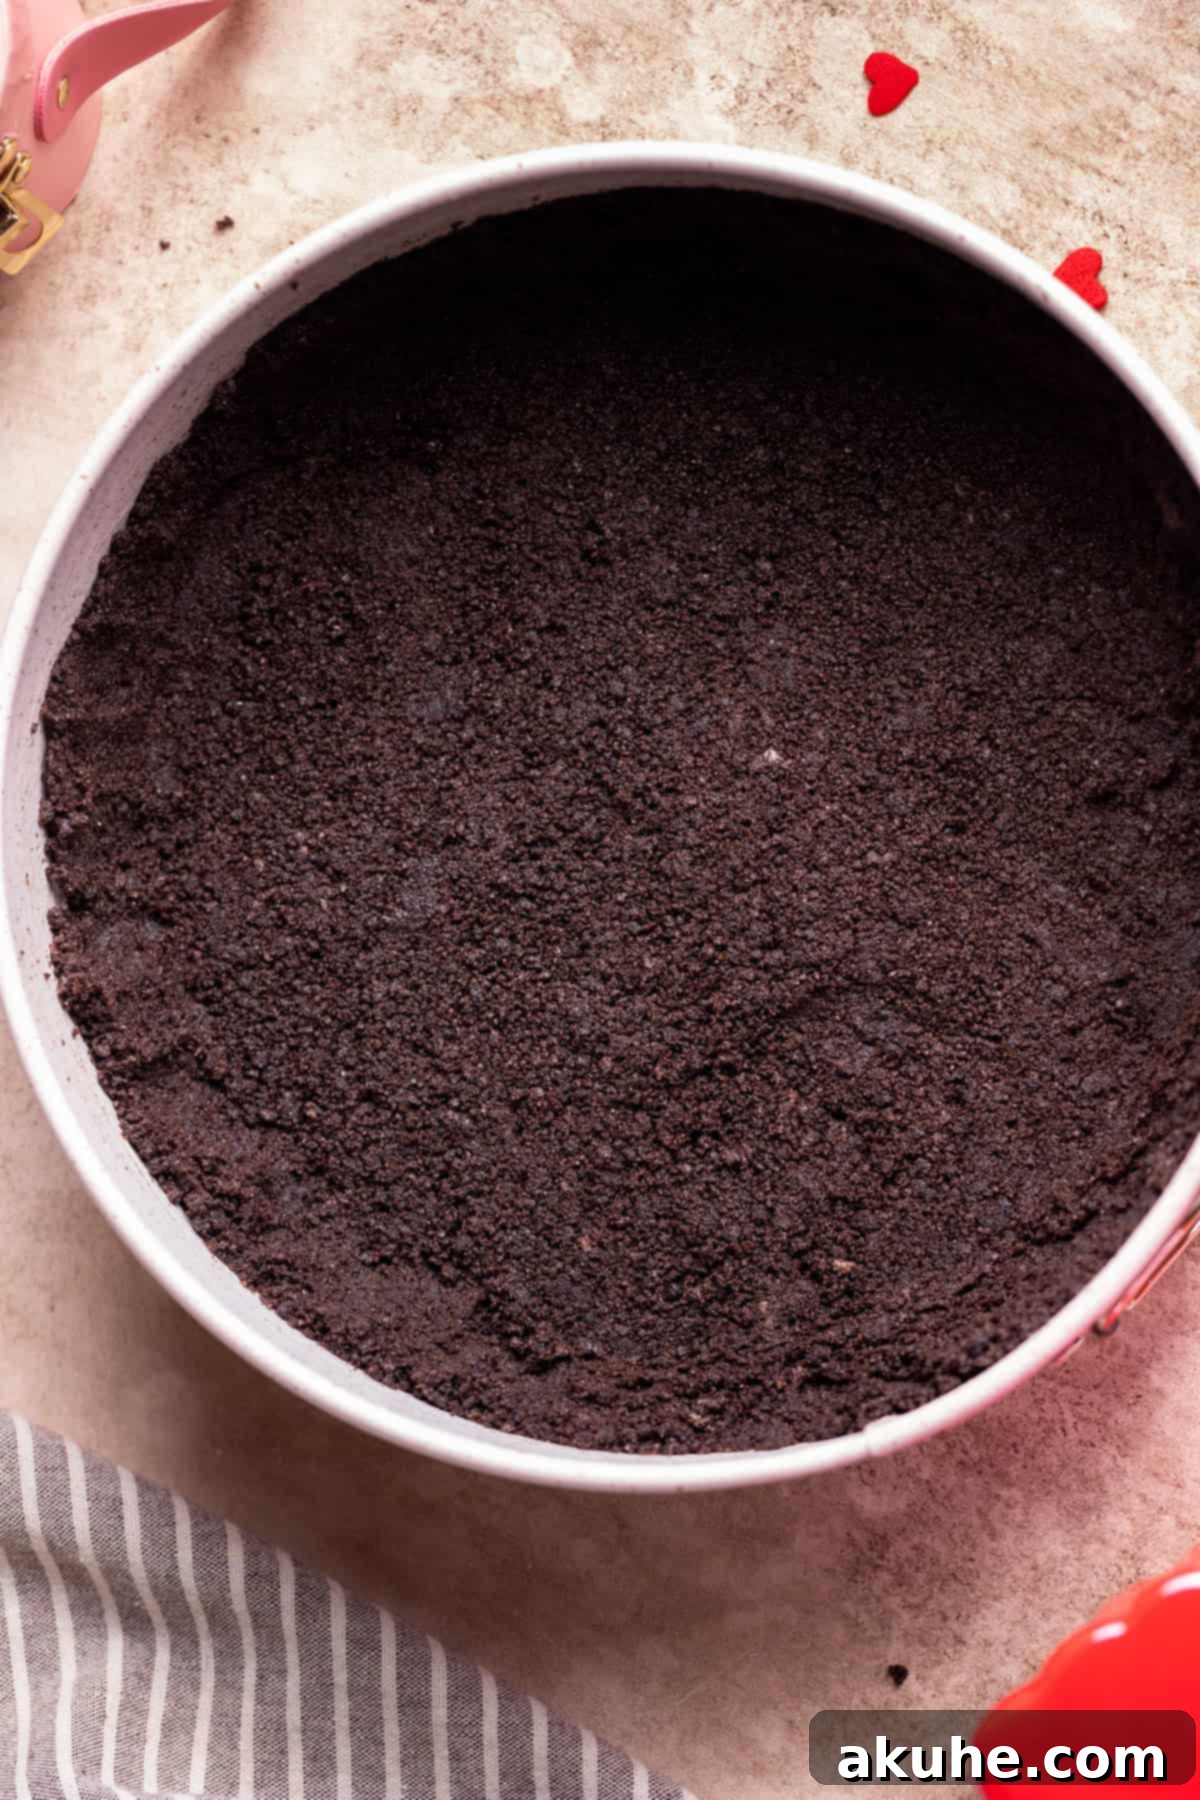
- In a food processor, blend the whole Oreos (including the cream filling) until you achieve fine crumbs. In a small bowl, combine the Oreo crumbs with the melted butter and mix until the crumbs are thoroughly coated.
- Press the buttered Oreo crumbs evenly into the bottom of the prepared springform pan, extending about halfway up the sides. Use the bottom of a measuring cup or a flat-bottomed glass to firmly compact the crust, especially the bottom.
- Bake the crust for 11 minutes. Remove from oven and let it cool slightly while preparing the cheesecake batter.
Cheesecake
- In a large mixing bowl with an electric mixer, beat the room temperature cream cheese and granulated sugar on high speed for 2 minutes until light and fluffy, ensuring no lumps remain.
- Add the sour cream, heavy cream, and vanilla extract. Mix on medium speed until just combined.
- Reduce mixer speed to low. Add the eggs and the extra egg yolk one at a time, mixing only until each is just incorporated. Be careful not to overmix, as too much air can cause cracks.
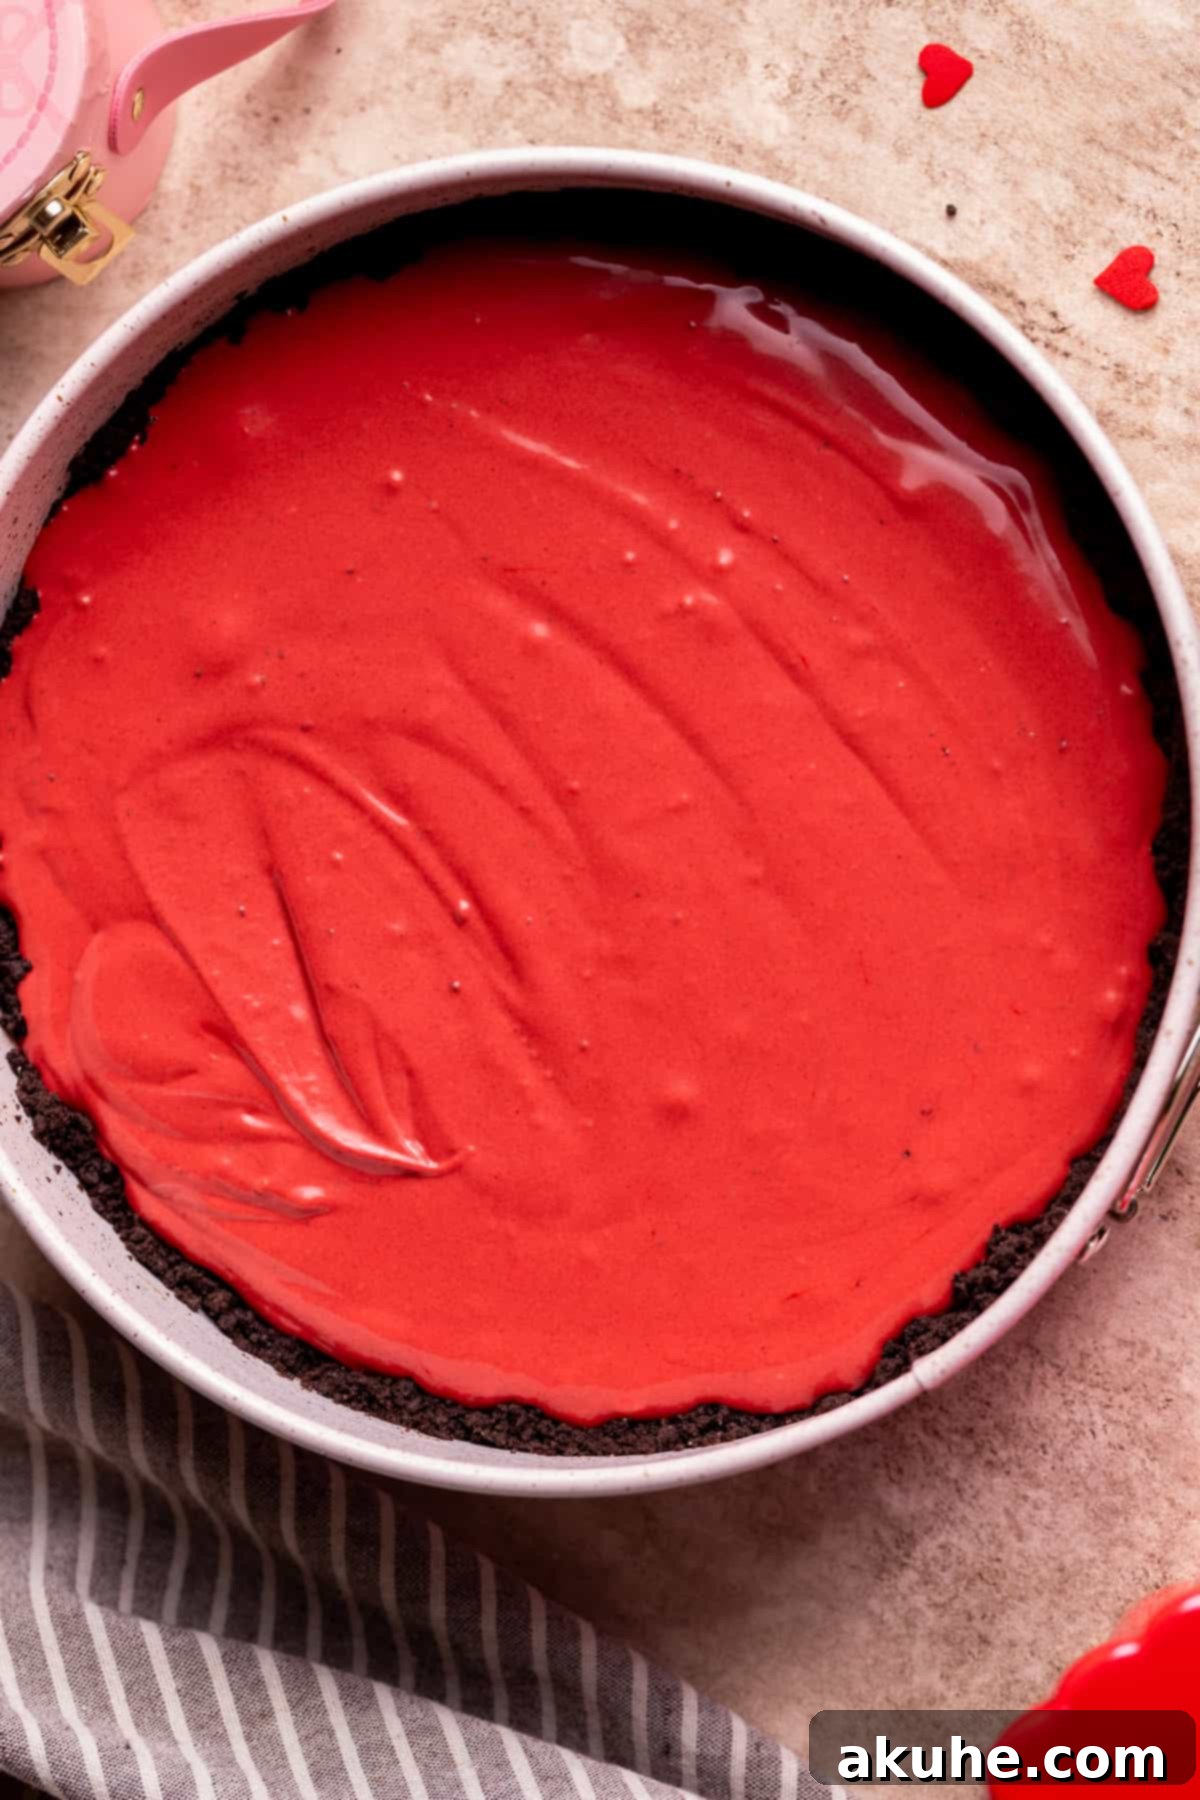
- Divide the cheesecake batter: pour about one-third of the plain batter into a separate bowl. To the remaining two-thirds of the batter, add the sifted cocoa powder and red food gel dye. Mix on low speed until the color is uniform and ingredients are just combined.
- Pour the red velvet cheesecake batter over the baked Oreo crust in the springform pan, spreading it evenly. Then, gently dollop spoonfuls of the plain cheesecake batter on top of the red velvet layer. Use an offset icing spatula to lightly spread the plain batter, creating a beautiful marbled swirl effect without fully blending the layers.
- Prepare a water bath:
- Method 1 (Recommended): Place the springform pan inside a 10-inch round cake pan. Place this assembly into a larger roasting pan. Carefully fill the roasting pan with hot water, ensuring it comes halfway up the sides of the 10-inch cake pan.
- Method 2: Tightly wrap the springform pan twice with heavy-duty aluminum foil. Place it directly into a larger roasting pan. Fill the roasting pan with hot water, halfway up the sides of the springform pan.
- Bake the cheesecake in the water bath for 75-85 minutes. It is done when the edges are set and firm, but the center (a small 2-3 inch circle) still has a slight jiggle when gently shaken.
- Once baked, turn off the oven and crack the oven door open slightly. Let the cheesecake cool in the oven for 30 minutes. This slow cooling helps prevent cracks.
- Carefully remove the cheesecake (still in its springform pan) from the water bath and place it on a wire cooling rack. Let it cool completely to room temperature.
- Once fully cooled, cover the cheesecake with foil and refrigerate for at least 6 hours, or ideally overnight, to allow it to set completely and develop its rich flavor.
Whipped Cream Topping
- In a cold metal bowl with a whisk attachment (if using a stand mixer), combine the cold heavy cream, sifted powdered sugar, and vanilla extract.
- Beat on high speed until medium peaks form, indicating a light and fluffy whipped cream. Be careful not to overbeat, or it will become grainy.
- Once the cheesecake is fully chilled, remove it from the springform pan (run a thin knife around the edge if needed, then release the spring). Carefully remove the parchment paper from the bottom. Spread the freshly whipped cream evenly over the top of the cheesecake. Decorate as desired.
Notes
Remember to pull out all dairy ingredients 1-2 hours before baking to ensure they reach room temperature.
Nutrition Information (per slice)
Calories: 554kcal, Carbohydrates: 41g, Protein: 7g, Fat: 43g, Saturated Fat: 24g, Polyunsaturated Fat: 3g, Monounsaturated Fat: 12g, Trans Fat: 0.2g, Cholesterol: 121mg, Sodium: 307mg, Potassium: 211mg, Fiber: 1g, Sugar: 28g, Vitamin A: 1414IU, Vitamin C: 0.3mg, Calcium: 96mg, Iron: 4mg
