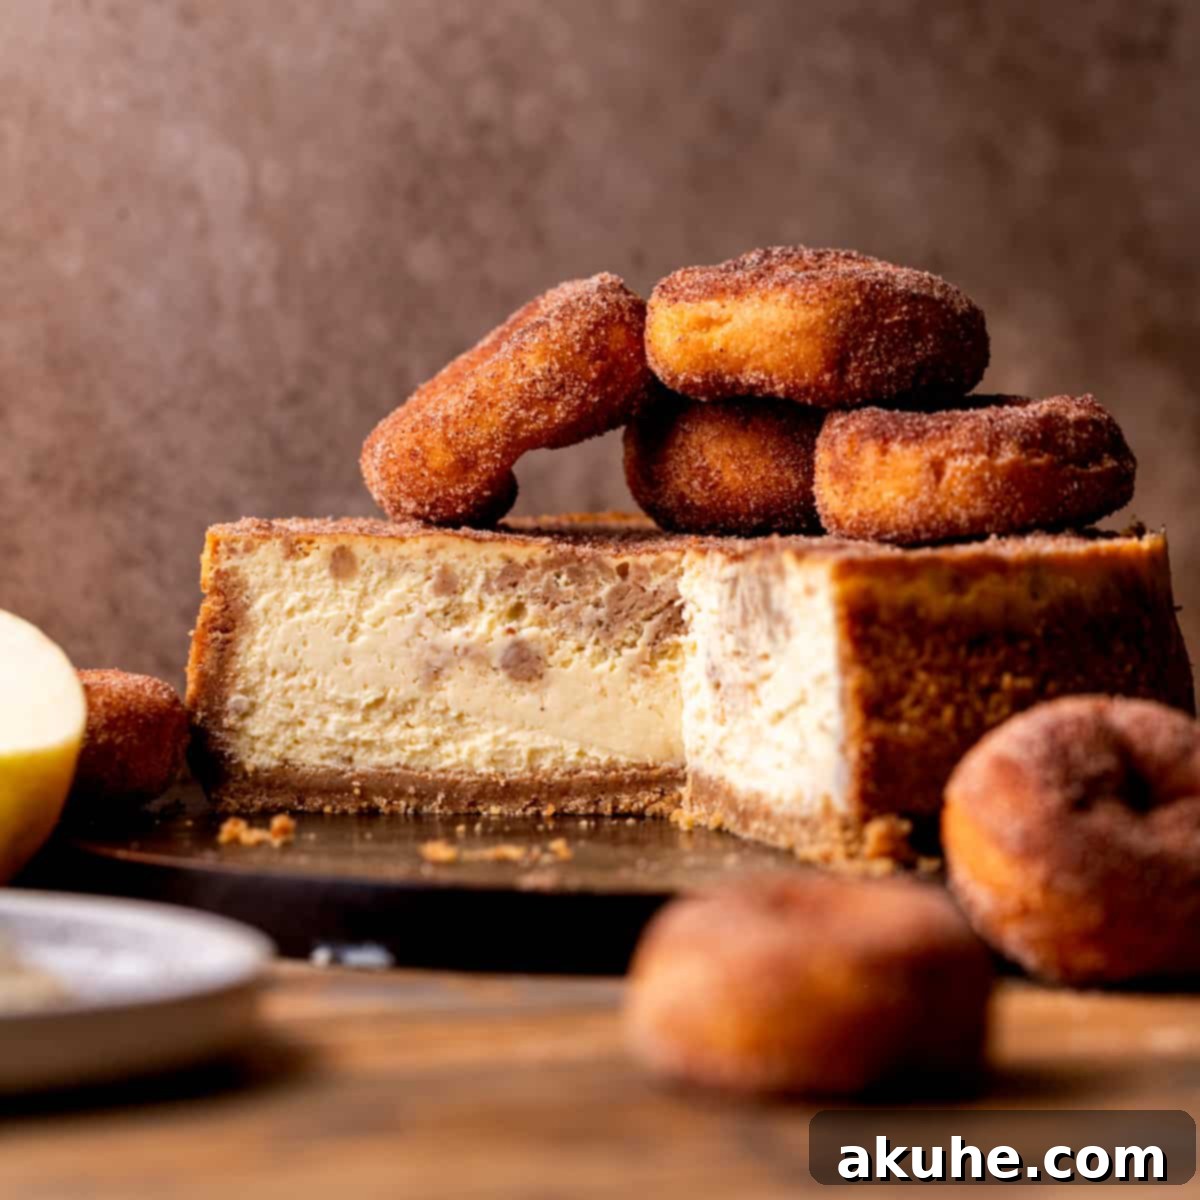
Welcome to the ultimate autumn indulgence: an exquisite Apple Cider Cheesecake that perfectly captures the essence of a classic apple cider donut in a rich, creamy dessert. Imagine a buttery graham cracker crust, a velvety smooth baked cheesecake infused with reduced apple cider, a spiced cinnamon filling swirled throughout, and a generous sprinkle of cinnamon sugar on top. This is more than just a cheesecake; it’s a celebration of apple season, a centerpiece for your holiday table, and a guaranteed crowd-pleaser that will have everyone asking for your secret recipe.
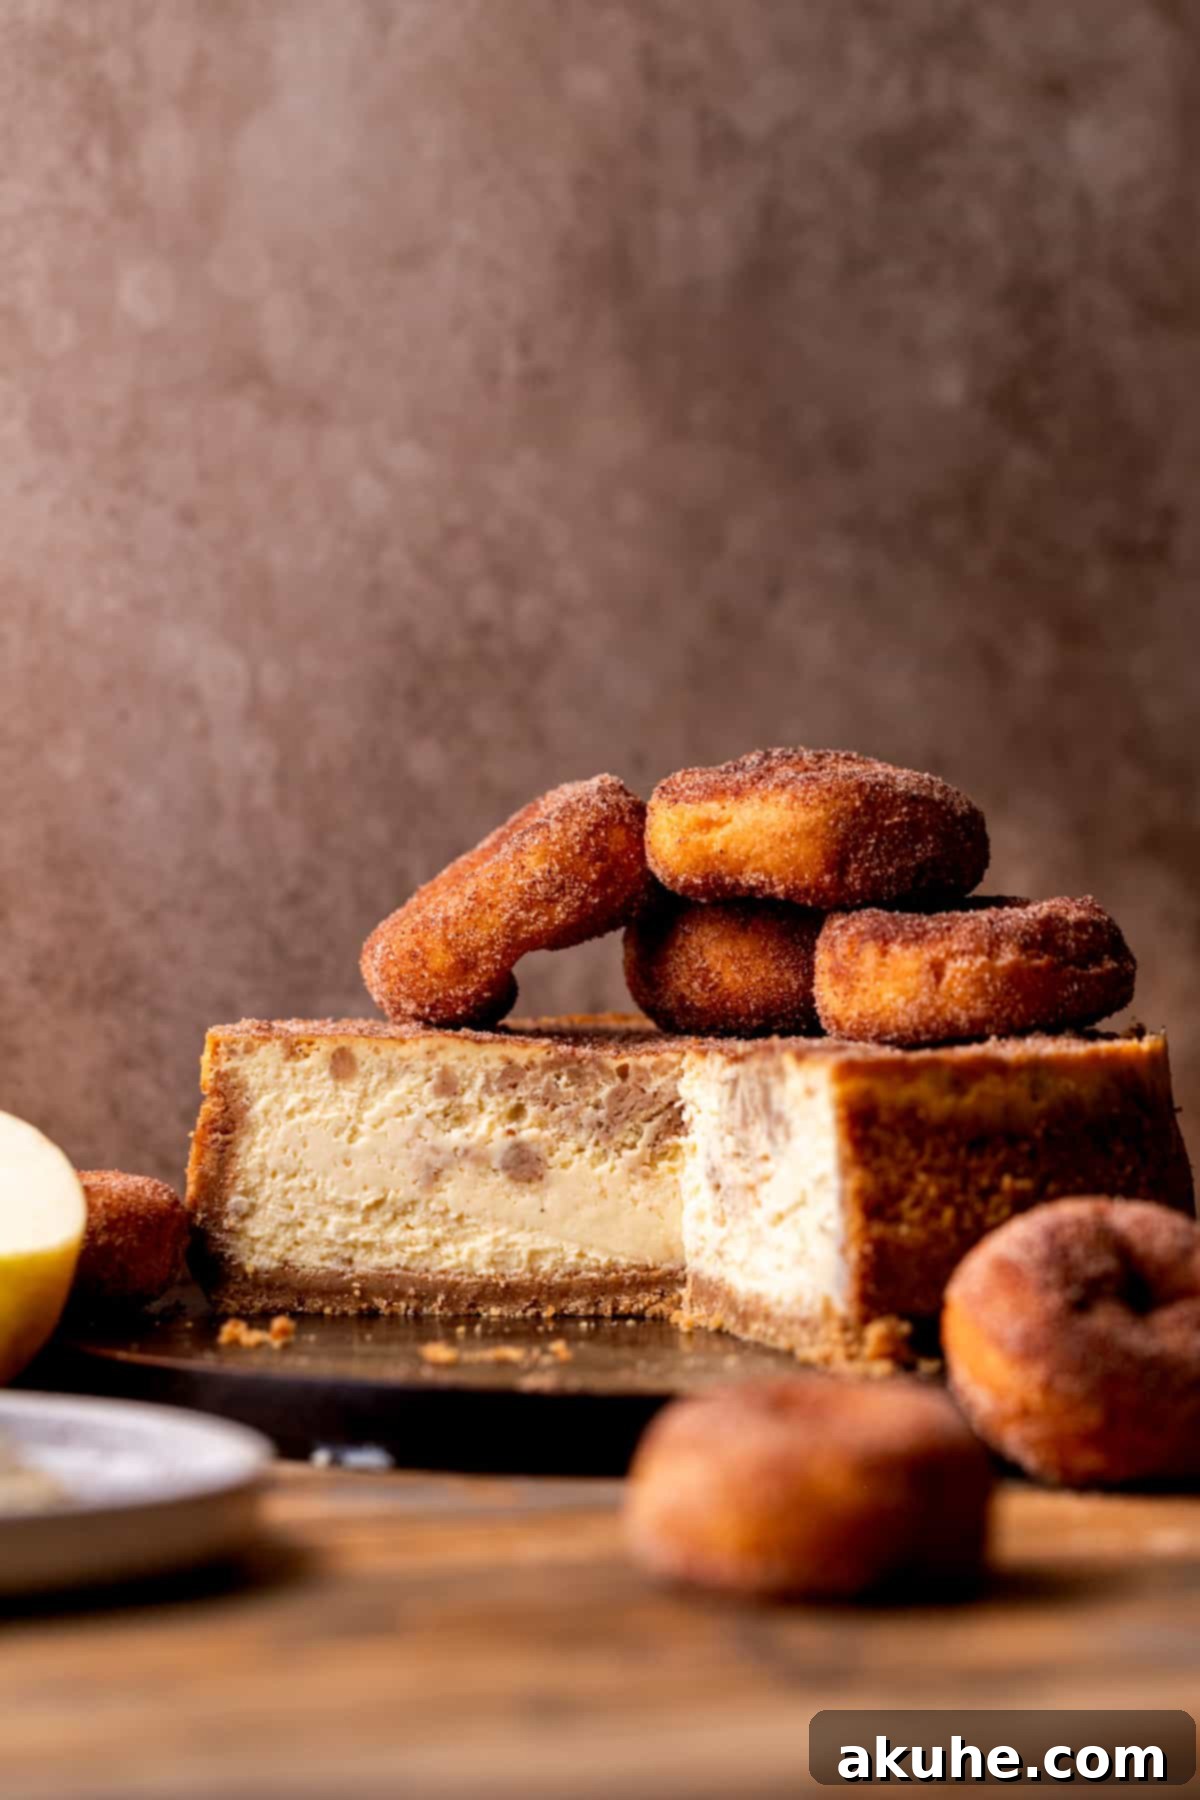
This remarkable apple cider donut cheesecake offers a robust apple cider and cinnamon sugar flavor profile that is deeply satisfying. We’ve layered the apple cider essence throughout the entire dessert: it’s baked into the creamy cheesecake batter, incorporated into the spiced filling, and even brushed onto the top before the final cinnamon sugar flourish. If you’ve been searching for a truly special treat to highlight the vibrant, crisp flavors of fresh apple cider, your quest ends here. It’s also an exceptional choice for the upcoming holiday season, providing a sophisticated yet comforting dessert that will impress friends and family alike.
For those who adore apple-infused sweets, be sure to explore more of our delightful recipes such as Apple Cinnamon Rolls, Apple Crumble Cheesecake, and Apple Cinnamon Cake. Each one promises a taste of seasonal bliss!
Why This Apple Cider Cheesecake Recipe Stands Out
There are countless reasons why this homemade apple cider cheesecake is a must-try. Its unique blend of flavors and textures elevates it beyond a traditional cheesecake, making it a truly unforgettable dessert.
- Intense Apple Cider Flavor: This recipe masterfully encapsulates the beloved taste of apple cider donuts within a luxurious cheesecake format. By reducing fresh apple cider, we concentrate its natural sweetness and tang, infusing every layer with that distinct, comforting apple essence that defines autumn.
- Luxuriously Creamy Texture: Achieving the perfect cheesecake texture is paramount, and this recipe delivers. Our careful blending technique and essential baking tips ensure a consistently smooth, rich, and incredibly creamy cheesecake that melts in your mouth, free from any lumps or cracks.
- Irresistible Cinnamon Sugar Topping: The final touch of a buttery, cinnamon-sugar topping is what truly elevates this dessert. It mirrors the familiar crispy, sweet coating of an apple cider donut, adding a delightful textural contrast and an extra burst of spice that complements the creamy cheesecake and tart apple cider notes beautifully.
- Perfect for Any Occasion: While it screams “fall,” this spiced apple cheesecake is versatile enough for any celebration. Whether it’s a cozy family dinner, a festive holiday gathering, or a special weekend treat, its impressive appearance and phenomenal taste will make it the star of your dessert spread.
- Beginner-Friendly with Expert Results: Don’t let the elegant appearance fool you. We’ve broken down each step into clear, concise instructions, making this recipe approachable for bakers of all skill levels. With our detailed guidance, you’ll achieve professional-quality results right in your home kitchen.
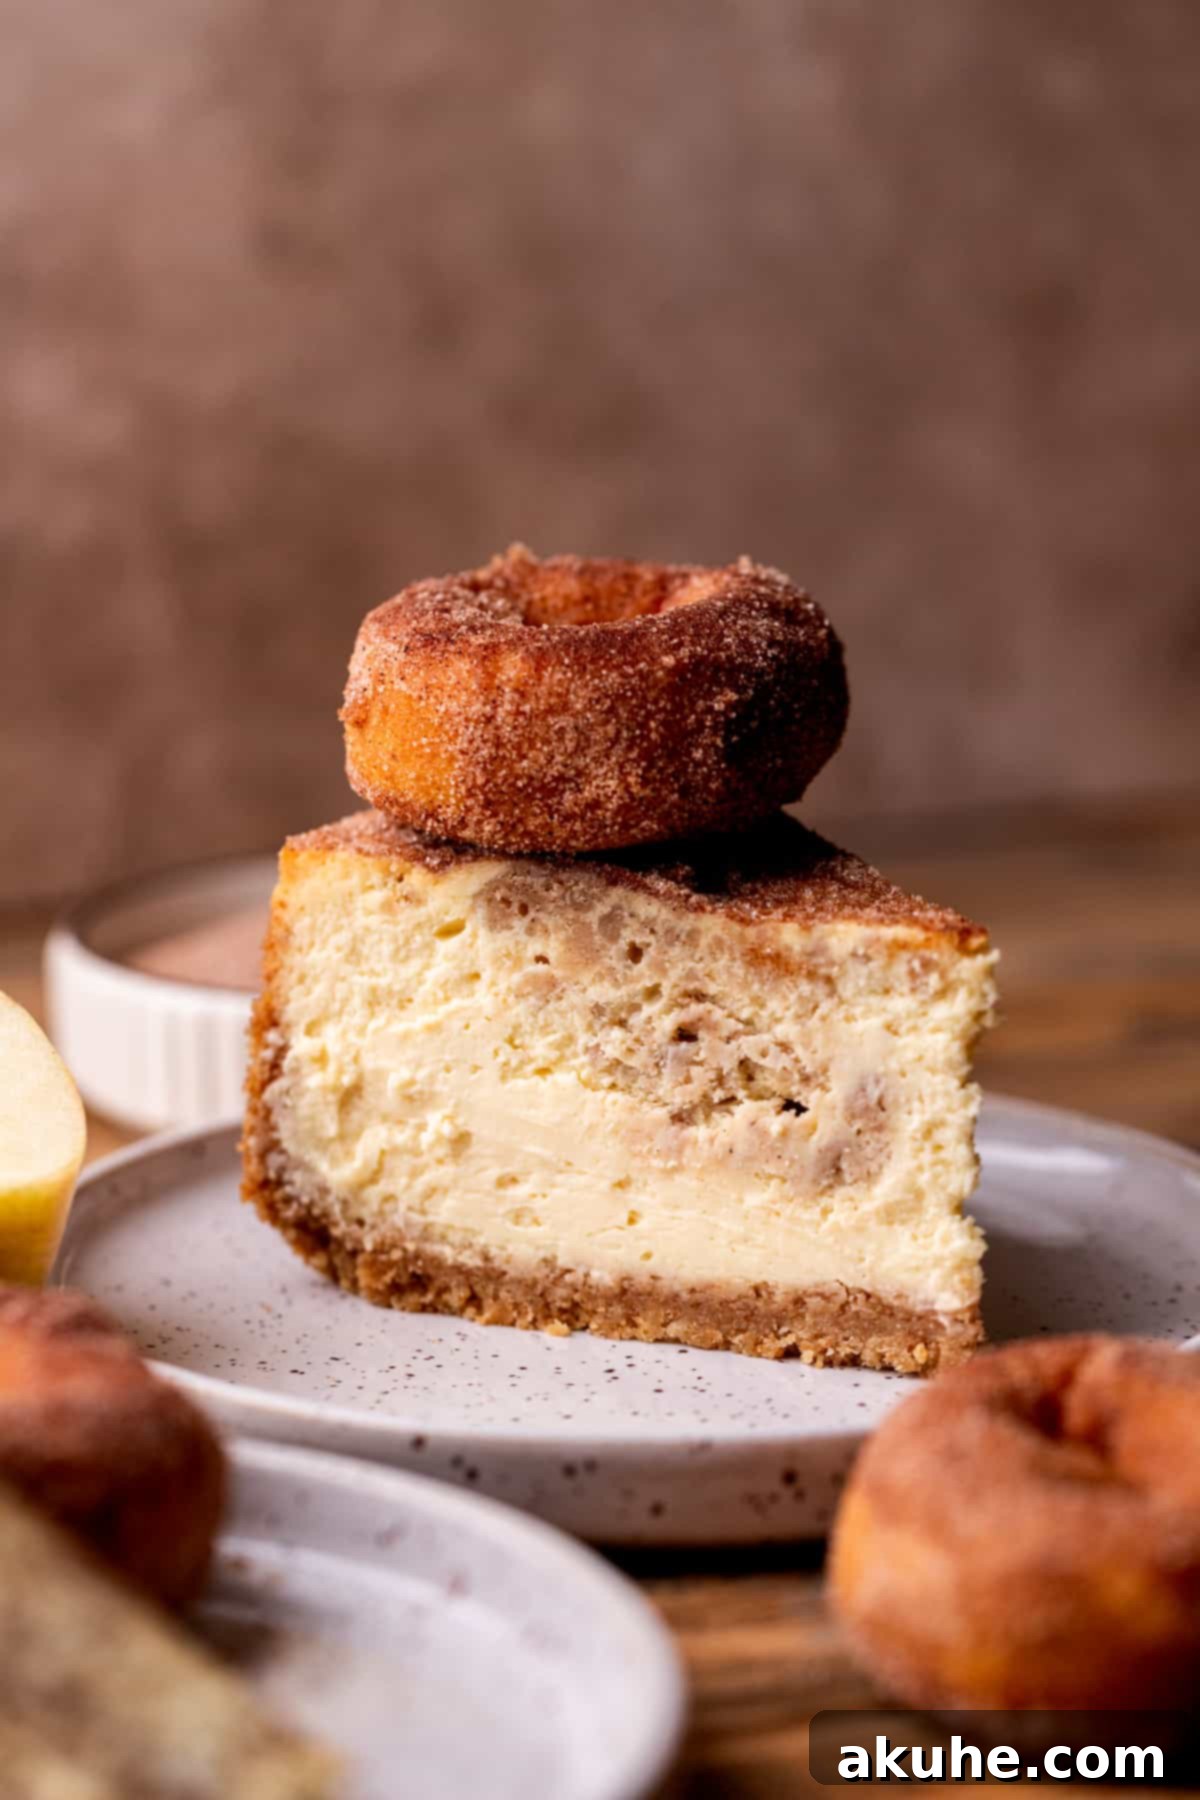
Essential Ingredient Notes for Your Apple Cider Donut Cheesecake
Success in baking often starts with understanding your ingredients. Here are some detailed notes to ensure your apple cider cheesecake turns out perfectly. For a complete list of quantities, please refer to the recipe card below.
- Graham Crackers: These form the base of our sturdy, flavorful crust. If graham crackers aren’t readily available in your region, digestive biscuits are an excellent and commonly used substitute that will provide a similar texture and mild flavor.
- Unsalted Butter: Melted butter is crucial for binding the graham cracker crumbs into a cohesive crust. Always opt for unsalted butter to control the overall saltiness of your dessert. You can easily melt it in the microwave or a small saucepan.
- Brown Sugar: We recommend using light brown sugar for its delicate caramel notes that complement the apple cider. However, dark brown sugar can also be used if preferred; it will impart a slightly deeper molasses flavor to both the crust and the filling. Ensure it’s packed tightly when measuring.
- Sour Cream: This ingredient is key to achieving that signature tangy flavor and incredibly moist, creamy texture in cheesecakes. It’s imperative that your sour cream is at room temperature before mixing. Cold sour cream can cause lumps in your batter and affect its smooth consistency. Take it out of the fridge at least two hours before you plan to start baking.
- Cream Cheese: For the richest and creamiest cheesecake, always use full-fat cream cheese, typically sold in block form (not the spreadable kind in a tub). Like sour cream, room temperature cream cheese is non-negotiable. Cold cream cheese will result in a lumpy batter that won’t bake evenly, potentially leading to cracks. Allow it to soften on your counter for at least two hours.
- Eggs: Large eggs are specified for this recipe, and bringing them to room temperature is another vital step. Room temperature eggs emulsify better with the other ingredients, creating a smoother, more uniform cheesecake batter. Using whole eggs, rather than just egg whites, ensures a rich and stable custard thanks to the fat in the yolks.
- Baking Spray (with Flour): This is a simple but effective tool for ensuring your cheesecake doesn’t stick. Make certain you are using a nonstick baking spray that contains flour. This adds an extra layer of protection compared to plain cooking spray, which might not be sufficient for a delicate cheesecake.
Step-By-Step Instructions: Crafting the Graham Cracker Crust and Apple Cider Cinnamon Filling
Let’s begin by preparing the foundation of our incredible dessert: the crisp graham cracker crust and the wonderfully spiced apple cider cinnamon filling. Precision in these initial steps lays the groundwork for a perfect cheesecake.
STEP 1: Reduce Apple Cider. Pour the fresh apple cider into a medium saucepan. Place the saucepan over medium-high heat and bring the cider to a gentle boil. Continue to cook, stirring occasionally, until the liquid reduces significantly, typically down to about ½ cup. This reduction process intensifies the apple flavor, making it a prominent note in your cheesecake. This usually takes between 10 to 15 minutes. Once reduced, remove it from the heat and allow it to cool completely to room temperature before incorporating it into the cheesecake batter.
STEP 2: Prepare Your Pan. While the apple cider cools, preheat your oven to 325°F (160°C). Prepare a 9-inch springform pan by thoroughly spraying the inside with a nonstick baking spray (ensure it contains flour). For an extra layer of protection against sticking and for easy removal, line the bottom of the pan with a circle of parchment paper. Spray the parchment paper again after placing it in the pan.
STEP 3: Prepare the Graham Cracker Crumbs. Using a food processor, blend the graham crackers until they form very fine, even crumbs. In a small mixing bowl, combine these fine graham cracker crumbs with the brown sugar and melted unsalted butter. Use a fork to mix everything together thoroughly until the crumbs are evenly moistened and resemble wet sand.
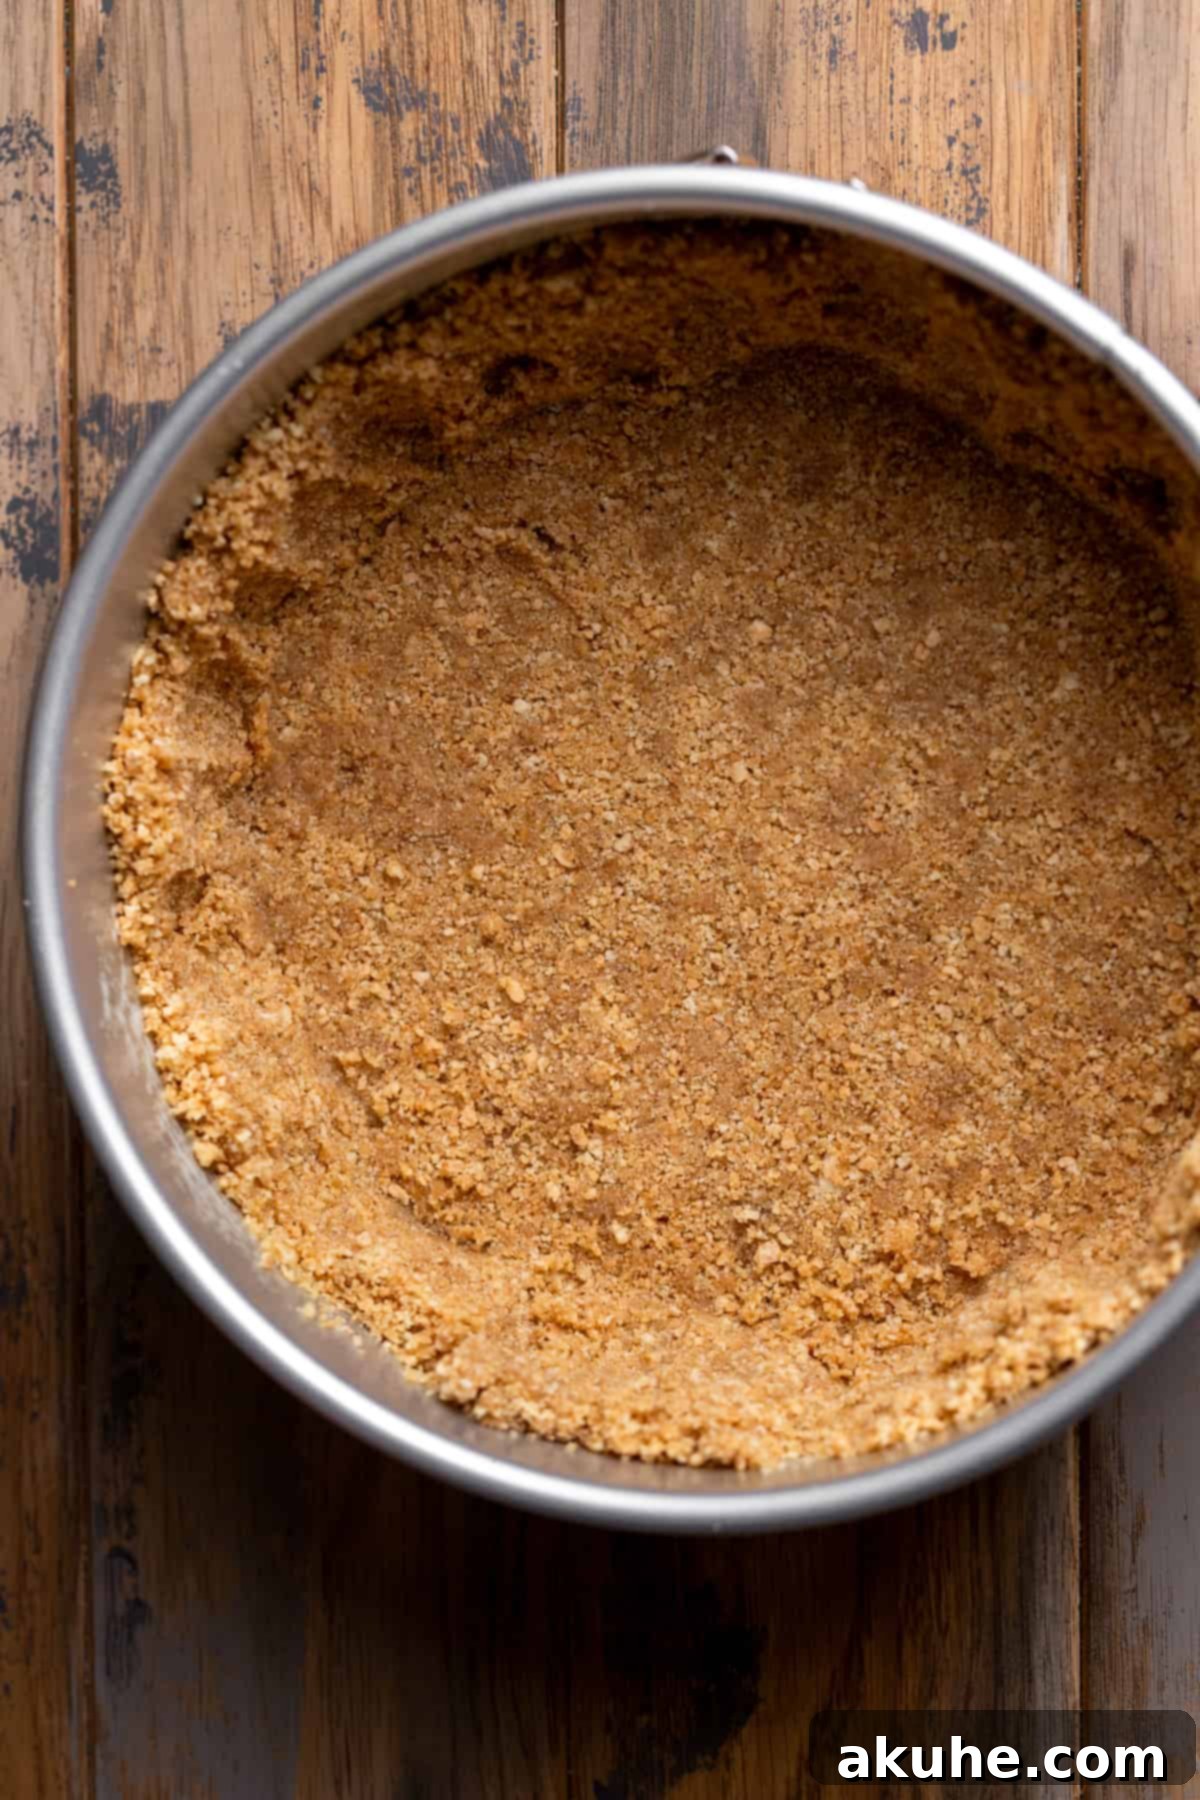
STEP 4: Form the Crust. Pour the graham cracker mixture into the prepared springform pan. Use your hands to firmly press the mixture across the bottom and about halfway up the sides of the pan. For an extra compact and even base, use the back of a flat-bottomed measuring cup or glass to press down firmly on the bottom of the crust.
STEP 5: Bake the Crust. Place the pan with the formed crust into the preheated oven and bake for 12 minutes. This brief bake time helps to set the crust, making it sturdy and preventing it from becoming soggy once the cheesecake filling is added. After baking, remove the crust from the oven and let it cool completely on a wire rack.
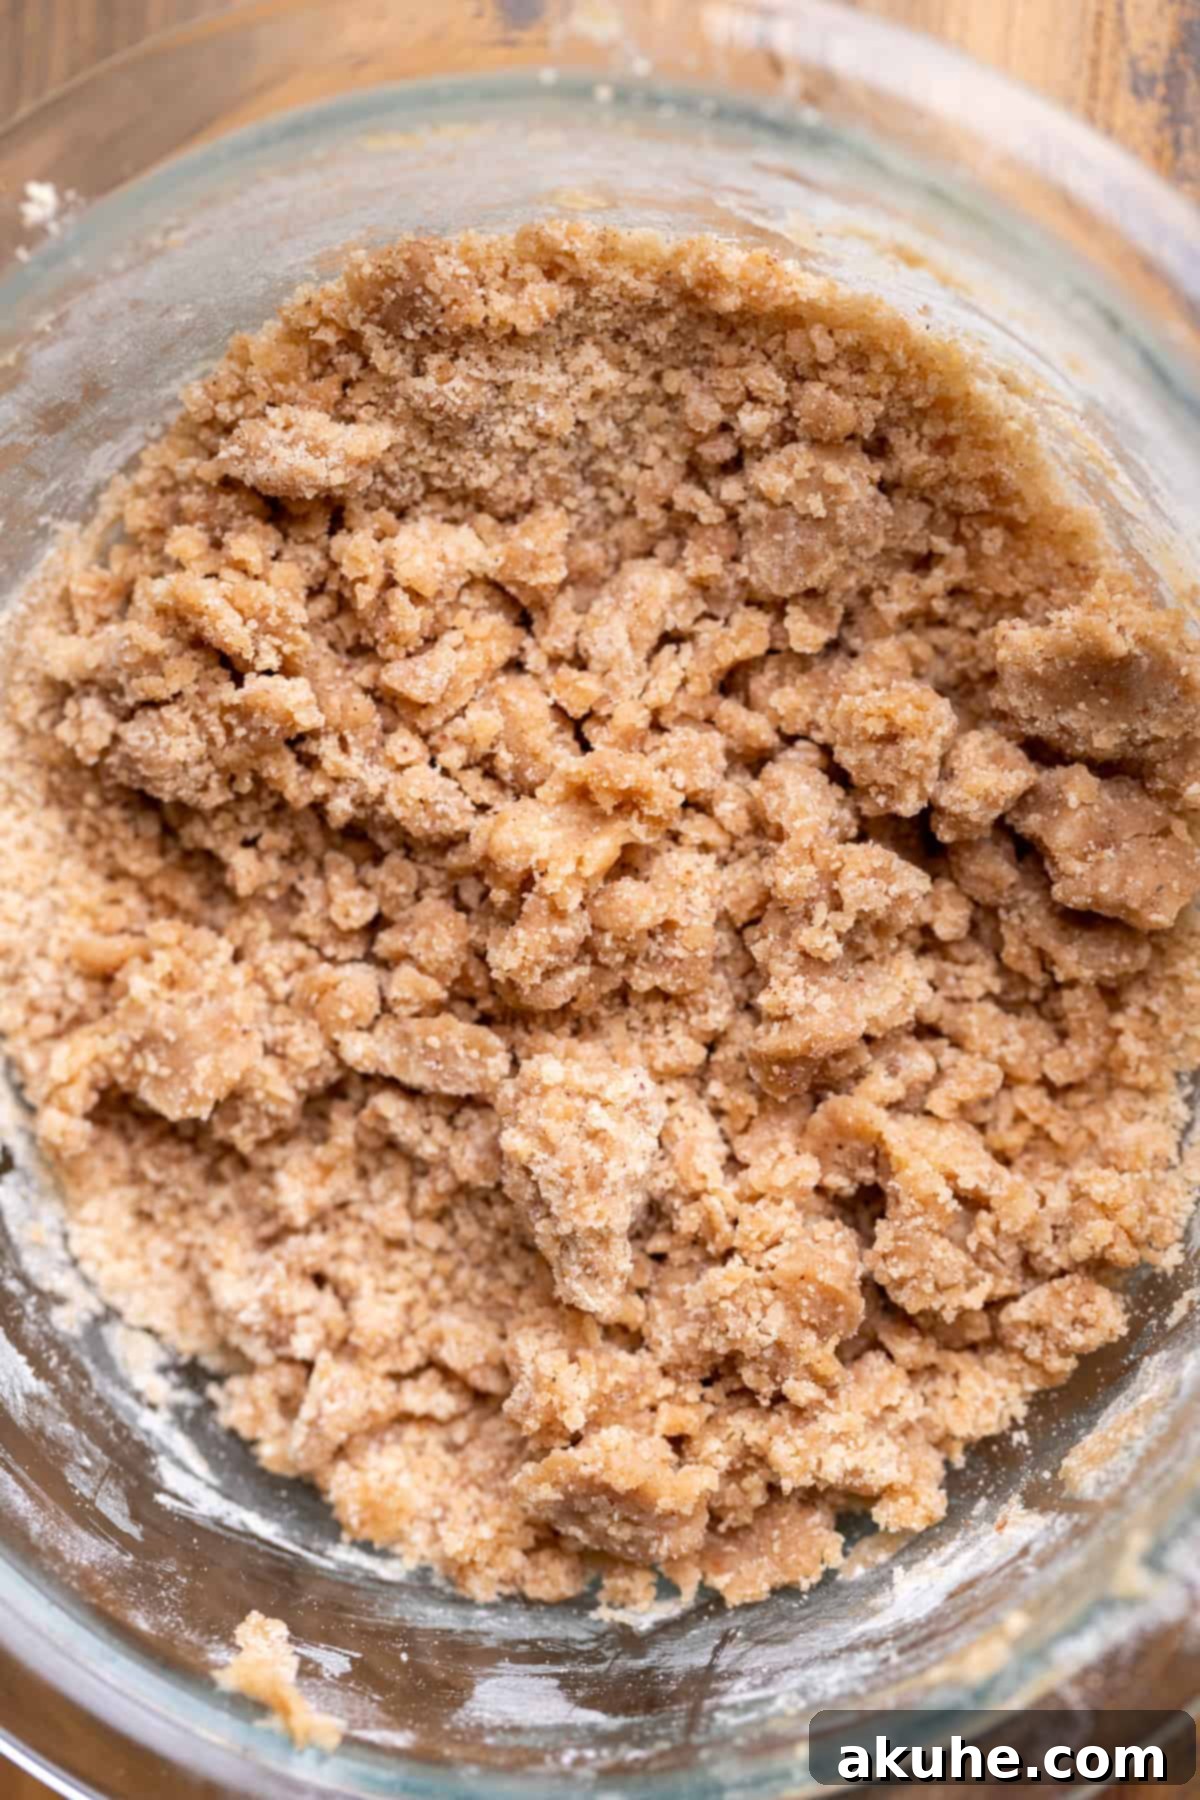
STEP 6: Prepare the Cinnamon Filling. In a separate small bowl, combine the brown sugar, all-purpose flour, ground cinnamon, a tablespoon of apple cider, and melted butter. Mix these ingredients together thoroughly with a fork until a thick, crumbly mixture forms. This is your delicious apple cider cinnamon filling. Place the bowl in the refrigerator to allow the filling to set slightly while you prepare the cheesecake batter.
Step-By-Step Instructions: Assembling and Baking the Apple Cider Cheesecake
Now that your crust is baked and your filling is ready, it’s time to create the creamy, flavorful heart of this dessert: the apple cider cheesecake. This recipe utilizes an electric mixer; a stand mixer with a paddle attachment is ideal for best results, but a hand mixer will also work effectively.
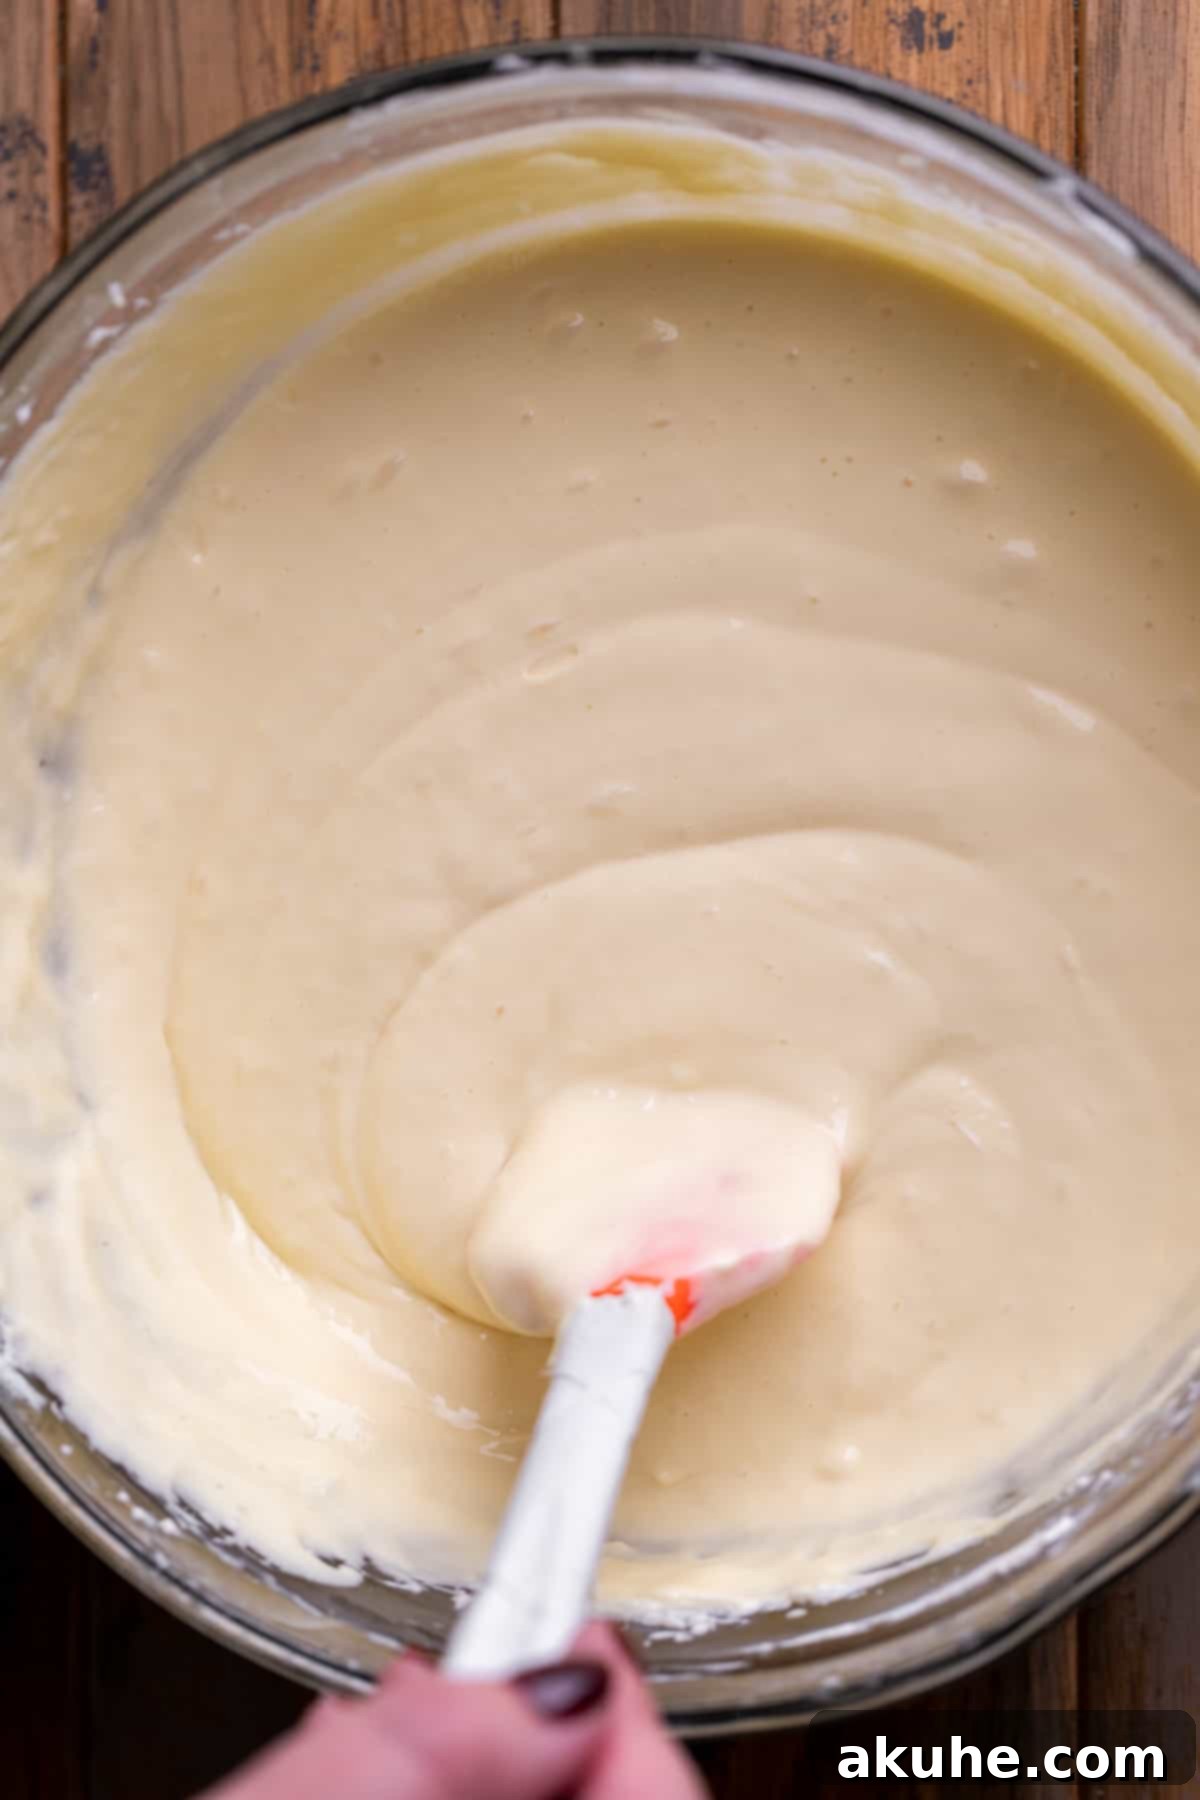
STEP 1: Cream Together Cream Cheese and Sugar. In the bowl of your electric mixer, combine the softened full-fat cream cheese and white granulated sugar. Beat these ingredients together on high speed for approximately 2 minutes. The mixture should become light, fluffy, and completely smooth, with no visible lumps of cream cheese. Stop the mixer and use a rubber spatula to scrape down the sides and bottom of the bowl thoroughly, ensuring all ingredients are fully incorporated.
STEP 2: Incorporate Liquid Ingredients. To the cream cheese mixture, add the cooled reduced apple cider, room temperature sour cream, and pure vanilla extract. Mix these ingredients on medium speed until the batter is completely smooth and uniform. Continue to scrape down the bowl as needed to prevent any unmixed pockets.
STEP 3: Add Eggs Carefully. Add the large, room-temperature eggs to the batter, one at a time. Mix on a very low speed, just until each egg is combined. It is crucial not to overmix the eggs, as incorporating too much air at this stage can lead to cracks in your cheesecake during baking. Once the eggs are just combined, remove the bowl from the mixer and give the batter a final gentle scrape with a rubber spatula to ensure everything is perfectly blended.
STEP 4: Prepare a Water Bath. A water bath (bain-marie) is essential for baking a perfectly smooth, crack-free cheesecake. It creates a moist, even-temperature environment that gently cooks the cheesecake. Refer to the detailed “Water Bath Tips” section below for specific techniques.
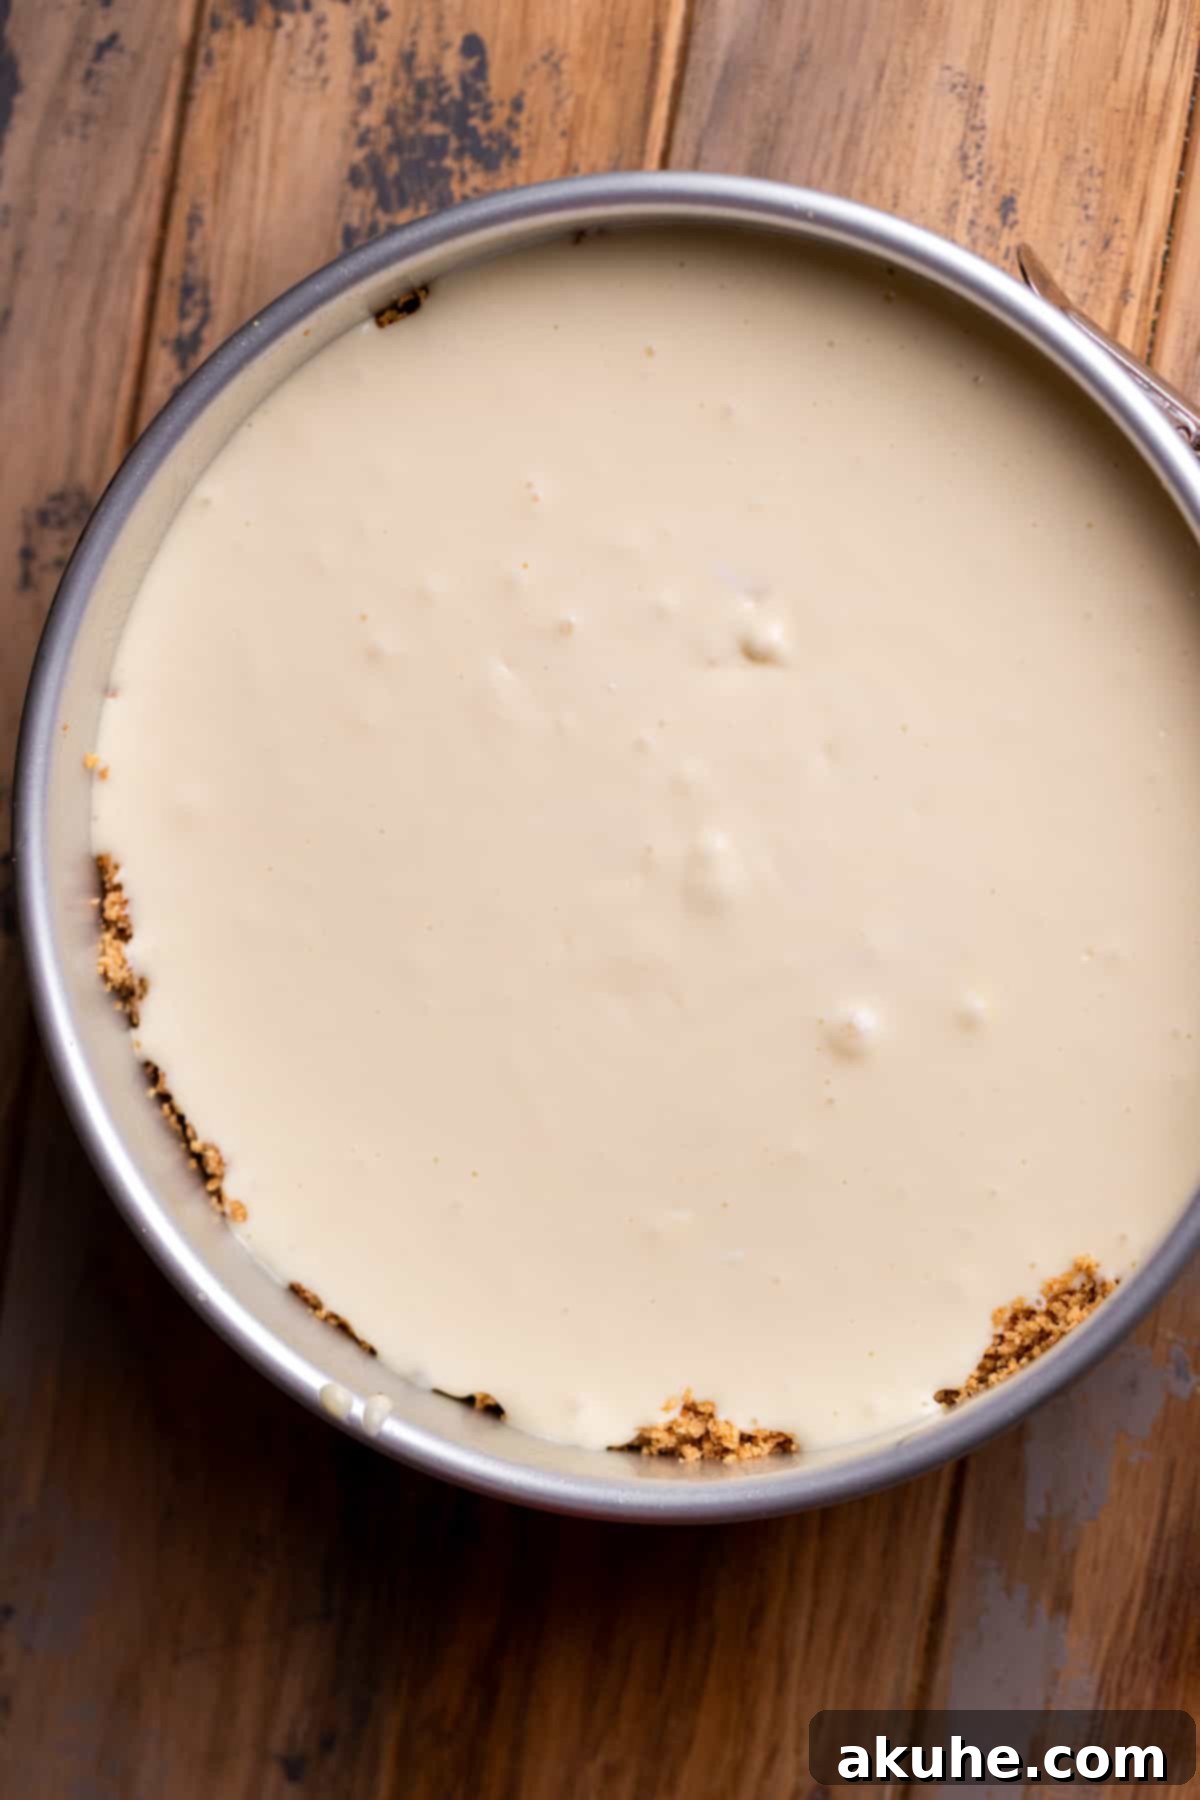
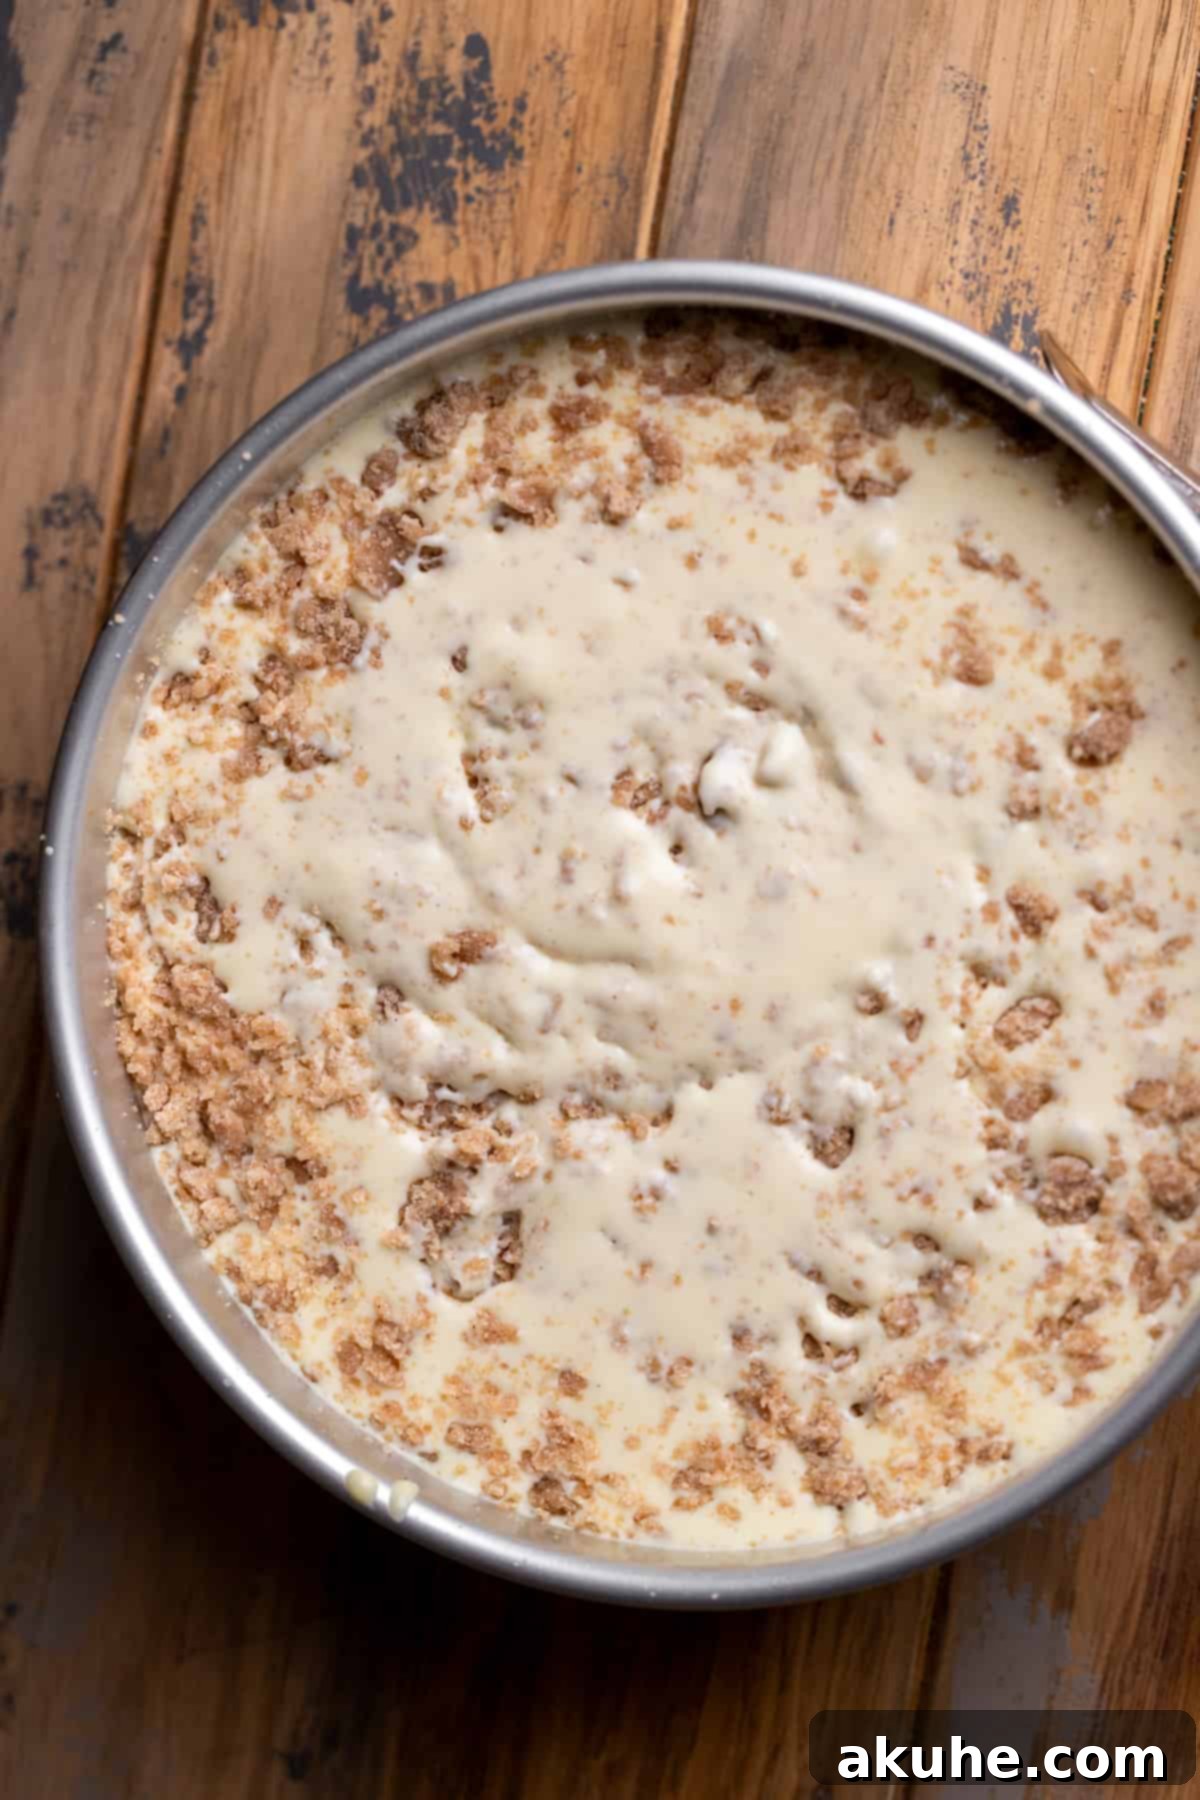
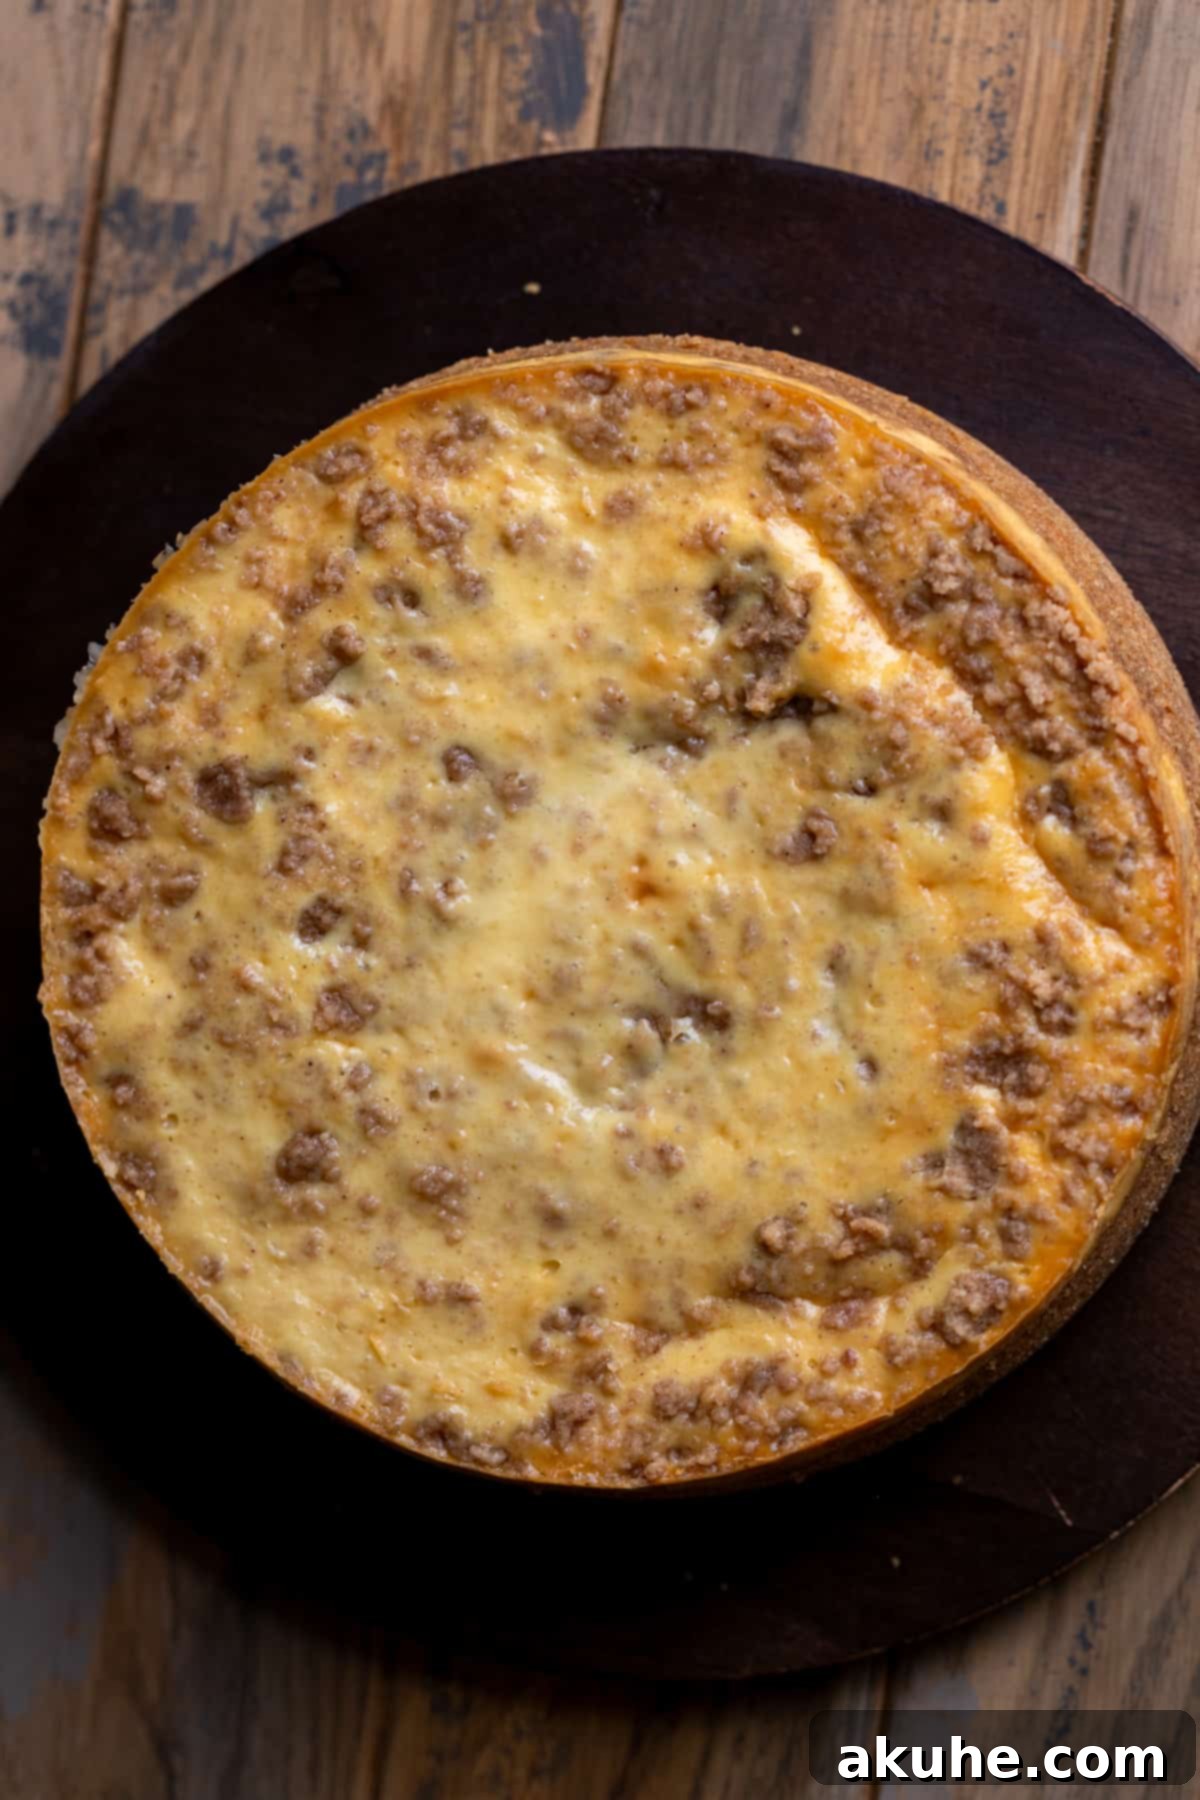
STEP 5: Assemble the Cheesecake. Pour the prepared cheesecake batter evenly over the cooled graham cracker crust in the springform pan. Retrieve your chilled apple cider cinnamon filling from the refrigerator and sprinkle it generously over the top of the cheesecake batter. Using a butter knife or a skewer, gently swirl the filling into the cheesecake batter, creating beautiful ribbons of spiced apple flavor throughout. Be careful not to swirl too deeply into the crust.
STEP 6: Bake the Cheesecake. Carefully place the springform pan (within its water bath setup) into your preheated oven. Bake for approximately 70-80 minutes. The cheesecake is done when the edges are set and appear firm, but the very center still has a slight, gentle jiggle when the pan is lightly tapped. This slight movement indicates that it is cooked through but still moist.
STEP 7: Slow Cooling Process. Once the cheesecake is baked, turn off the oven but leave the cheesecake inside. Prop the oven door open slightly (about 2-3 inches) and allow the cheesecake to cool slowly in the diminishing heat for about 30 minutes. This gradual cooling prevents drastic temperature changes that can cause cracks. After 30 minutes, carefully remove the springform pan from the oven and transfer it to a wire rack to cool completely to room temperature. This can take several hours.
STEP 8: Chill Thoroughly. Once the cheesecake has cooled completely to room temperature, wrap the springform pan tightly with aluminum foil to protect it from absorbing refrigerator odors. Transfer the wrapped cheesecake to the refrigerator and chill it for a minimum of 6 hours, or ideally, overnight. This chilling period is crucial for the cheesecake to fully set, firm up, and allow its flavors to meld beautifully, resulting in the perfect slice.
Step-By-Step Instructions: The Perfect Cinnamon Sugar Topping
The final touch for your apple cider donut cheesecake is the delightful cinnamon sugar topping, which perfectly mimics the iconic texture and flavor of its donut inspiration. This simple step adds both visual appeal and an extra layer of deliciousness.
STEP 1: Prepare Topping Mixtures. In one small bowl, combine the melted unsalted butter and the tablespoon of apple cider, mixing until well blended. In a separate, larger bowl, whisk together the white granulated sugar and ground cinnamon until they are thoroughly combined. Set both aside.
STEP 2: Prepare Cheesecake for Topping. Once your cheesecake has been thoroughly chilled (ideally overnight), carefully remove it from the refrigerator and gently release it from the springform pan. Peel away the parchment paper from the bottom. Place the cheesecake on your desired serving platter or cake stand.
STEP 3: Brush with Butter Mixture. Using a clean pastry brush, generously brush the melted butter and apple cider mixture evenly over the entire top surface of the chilled cheesecake. This creates a slightly sticky surface, helping the cinnamon sugar adhere beautifully and adding an extra layer of apple cider flavor.
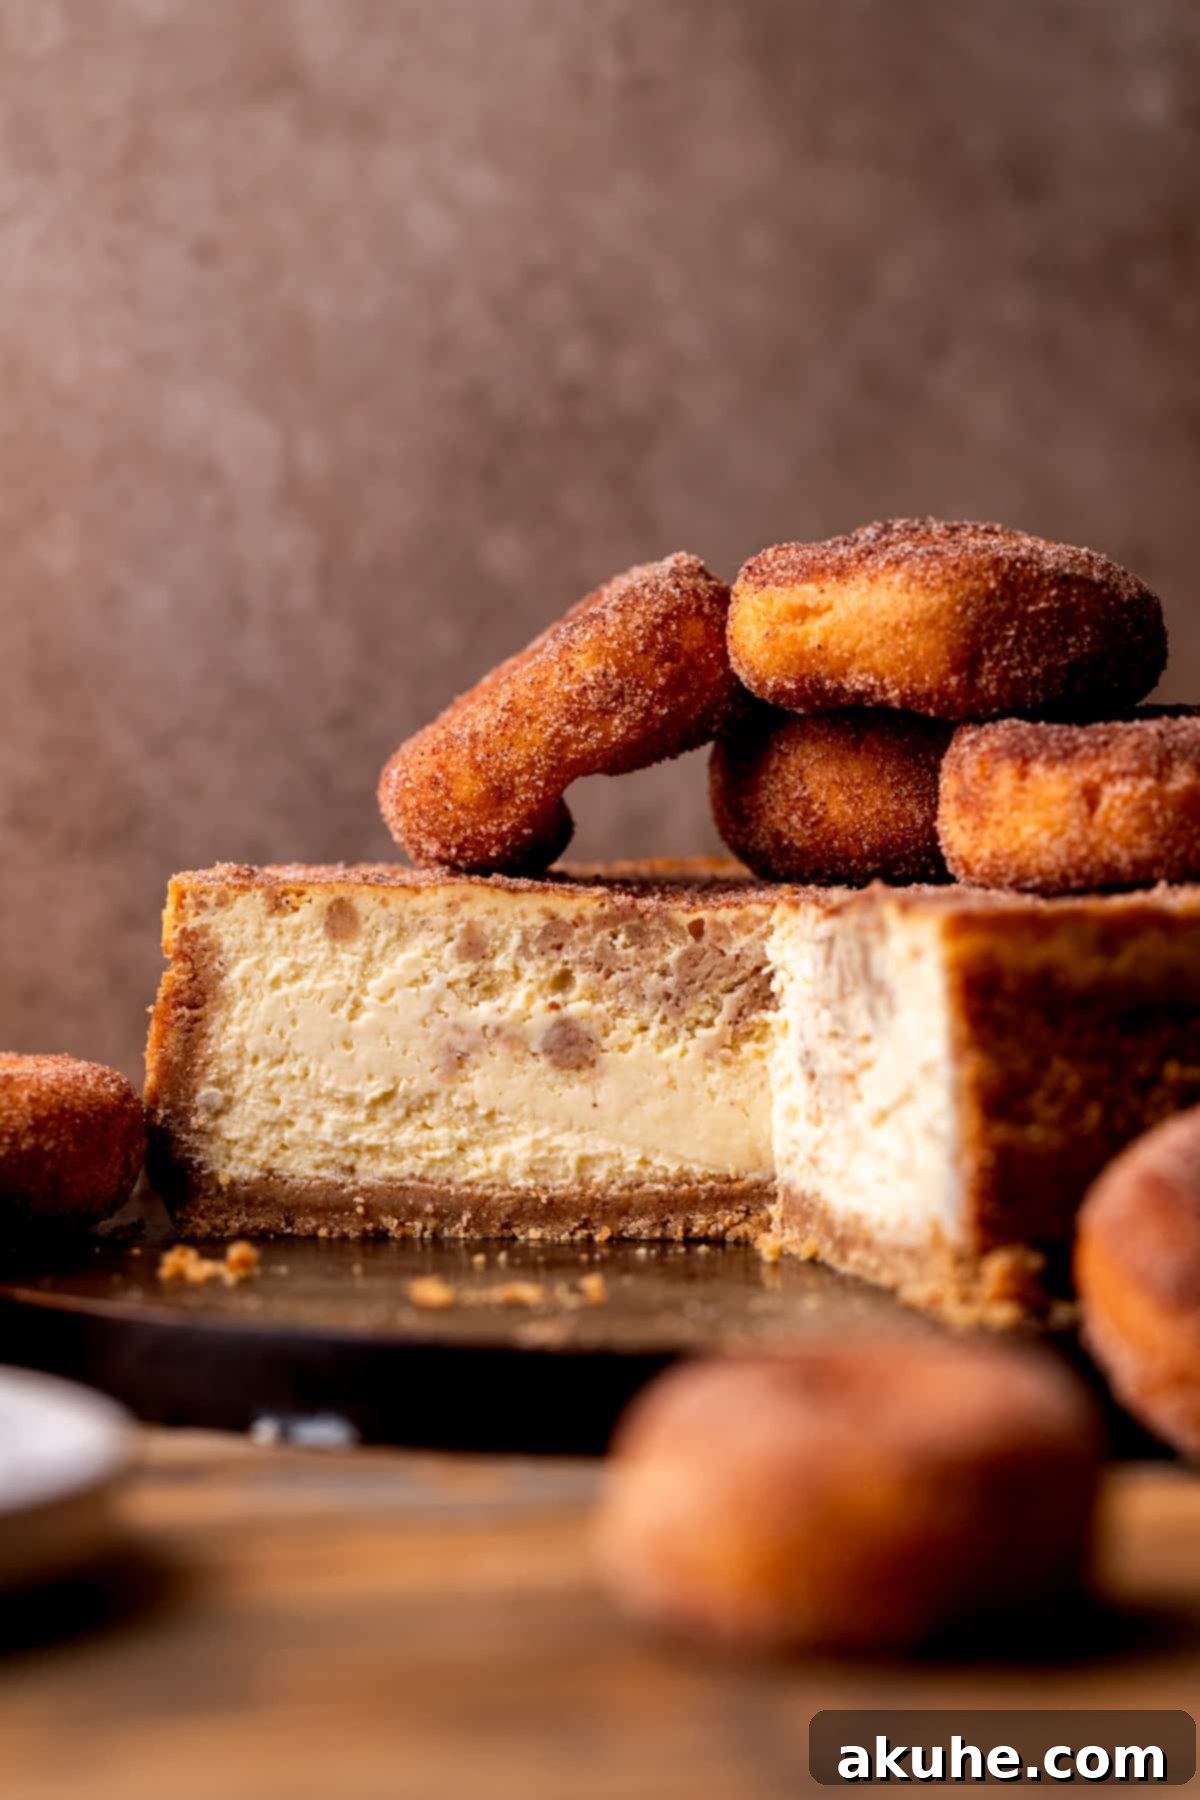
STEP 4: Apply Cinnamon Sugar. Immediately after brushing, generously sprinkle the cinnamon sugar mixture over the top of the cheesecake. Ensure an even and heavy coat, covering the entire surface. This not only adds a burst of flavor but also creates that appealing textured finish, reminiscent of a freshly fried apple cider donut.
Water Bath Techniques for Flawless Cheesecake
A water bath (bain-marie) is the secret weapon for achieving a perfectly smooth, crack-free, and evenly baked cheesecake. The steam generated by the hot water creates a moist environment in the oven, preventing the cheesecake from drying out, rising too quickly, and subsequently cracking. It also provides gentle, consistent heat, ensuring a creamy texture throughout.
Here are two proven techniques for setting up a water bath, both utilizing a large roasting pan filled with hot, steaming water:
- The Double Pan Method (Recommended): This is our preferred method as it offers the best protection against water seeping into your crust. Place your springform pan (with the cheesecake batter inside) directly into a larger, 10-inch round cake pan. Then, place this cake pan into your large roasting pan. Carefully fill the roasting pan with hot, steaming water, ensuring the water comes about halfway up the sides of the 10-inch cake pan. This method completely encloses the springform pan, making it virtually impossible for water to reach the crust, resulting in a perfectly crisp base every time.
- The Foil Wrap Method: This is a common and effective method, but requires careful execution to avoid a soggy crust. Wrap your springform pan (with the cheesecake batter) very tightly twice over with heavy-duty aluminum foil. Ensure there are no gaps or tears that could allow water to seep in. Place the foil-wrapped springform pan directly into the large roasting pan. Fill the roasting pan with hot, steaming water, again, ensuring the water comes about halfway up the sides of the foil-wrapped springform pan. While effective, there is a slightly higher chance of water finding its way through the foil, potentially leading to a less crisp crust.
By employing the water bath method, you’re taking a crucial step towards baking a consistently perfect cheesecake, ensuring a beautiful appearance and an unbelievably creamy texture.
Mastering the Art of Preventing Cheesecake Cracks
Cheesecake cracks can be frustrating, but they are entirely preventable with a few key techniques. Achieving that smooth, unblemished surface is simpler than you might think:
- Ensure Smooth Batter Consistency: Begin by beating your softened cream cheese and sugar on high speed until the mixture is exceptionally light, fluffy, and completely smooth. Any small chunks of cream cheese can create air pockets that expand and collapse during baking, leading to cracks. Scrape the bowl frequently with a rubber spatula to ensure thorough mixing.
- Mix Eggs Gently and Briefly: When adding the eggs, switch your mixer to the lowest possible speed and mix just until they are barely incorporated into the batter. The goal is to introduce as little air as possible. Overmixing eggs creates excessive air bubbles in the batter, which cause the cheesecake to puff up too much during baking and then fall rapidly during cooling, resulting in unsightly cracks.
- Utilize a Water Bath: As detailed above, a water bath is indispensable. It creates a moist, even-temperature baking environment that prevents the cheesecake from drying out and baking too quickly around the edges while the center lags. This gentle, consistent heat minimizes stress on the custard, allowing it to set smoothly.
- Implement a Slow Cooling Process: The transition from hot oven to cooler room temperature is a critical phase. Drastic temperature changes are a common culprit for cracks. Once your cheesecake is baked, turn off the oven, crack the door open (about 2-3 inches), and let the cheesecake sit in the gradually cooling oven for at least 30 minutes. This slow, controlled descent in temperature helps the cheesecake settle gently without cracking. Only after this period should you transfer it to a wire rack to cool completely at room temperature before chilling.
By following these steps, you’ll significantly increase your chances of achieving a beautiful, crack-free apple cider cheesecake that looks as perfect as it tastes.
How To Effortlessly Remove Your Cheesecake From The Pan
After all your hard work, the last thing you want is a cheesecake that’s stuck in the pan. With proper preparation and patience, removing your cheesecake can be incredibly easy:
First, before you even pour in the crust mixture, remember to generously spray your springform pan with a nonstick baking spray that contains flour. Then, take a 9-inch parchment paper circle and place it firmly on the bottom of the pan. Crucially, spray the parchment paper again with baking spray. This double layer of protection ensures that neither the crust nor the cheesecake itself will adhere to the pan.
The key to easy removal is thorough chilling. After your cheesecake has chilled in the refrigerator overnight (at least 6 hours), it should be firm enough to handle. The sides of the springform pan should typically pop right off when you unlatch the clasp. If you find a slight resistance, very gently run a thin, sharp knife (dipped in hot water and wiped clean) around the inner edge of the cheesecake before unlatching. Be careful not to cut into the cheesecake itself, just along the pan’s edge.
Once the sides are removed, you can usually slide the cheesecake off the bottom of the pan onto your serving plate. If the bottom seems stubborn, gently lay the cheesecake on its side on a clean surface or cutting board, then carefully slide the pan bottom and parchment paper out from underneath. This method helps maintain the cheesecake’s perfect shape.
Frequently Asked Questions (FAQ)
Absolutely! This recipe is wonderfully adaptable for mini cheesecakes. To make 12 individual mini cheesecakes, simply divide the recipe into thirds for optimal filling per cupcake liner. Bake them in a standard muffin pan lined with paper liners for approximately 18-20 minutes, or until the centers are set. For more detailed guidance and expert tips on baking perfect mini cheesecakes, you can follow our Mini Oreo Cheesecakes recipe, applying similar techniques for this apple cider version.
This recipe offers flexibility with pan sizes, though adjustments to baking time and ingredient quantities may be necessary. If you wish to make apple cider cheesecake bars, you can halve the recipe and bake it in an 8×8 or 9×9 inch baking pan. In this case, use 16 oz of cream cheese. You can also use an 8-inch springform pan for a slightly thicker cheesecake. If you opt for a 6-inch springform pan, you should also halve the recipe but maintain 16 oz of cream cheese. Remember, a thinner cheesecake in a larger pan will bake faster, so always adjust your baking time accordingly and watch for the “slight jiggle” in the center.
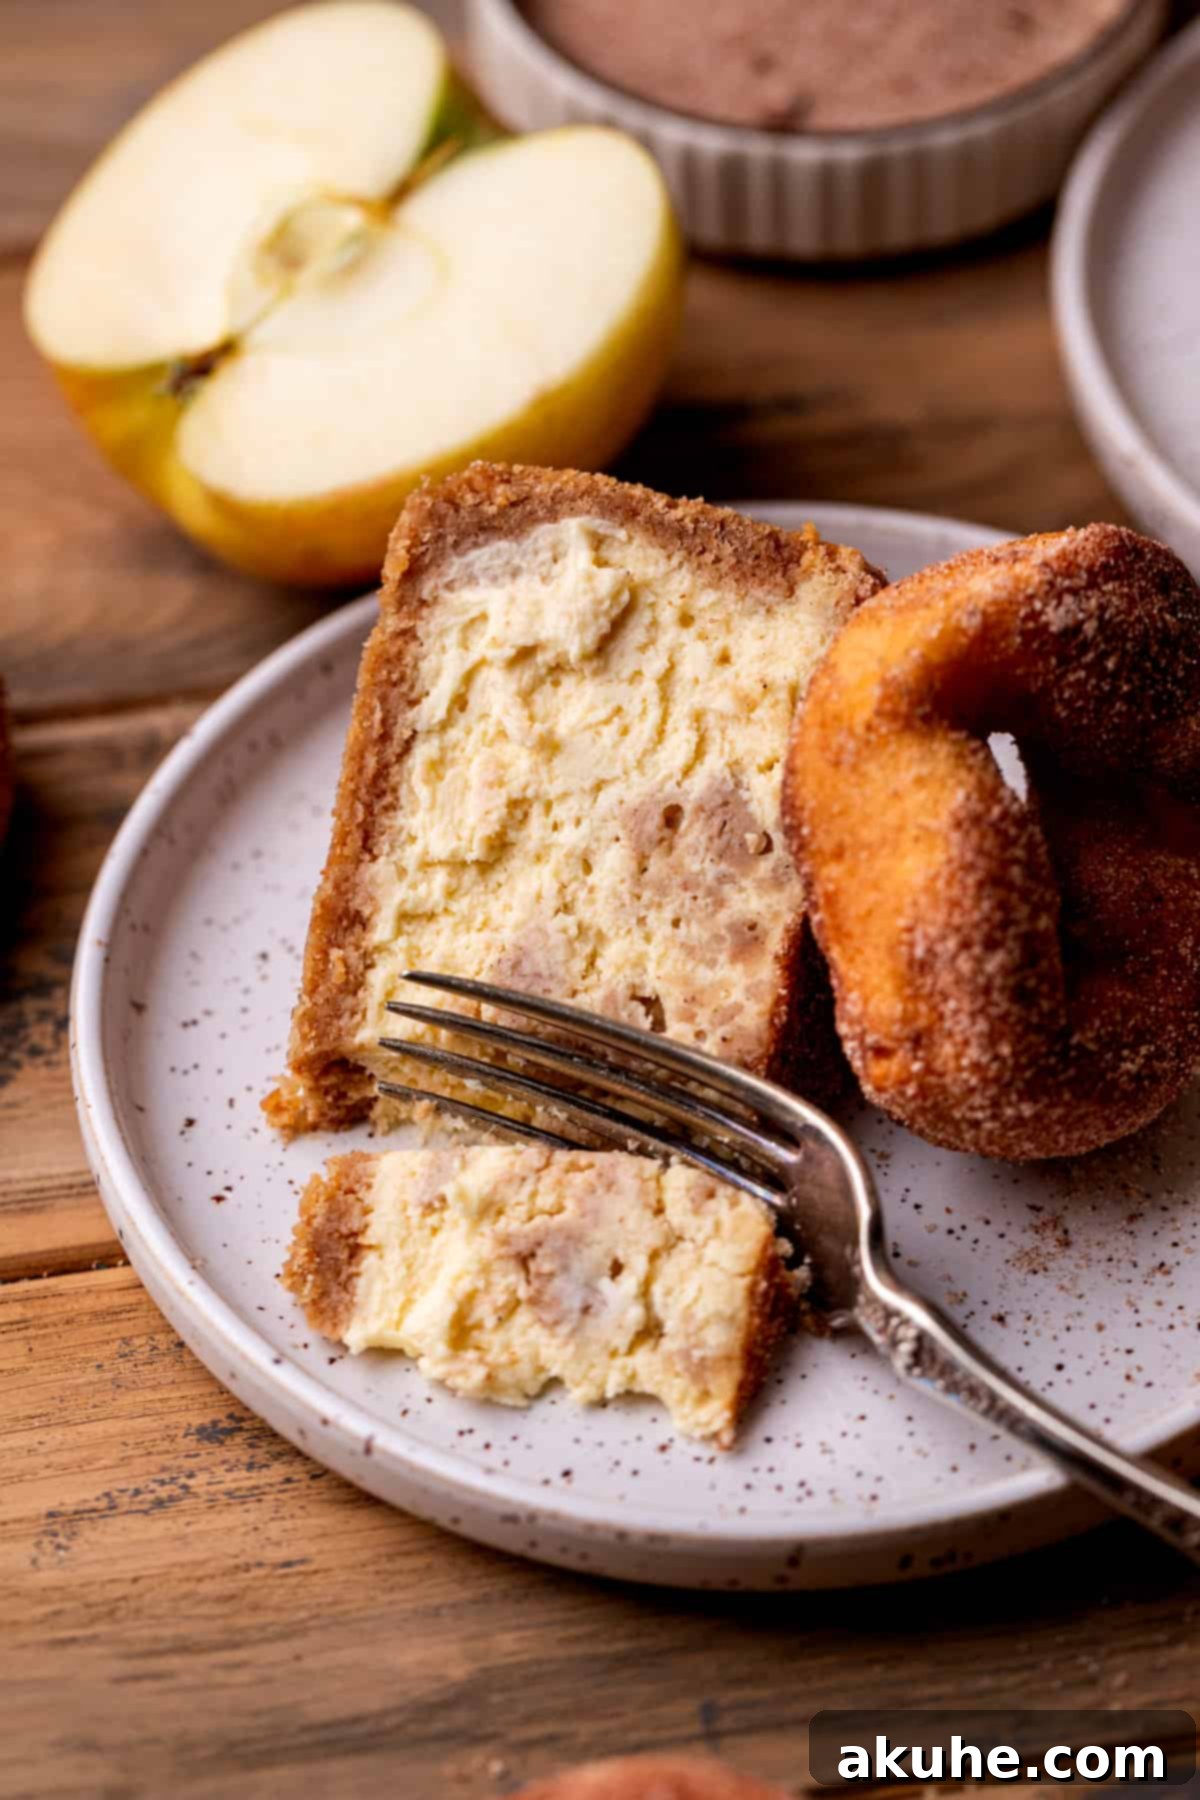
Achieving clean, elegant slices is easy with a few simple tricks. First and foremost, ensure your cheesecake is very cold and completely set. This means chilling it overnight is highly recommended. When you’re ready to slice, use a sharp, thin-bladed knife. For the cleanest cuts, dip your knife in hot water and wipe it completely dry after each slice. This keeps the knife warm and clean, preventing it from dragging and tearing the cheesecake, resulting in beautifully presented slices every time.
For the most authentic and robust flavor, we highly recommend using fresh, unfiltered apple cider. Look for it at local orchards, farmers’ markets, or in the refrigerated section of your grocery store, especially during the fall season. Avoid using apple juice, as it lacks the complex, tangy depth of true cider, which is essential for this recipe’s distinct taste. The reduction process will concentrate the natural sugars and apple notes, so a good quality cider makes a significant difference.
Yes, absolutely! Cheesecake is an excellent dessert for making ahead, which can be a huge convenience, especially during busy holidays. This apple cider cheesecake can be baked and chilled up to 2-3 days in advance. Just be sure to keep it tightly wrapped in plastic wrap or foil in the refrigerator to maintain its freshness and prevent it from absorbing any other odors. The flavors often deepen and develop further after a day or two, making it even more delicious.
Storing and Freezing Your Apple Cider Cheesecake
To ensure your delightful apple cider cheesecake remains fresh and delicious, proper storage is key. Following these guidelines will allow you to enjoy your dessert for days or even weeks.
Store this baked apple cider cheesecake in the refrigerator. The best way to keep it fresh is in an airtight container, such as a specialized cake carrier, or tightly wrapped in several layers of plastic wrap followed by aluminum foil. Properly stored, it will maintain its quality and delicious flavor for up to 5 days in the fridge.
Freezing Instructions
Freezing is an excellent option if you want to extend the life of your cheesecake or prepare it well in advance.
You can freeze the apple cider cheesecake in individual slices. First, allow the cheesecake to chill overnight in the fridge. Then, cut it into desired slices. Wrap each individual slice tightly in plastic wrap, then an additional layer of aluminum foil. Place the wrapped slices in an airtight freezer-safe container to prevent freezer burn. They can be frozen for up to 30 days. To enjoy, simply thaw individual slices in the refrigerator for 1-2 hours before serving.
Alternatively, you can freeze the entire cheesecake before decorating it with the cinnamon sugar topping. After the cheesecake has been baked and thoroughly chilled overnight in the refrigerator, wrap the entire cheesecake (still in its springform pan bottom or on a sturdy cardboard cake round) tightly with several layers of plastic wrap, followed by a layer of aluminum foil. This protects it from freezer burn. It can be frozen for up to 30 days. When you’re ready to serve, thaw the cheesecake in the refrigerator for 1-2 hours, then proceed with the topping instructions before serving.
Other Decadent Cheesecake Recipes To Try
If you’ve fallen in love with the creamy indulgence of this apple cider creation, we invite you to explore more of our beloved cheesecake recipes. Each one promises a unique flavor journey and the same commitment to a perfect texture:
- Classic New York Cheesecake: For the purists, our recipe for the quintessential New York cheesecake delivers unparalleled richness and density.
- Pumpkin Spice Cheesecake: Embrace the flavors of autumn further with a creamy pumpkin cheesecake spiced with warm cinnamon, nutmeg, and ginger.
- Lemon Raspberry Swirl Cheesecake: A bright and zesty option, featuring a vibrant lemon cheesecake swirled with sweet-tart raspberry coulis.
- Chocolate Lover’s Cheesecake: Indulge in a decadent, rich chocolate cheesecake, perfect for any chocoholic’s dream dessert.
We hope you adore this Apple Cider Cheesecake as much as we do! If you loved this recipe, please take a moment to leave a STAR REVIEW below. Your feedback helps us share these delicious creations with more home bakers. Don’t forget to tag us on Instagram @stephaniesweettreats when you share your delicious results. For even more baking inspiration and sweet ideas, be sure to follow us on Pinterest. Happy baking!
Apple Cider Cheesecake
Print Recipe
Pin Recipe
Leave a Review
Ingredients
Graham Cracker Crust
- ▢ 2 1/2 cups Graham cracker crumbs, fine crumbs. 2 sleeves of graham crackers
- ▢ 1/8 cup Brown sugar, packed light or dark
- ▢ 10 TBSP Unsalted butter, melted
Apple Cider Cheesecake
- ▢ 2 cups Apple cider, reduced down to 1/2 cup
- ▢ 24 oz Cream cheese, room temperature
- ▢ 3/4 cup White granulated sugar
- ▢ 1/2 cup Sour cream, room temperature
- ▢ 1 tsp Pure vanilla extract
- ▢ 4 Large eggs, room temperature
Apple Cider Cinnamon Filling
- ▢ 1/4 cup Brown sugar, packed light or dark
- ▢ 1/3 cup All-purpose flour
- ▢ 1/4 tsp Ground cinnamon
- ▢ 1 TBSP Melted butter
- ▢ 1 TBSP Apple Cider
Topping
- ▢ 1 TBSP Unsalted butter, melted
- ▢ 1 TBSP Apple cider
- ▢ 1/2 cup White granulated sugar
- ▢ 2 tsp Ground cinnamon
Instructions
Apple Cider
- In a medium saucepan over medium-high heat, heat the apple cider. Cook the apple cider until it reduces down to 1/2 cup. This will take 10-15 minutes. Cool completely.2 cups Apple cider
Graham Cracker Crust
- Preheat the oven to 325℉. Spray a 9-inch springform pan with baking nonstick spray. Line the bottom with a 9-inch parchment paper circle and spray again.
- Using a food processer, blend the graham crackers into a fine crumb. In a small bowl, mix the crumbs, brown sugar, and melted butter. Mix using a fork.2 1/2 cups Graham cracker crumbs, 1/8 cup Brown sugar, 10 TBSP Unsalted butter
- Pour the crumbs into the pan. Use your hands to press the crust halfway up the sides of the pan. Use the bottom of a measuring cup to compact the crust.
- Bake for 12 minutes.
Apple Cider Cinnamon Filling
- In a small bowl, mix the brown sugar, flour, cinnamon, apple cider, and melted butter. Use a fork to mix it together. Place in the fridge to set.1/4 cup Brown sugar, 1/3 cup All-purpose flour, 1/4 tsp Ground cinnamon, 1 TBSP Melted butter, 1 TBSP Apple Cider
Apple Cider Cheesecake
- Using a mixer, beat the cream cheese and sugar on high speed for 2 minutes. Use a rubber spatula to scrape the bowl.24 oz Cream cheese, 3/4 cup White granulated sugar
- Add in the apple cider, sour cream, and vanilla. Mix on medium until smooth.1/2 cup Sour cream, 1 tsp Pure vanilla extract
- Add in the eggs. Mix on low speed until just combined. Take off the mixer, and use the rubber spatula to scrape the bowl.4 Large eggs
- Prepare the water bath:
Use one of these methods for a water bath. Both methods use a large roasting pan and hot steaming water.
1. Place the springform pan in a 10 inch cake pan. Place the cake pan in the roasting pan and fill with hot water halfway up the cake pan. This method prevent water getting into the crust.
2. Wrap the springform pan tightly twice in aluminum foil. Place the springform pan inside the roasting pan. Fill with hot water halfway up the springform pan. This method works great, but can sometimes leak water into the crust.
- Pour the cheesecake batter on top of the crust. Take out the filling and sprinkle it on top of the cheesecake. Use a butter knife to swirl it in.
- Bake for 70-80 minutes. Bake until the edges are set and the middle has a slight jiggle.
- Turn off the oven, crack open the door, and let it sit for 30 minutes to slowly cool. Then, take the springform pan out and place on a cooling rack. Cool completely.
- Wrap the pan with foil. Chill for at least 6 hours or overnight.
Topping
- In a small bowl, mix the melted butter and apple cider. In a separate bowl, mix the sugar and cinnamon.1 TBSP Unsalted butter, 1 TBSP Apple cider, 1/2 cup White granulated sugar, 2 tsp Ground cinnamon
- Take the cheesecake out of the pan and remove the parchment paper. Use a pastry brush to brush the butter over the cheesecake. Sprinkle the cinnamon sugar over the cheesecake. It should be heavily coated.
