Indulge in the Ultimate Apple Pie Cheesecake: A Decadent Seasonal Delight
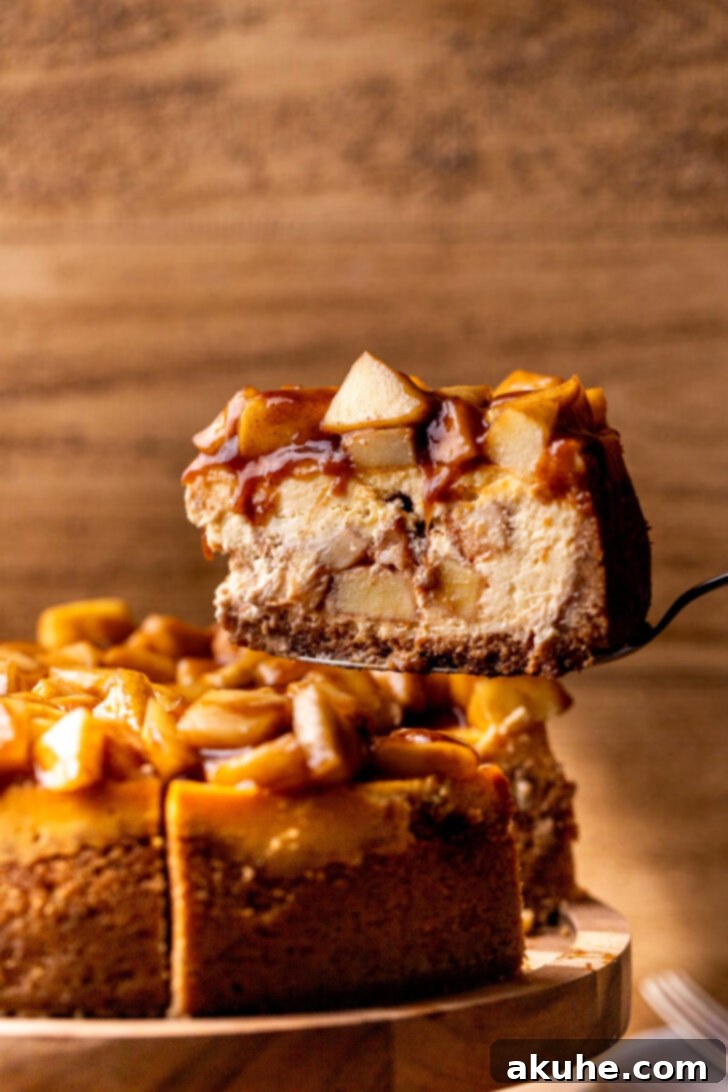
Prepare to embark on a culinary journey with our extraordinary Apple Pie Cheesecake – a dessert that masterfully combines the creamy richness of cheesecake with the warm, spiced comfort of a classic apple pie. This show-stopping creation features a perfectly golden graham cracker crust, a velvety baked caramel cheesecake layer, and a luscious core of homemade apple pie filling. As if that wasn’t enough, it’s artfully crowned with even more delicious apple pie topping, making every slice an unforgettable experience. Forget choosing between two beloved desserts; this recipe offers the best of both worlds, transforming familiar flavors into an elevated treat perfect for any special occasion or a cozy evening indulgence.
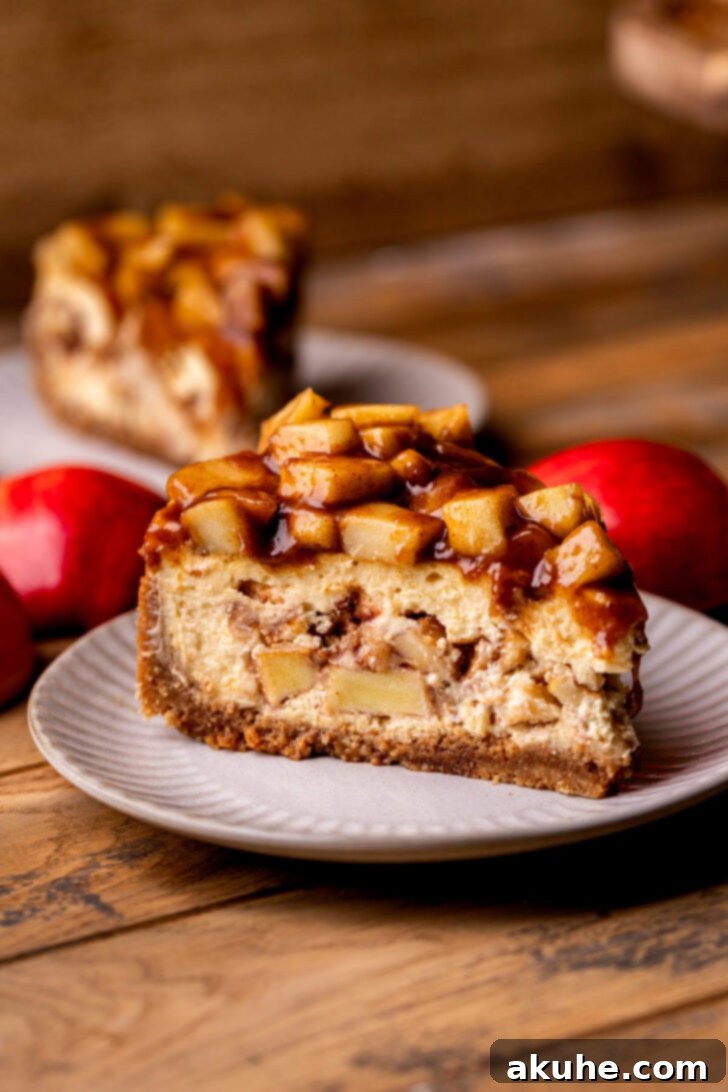
Our Apple Pie Cheesecake is not just a dessert; it’s a celebration of seasonal flavors, meticulously crafted to deliver a harmonious blend of textures and tastes. Imagine the buttery crunch of the graham cracker crust yielding to an incredibly smooth, caramel-infused cheesecake. Then, your palate discovers the delightful surprise of tender, cinnamon-spiced apple pie filling nestled within the creamy layers. It’s a sophisticated twist on a traditional favorite, ensuring that every forkful delivers the comforting essence of autumn and the luxurious indulgence of a gourmet cheesecake. This recipe is designed to impress, whether you’re hosting a holiday gathering, a dinner party, or simply treating your family to something truly special.
Mastering Your Apple Pie Cheesecake: Expert Baking Tips
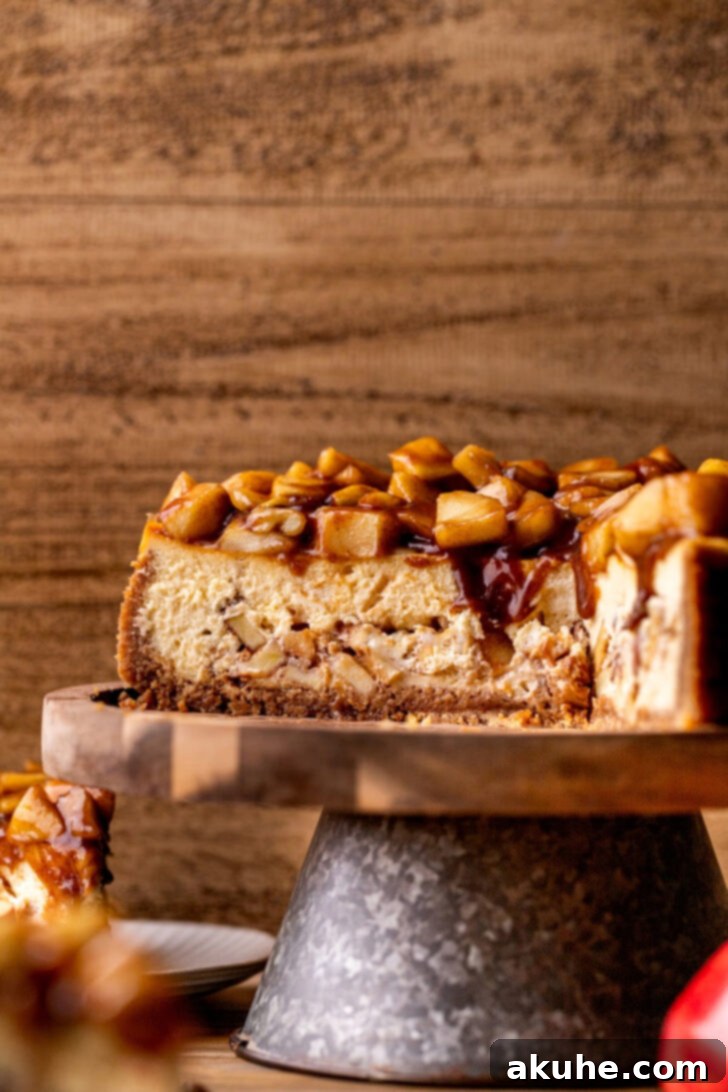
Creating a flawless apple pie cheesecake requires a few essential techniques and considerations. Following these expert tips will help ensure your dessert turns out perfectly smooth, crack-free, and bursting with flavor, just like the one pictured. Remember, precision and patience are key ingredients when baking a show-stopping cheesecake.
- Tip 1: Prepare the Apple Filling First for Optimal Cooling. Begin by making your homemade apple pie filling before anything else. This crucial step allows the filling ample time to cool completely. Warm filling introduced into cold cheesecake batter can affect the cheesecake’s set and potentially lead to a less uniform texture. Cook the apples until they are tender yet still hold their shape, ensuring a delightful bite. Divide the finished filling into two portions: one for the middle layer of the cheesecake and the other for the glorious topping.
- Tip 2: Embrace Room Temperature Dairy for a Silky Smooth Batter. One of the most common culprits for lumpy cheesecake batter and cracks in the final product is using cold dairy ingredients. Always ensure your cream cheese, sour cream, and eggs are at room temperature for at least two hours before you begin mixing. Room temperature ingredients blend together seamlessly, creating a wonderfully smooth, lump-free batter that bakes evenly and prevents overmixing, which can incorporate too much air and cause cracks.
- Tip 3: The Indispensable Water Bath Technique. For a truly creamy, crack-free cheesecake, a water bath (Bain-Marie) is non-negotiable. This method provides gentle, even heat, preventing the edges from baking too quickly and cracking. I highly recommend using a large roasting pan filled halfway with hot, steaming water. To protect your springform pan from any water seepage, place it inside a slightly larger 10-inch cake pan before setting it into the water bath. This extra layer of protection is a foolproof way to ensure a perfectly baked crust. Alternatively, you can wrap your springform pan tightly with two layers of heavy-duty aluminum foil, though the cake pan method offers superior protection.
Crafting Each Delicious Layer of Your Apple Pie Cheesecake
Each component of this apple pie cheesecake contributes to its overall grandeur, from the crunchy foundation to the spiced fruit crown. Understanding the nuances of preparing each layer will elevate your baking experience and guarantee a dessert that’s truly a cut above the rest. The interplay of textures and flavors is what makes this cheesecake an absolute masterpiece.
Let’s begin with the Graham Cracker Crust. A sturdy yet tender crust is paramount for any cheesecake, providing the perfect counterpoint to the creamy filling. For this recipe, we’re aiming for a generously thick crust that extends halfway up the sides of the springform pan. Achieving finely crushed graham cracker crumbs is essential; a food processor makes quick work of this, ensuring a uniform texture. When combined with melted unsalted butter and a touch of brown sugar, these crumbs form a wonderfully fragrant base. Pressing the crumbs firmly into the pan, especially with the bottom of a measuring cup, creates a compact crust that won’t crumble when sliced. A brief pre-bake sets this foundation, giving it a subtle toastiness that enhances its flavor and prevents it from becoming soggy once the cheesecake batter is added.
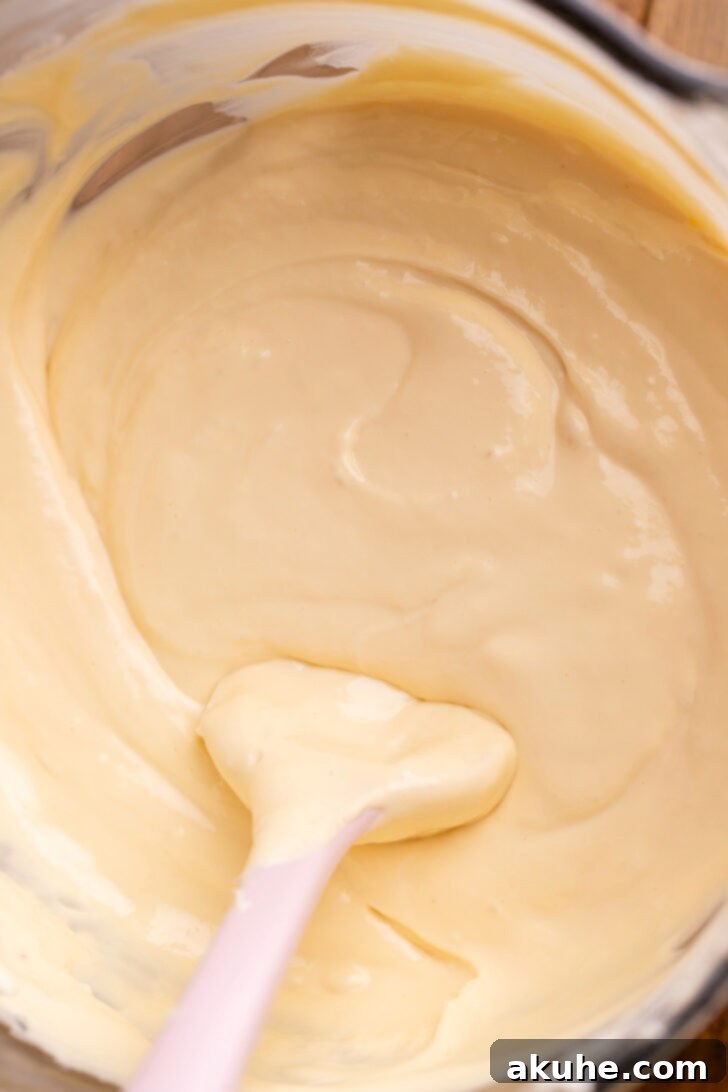
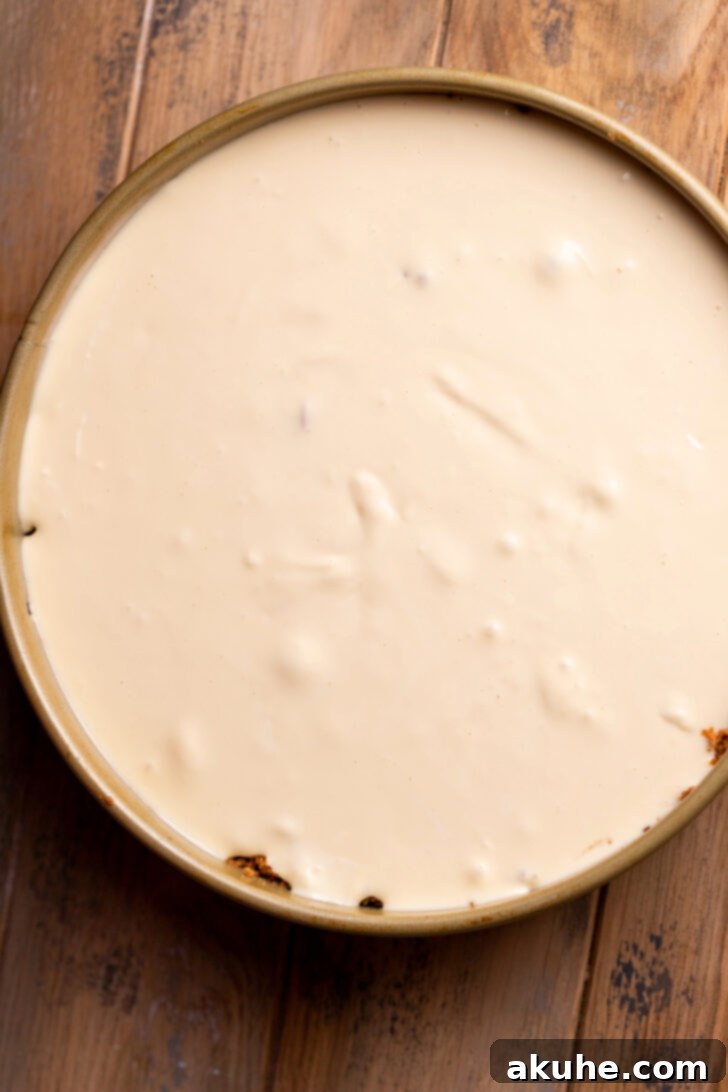
Next, the star of the show: the rich, creamy Caramel Cheesecake layer. This isn’t just any cheesecake; it’s infused with luscious caramel, adding an extra dimension of sweetness and depth that complements the spiced apples beautifully. Starting with room temperature cream cheese and granulated sugar, beat them until light and fluffy. This aeration is crucial for a smooth batter. The addition of sour cream lends a subtle tang and an incredibly tender texture, while pure vanilla extract elevates the overall aroma. The salted caramel, whether homemade or a quality store-bought variety, is folded in, weaving its golden threads of flavor throughout the cheesecake. Finally, the eggs are incorporated gently on low speed. Overmixing at this stage can introduce too much air, leading to cracks during baking, so a light touch is key to maintaining that perfect, dense consistency.
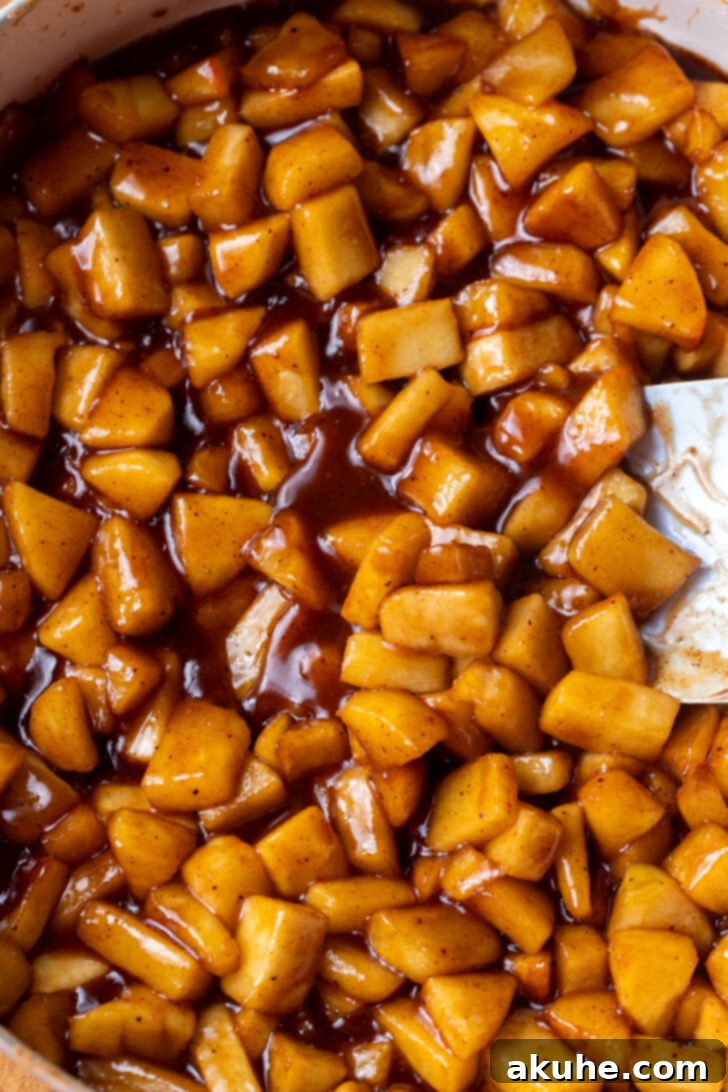
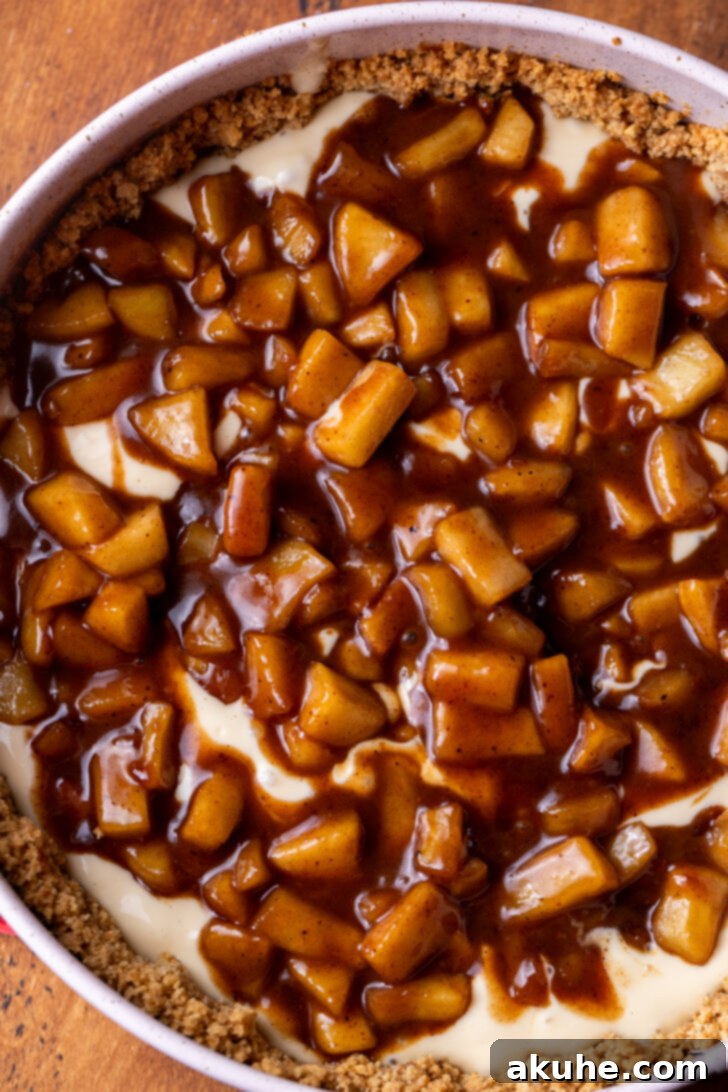
And then there’s the heart of the dessert: the exquisite Homemade Apple Pie Filling. This isn’t just a topping; a generous layer of this spiced apple goodness is baked right into the center of the cheesecake, creating a delightful surprise with every bite. We use crisp Gala apples, cut into uniform cubes, which hold their shape well during cooking while becoming tender. Simmered with unsalted butter, packed brown sugar (either light or dark for varying caramel notes), cornstarch for thickening, water, and a symphony of warming spices – cinnamon, nutmeg, and cloves – this filling becomes incredibly fragrant and flavorful. A splash of lemon juice brightens the mixture, balancing the sweetness and preventing the apples from oxidizing. Cooking it down until thickened ensures it sets beautifully within the cheesecake, rather than creating a watery layer. Remember to cool this filling completely before incorporating it into the cheesecake batter, as mentioned in our crucial tips.
Baking to Perfection and Cooling for the Best Results
The baking and cooling phases are just as critical as ingredient preparation when aiming for a perfect cheesecake. The goal is a cheesecake that is beautifully set around the edges with a slight jiggle in the center, indicative of a creamy, custardy texture. Our carefully orchestrated water bath provides the ideal environment for this transformation, ensuring a slow, gentle bake that prevents cracking and maintains moisture.
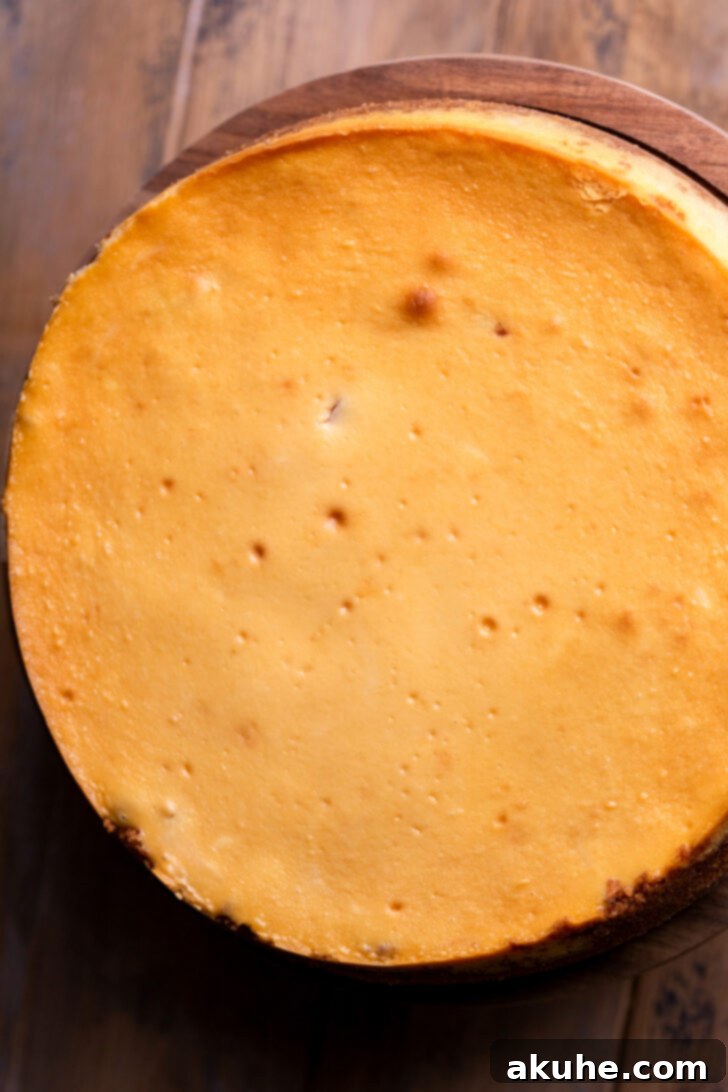
Once assembled with its delightful apple filling core, the cheesecake enters the preheated oven, nestled within its water bath. Baking for approximately 65-75 minutes allows the cheesecake to slowly cook through. You’ll know it’s ready when the outer edges are firm and set, while the very center still offers a gentle wobble when the pan is lightly tapped. This slight jiggle is your assurance that the cheesecake will continue to set as it cools, resulting in that coveted silky-smooth consistency. Overbaking, on the other hand, can lead to a dry, crumbly texture and, inevitably, cracks.
The cooling process is equally important and should not be rushed. After baking, turn off your oven, crack open the door slightly, and allow the cheesecake to cool gradually inside for about 20 minutes. This slow transition from hot to warm helps prevent thermal shock, which is a major cause of cracks. Once out of the oven, remove the springform pan from the water bath (keeping the cheesecake inside the pan) and transfer it to a wire cooling rack. It’s crucial for the cheesecake to cool completely at room temperature before moving to the fridge. Finally, wrap the springform pan tightly in foil and refrigerate the cheesecake for at least 6 hours, or ideally, overnight. This extended chilling period allows the flavors to meld, the cheesecake to firm up, and ensures clean, beautiful slices.

Serving and Enjoying Your Homemade Masterpiece
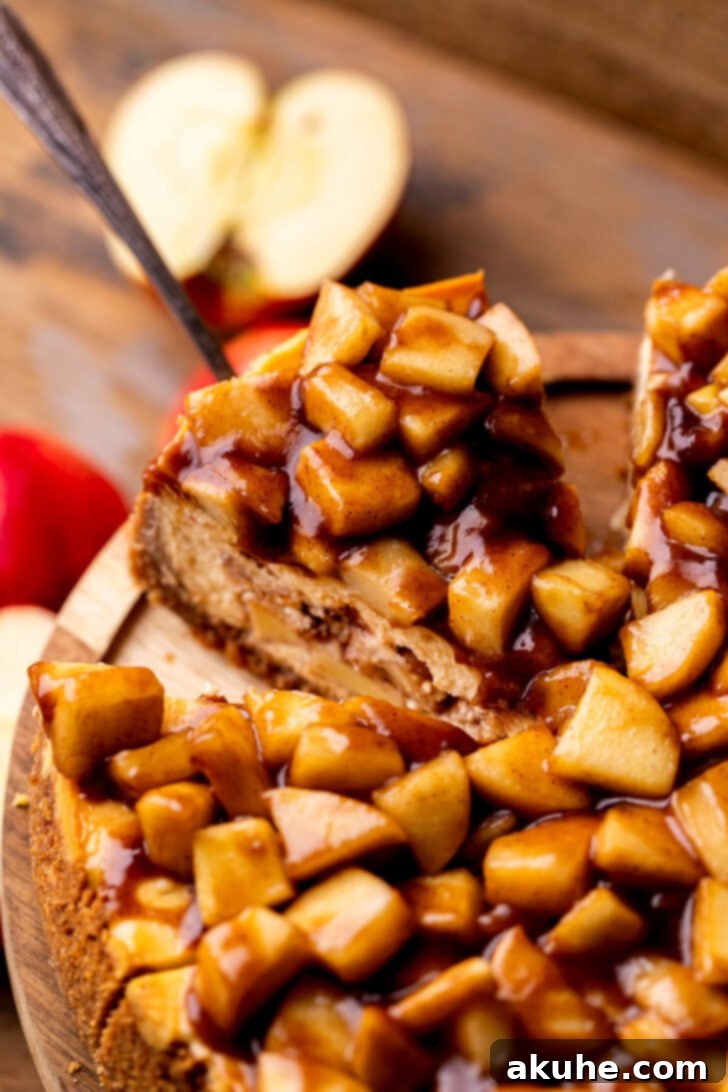
Once your Apple Pie Cheesecake has chilled to perfection, the moment arrives to unveil and enjoy your culinary creation. Carefully remove the springform pan sides and peel away the parchment paper from the bottom. The visual appeal of the cheesecake, with its distinct layers and inviting golden hue, is truly a sight to behold. Now, for the final touch: generously spoon the remaining half of your delicious homemade apple pie filling over the top, creating a vibrant and flavorful crown. For an extra touch of decadence, a drizzle of additional salted caramel takes this dessert to an even higher level, adding shine and another layer of sweet-and-salty complexity. Serve chilled slices to eager guests, perhaps alongside a scoop of vanilla bean ice cream or a dollop of fresh whipped cream, to complete this sublime dessert experience. Store any leftovers in an airtight container in the refrigerator for up to 3-4 days.
For more inspiring recipes and sweet treats, be sure to explore our collection!
Did you love this recipe? We’d be thrilled if you could leave astar review below! Share your delicious creations with us on Instagram by tagging @stephaniesweettreats. For endless baking inspiration and more mouth-watering ideas, follow us on Pinterest.
Recipe Video
Watch our step-by-step video guide to see how this incredible Apple Pie Cheesecake comes to life!
5 from 1 review
Apple Pie Stuffed Cheesecake
Stephanie Rutherford
Print Recipe
Pin Recipe
Leave a Review
1 hour
1 hour 10 minutes
6 hours
8 hours 10 minutes
16 slices
Ingredients
Apple Pie Filling
- 5 Large Gala apples, cut into cubes
- 6 TBSP Unsalted butter
- 2/3 cup Brown sugar, packed light or dark
- 1 TBSP Cornstarch
- 2 TBSP Water
- 2 tsp Ground cinnamon
- 1/4 tsp Ground nutmeg
- 1/4 tsp Ground cloves
- 1 tsp Lemon juice
Graham Cracker Crust
- 2 1/2 cups Graham cracker crumbs, 2 packets into a fine crumb
- 1/4 cup Brown sugar, packed light or dark
- 10 TBSP Unsalted butter, melted
Caramel Cheesecake
- 24 oz Cream cheese, room temperature
- 3/4 cup White granulated sugar
- 1/2 cup Sour cream, room temperature
- 1/4 cup Salted caramel, homemade or store bought
- 1 tsp Pure vanilla extract
- 4 Large eggs, room temperature
Instructions
Apple Pie Filling
- Peel the apples and cut into uniform cubes. In a large saucepan (a large pan with lower sides works well), combine the cubed apples with butter, brown sugar, water, cornstarch, cinnamon, nutmeg, cloves, and lemon juice.
- Heat the mixture over medium heat, stirring occasionally, until it begins to bubble. Continue cooking for approximately 8 minutes, or until the apples are tender but still hold their shape, and the filling has thickened to a luscious consistency. Divide the cooked apple filling in half. Store one half in the refrigerator to cool completely; this portion will be used for the middle layer of the cheesecake. Reserve the other half for topping the finished cheesecake.
Graham Cracker Crust
- Preheat your oven to 325℉ (160°C). Prepare a 9-inch springform pan by spraying it generously with baking nonstick spray. Line the bottom of the pan with a circle of parchment paper, then spray the parchment paper again. This ensures easy removal.
- Using a food processor, blend the graham cracker crumbs until they are a fine, sandy consistency. In a small bowl, combine the graham cracker crumbs, brown sugar, and melted unsalted butter. Mix thoroughly with a fork until all the crumbs are moistened and resemble wet sand.
- Pour the crumb mixture into the prepared springform pan. Use your hands to press the crumbs firmly halfway up the sides of the pan. Then, use the bottom of a flat measuring cup or a glass to firmly compact the crumbs on the bottom of the pan, creating a solid base.
- Bake the crust for 11 minutes. This step helps to set the crust and give it a slight toasted flavor. Remove from oven and let cool slightly while preparing the cheesecake batter.
Caramel Cheesecake
- In the bowl of a stand mixer fitted with the paddle attachment (or using a hand mixer), beat the room temperature cream cheese and white granulated sugar on high speed for 2 minutes, until smooth and fluffy. Scrape down the sides of the bowl with a rubber spatula to ensure everything is well combined.
- Add the room temperature sour cream, salted caramel (homemade or store-bought), and pure vanilla extract to the cream cheese mixture. Mix on medium speed until the batter is smooth and well combined. Next, add the room temperature large eggs, one at a time. Mix on low speed just until they are fully incorporated; avoid overmixing. Remove the bowl from the mixer and use your rubber spatula to give the batter a final scrape and fold, ensuring no lumps remain and all ingredients are evenly distributed.
- Prepare your water bath (Bain-Marie) using one of the following methods, both of which require a large roasting pan and hot steaming water:
Method 1 (Recommended for preventing water seepage): Place your 9-inch springform pan (with the crust) into a larger 10-inch cake pan. Place the cake pan containing the springform pan into the roasting pan. Carefully fill the roasting pan with hot steaming water, ensuring the water comes halfway up the sides of the 10-inch cake pan. This method completely prevents water from getting into the crust.
Method 2: Tightly wrap the exterior of your 9-inch springform pan (with the crust) twice with heavy-duty aluminum foil. Place the wrapped springform pan directly into the roasting pan. Fill the roasting pan with hot steaming water, ensuring the water comes halfway up the sides of the springform pan. While effective, this method can sometimes allow tiny amounts of water to seep in, though often inconsequentially.
- Pour half of the cheesecake batter into the pre-baked graham cracker crust in the prepared springform pan. Using a spoon, carefully dollop the cooled half of the apple pie filling over the top of the batter, distributing it evenly. Then, gently pour the remaining cheesecake batter on top of the apples, spreading it smoothly to cover the apple layer completely.
- Carefully transfer the roasting pan with the cheesecake (and water bath) to the preheated oven. Bake for 65-75 minutes. The cheesecake is done when the edges are set and lightly golden, but the center still has a slight, delicate jiggle when the pan is gently nudged.
- Once baked, turn off the oven. Crack the oven door open slightly and allow the cheesecake to sit inside for 20 minutes. This slow cooling prevents sudden temperature changes that can cause cracks. After 20 minutes, carefully remove the cheesecake from the water bath (keeping it in the springform pan) and place it on a wire cooling rack to cool completely at room temperature.
- Once fully cooled to room temperature, wrap the cheesecake pan tightly in aluminum foil and transfer it to the refrigerator. Chill for at least 6 hours, or ideally, overnight. This chilling time is essential for the cheesecake to firm up, develop its full flavor, and allow for clean slicing.
- After chilling, carefully remove the springform pan sides and parchment paper from the cheesecake. Top the chilled cheesecake generously with the reserved apple pie filling. For an extra touch of indulgence, drizzle additional salted caramel over the top, if desired, before serving. Slice and enjoy!
Notes
Nutrition Information (per slice, approximate):
Calories:
407
kcal
,
Carbohydrates:
35
g
,
Protein:
4
g
,
Fat:
29
g
,
Saturated Fat:
17
g
,
Polyunsaturated Fat:
1
g
,
Monounsaturated Fat:
8
g
,
Trans Fat:
0.5
g
,
Cholesterol:
77
mg
,
Sodium:
228
mg
,
Potassium:
111
mg
,
Fiber:
1
g
,
Sugar:
27
g
,
Vitamin A:
967
IU
,
Vitamin C:
0.2
mg
,
Calcium:
76
mg
,
Iron:
1
mg
Did you make this recipe?
Please leave a star rating and review below!
