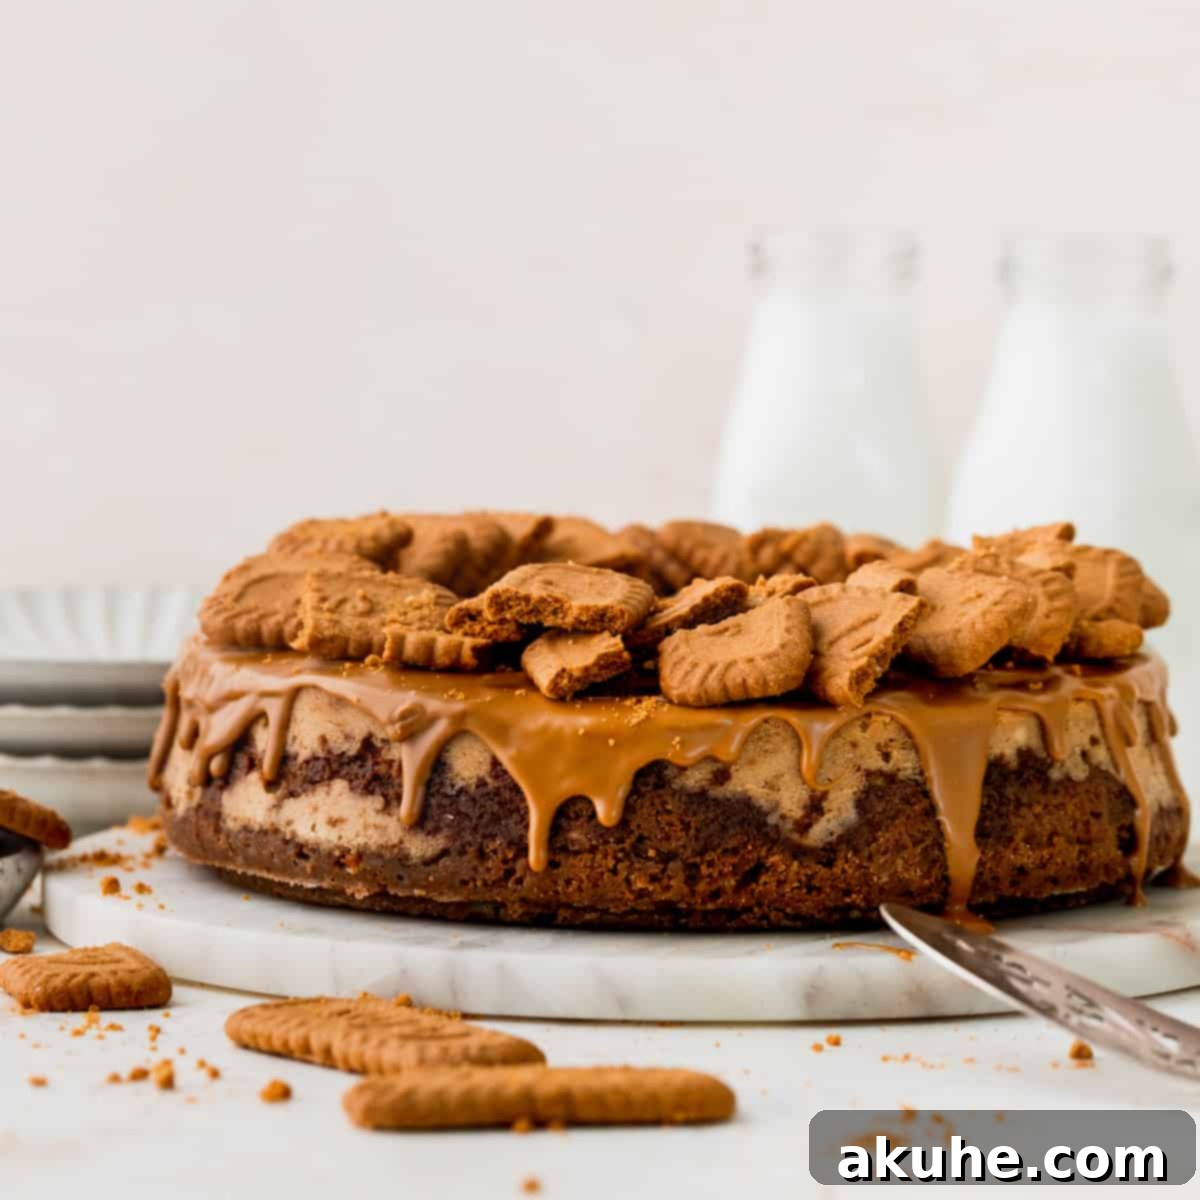
Indulge in the ultimate dessert experience with this spectacular Biscoff Cheesecake! This isn’t just any cheesecake; it’s a celebration of the beloved Lotus Biscoff flavor, meticulously crafted to deliver an unforgettable treat. From its rich, buttery Lotus Biscoff cookie crust to the lusciously baked cheesecake filling brimming with smooth cookie butter and delightful chunks of chopped Biscoff cookies, every bite is a journey into caramelized bliss. To crown this masterpiece, it’s generously adorned with a silky layer of melted Biscoff cookie butter and a scattering of additional cookies, ensuring a visual feast as much as a culinary one. If you’re a devoted fan of Biscoff cookies and their unique, spiced caramel notes, prepare to fall in love with this extraordinary Biscoff cheesecake recipe.
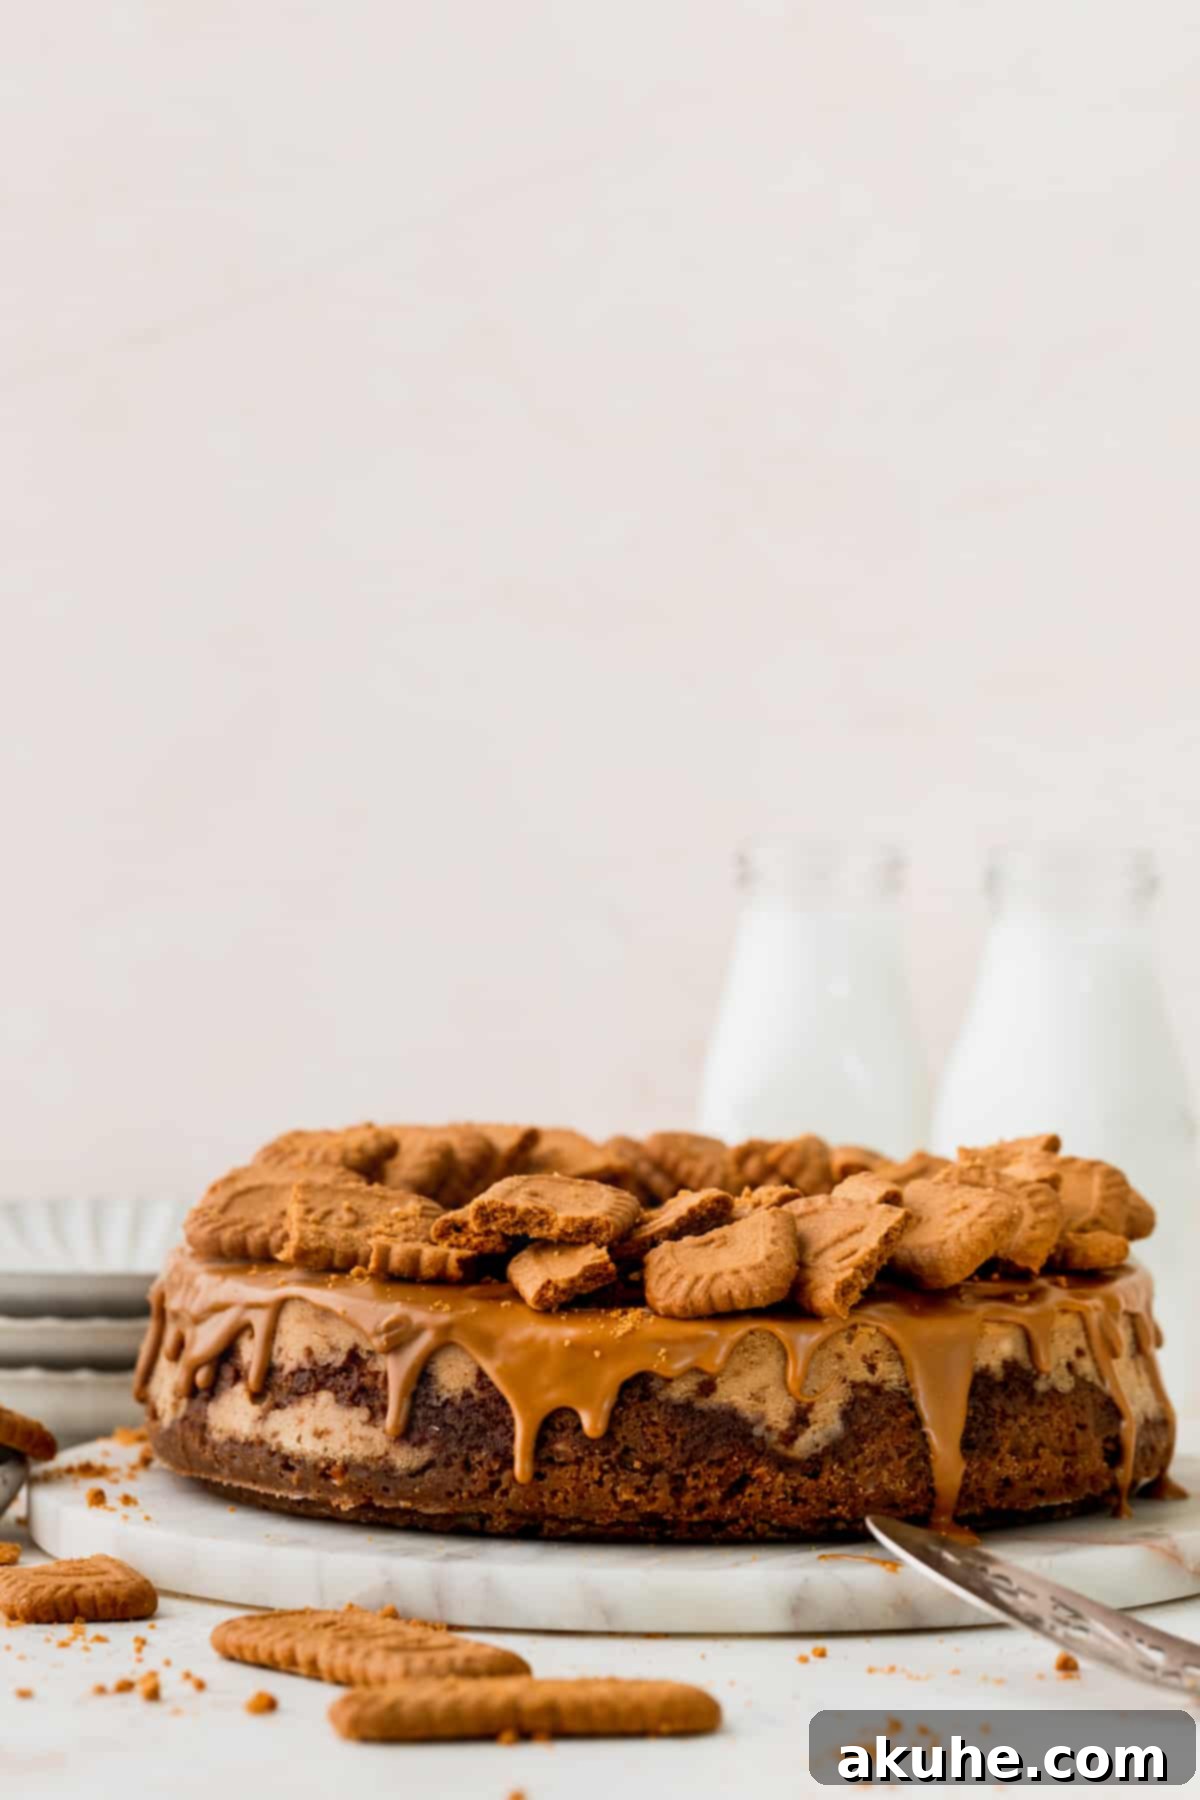
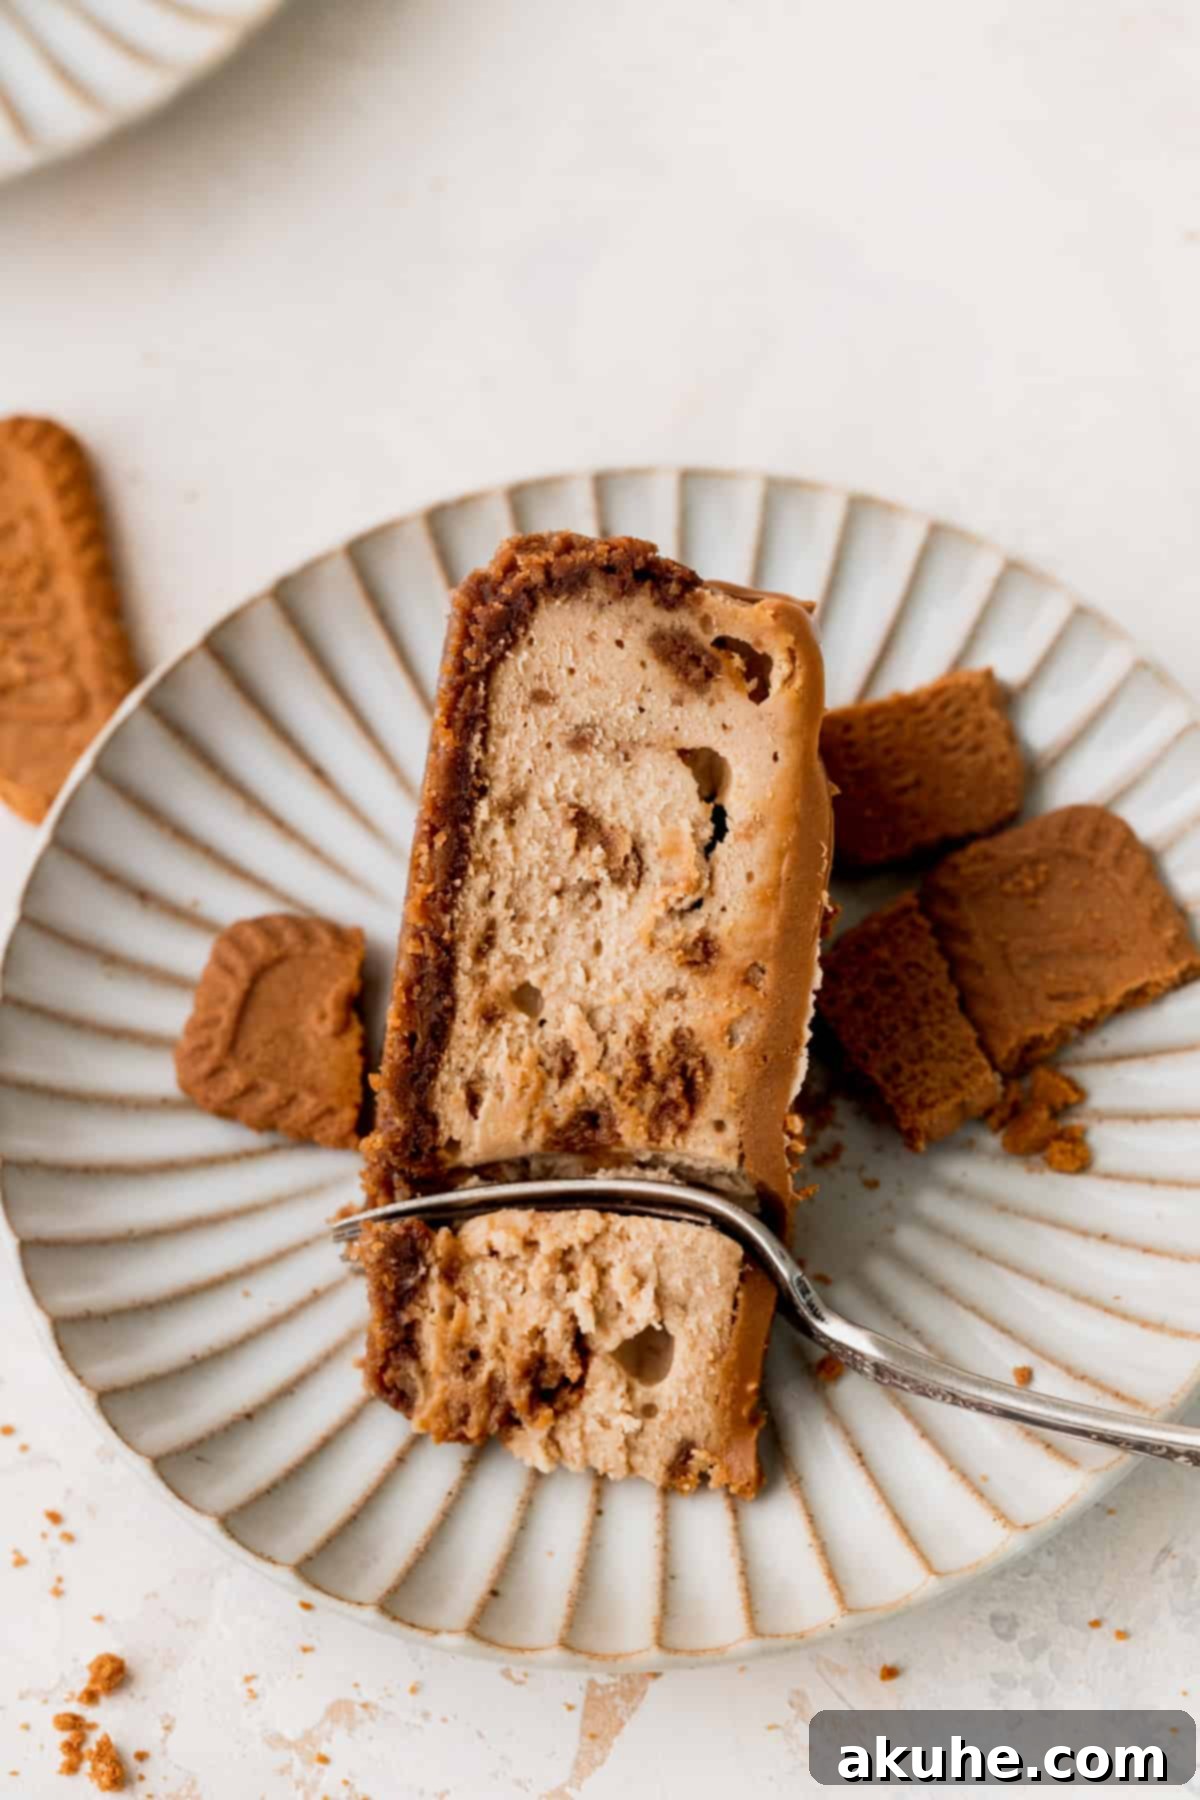
What sets this Biscoff cheesecake apart is its perfectly balanced sweetness. The inclusion of creamy Biscoff cookie butter within the cheesecake batter imparts a unique depth of flavor that is remarkably less sweet than many traditional cheesecakes, allowing the distinctive spiced caramel taste of Biscoff to truly shine. The result is a dessert that is not only unbelievably delicious but also incredibly satisfying without being overly cloying. Furthermore, a generous infusion of chopped Biscoff cookies throughout the velvety filling adds a delightful textural contrast, providing a subtle crunch in every decadent slice.
For those who adore the captivating flavor of Lotus Biscoff, this cheesecake is just the beginning. Explore more delightful Biscoff-inspired creations like our Biscoff Butter Cookies, a rich and decadent Layered Lotus Biscoff Cake, and intensely chocolatey Fudgy Biscoff Brownies, all designed to satisfy your Biscoff cravings.
Why This Biscoff Cheesecake Recipe Stands Out
Crafting the perfect Biscoff cheesecake involves a harmony of flavors and textures, and this recipe excels on all fronts:
- Irresistible Biscoff Cookie Crust: The foundation of this cheesecake is a golden, buttery crust made from finely crushed Lotus Biscoff cookies. This crust isn’t just a base; it’s a flavor powerhouse, deeply infused with the iconic spiced caramel notes of Biscoff, providing the perfect counterpoint to the creamy filling. Its robust flavor and slightly crumbly texture offer an incredible start to each bite.
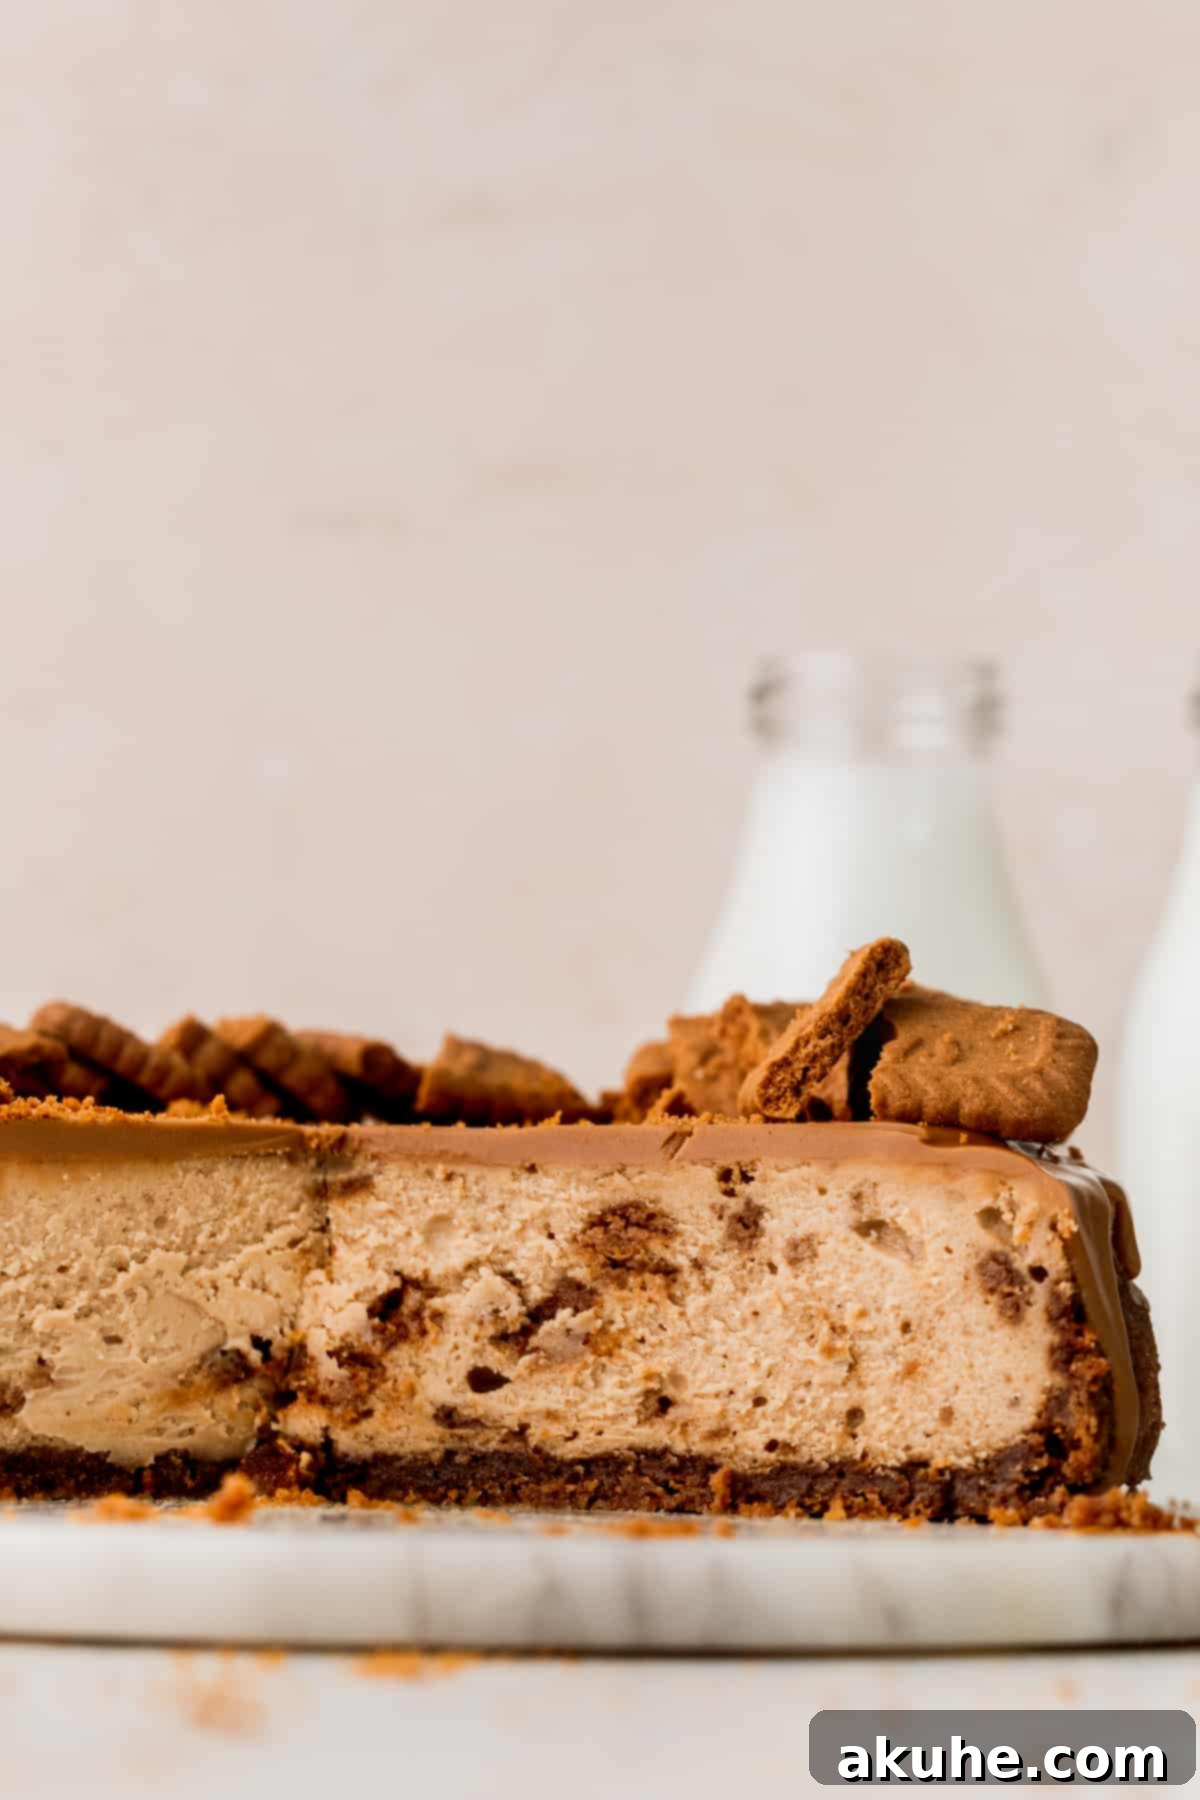
- Luxuriously Baked Cheesecake Filling: While some cheesecakes are no-bake, this recipe features a baked cheesecake, resulting in an exceptionally rich and dense texture that melts in your mouth. The filling is a harmonious blend of smooth cream cheese, infused with generous amounts of creamy Biscoff cookie butter and delightful pockets of chopped Biscoff cookies. This combination ensures a complex flavor profile and an appealing contrast between creamy and crunchy elements.
- Decadent Melted Cookie Butter Topping: No Biscoff cheesecake would be complete without an opulent topping. A luscious layer of melted Biscoff cookie butter is poured over the cooled cheesecake, creating a glossy, inviting sheen that drips elegantly down the sides. This not only enhances the visual appeal but also intensifies the Biscoff flavor, adding another layer of indulgent sweetness and spice.
- Perfect for Any Special Occasion: This stunning Biscoff cheesecake is more than just a dessert; it’s a centerpiece. Its sophisticated flavor and impressive presentation make it an ideal choice for holiday gatherings, birthday celebrations, anniversaries, or any moment that calls for an extra touch of sweetness and elegance. It’s guaranteed to impress your guests and become a new favorite.
Essential Ingredient Notes for Your Biscoff Cheesecake
Success in baking begins with understanding your ingredients. Here are detailed notes on the key components for this exceptional Biscoff cheesecake. For a complete list of quantities, refer to the recipe card further down this page.
- Lotus Biscoff Cookies: These iconic caramelized biscuits are the star of the show! You’ll need a substantial amount for both the crust and the filling. To ensure you have plenty, we recommend purchasing at least two large packs of Lotus Biscoff cookies. Their unique spice blend and caramelized flavor are irreplaceable.
- Brown Sugar: We specify light brown sugar for this recipe. Its molasses content adds a subtle depth and moisture to the crust, complementing the Biscoff cookies beautifully. You can use dark brown sugar for a slightly more intense flavor if preferred.
- Unsalted Butter: Melted unsalted butter is crucial for binding the cookie crumbs into a cohesive, flavorful crust. Using unsalted butter allows you to control the overall saltiness of the dessert.
- Cream Cheese: For a truly rich and creamy cheesecake, always opt for full-fat cream cheese. Low-fat varieties can result in a thinner, less luxurious texture. Remember to pull it out of the refrigerator at least two hours before you begin baking to ensure it reaches room temperature. This is vital for achieving a smooth, lump-free batter.
- Biscoff Cookie Spread: This velvety spread is the heart of the cheesecake’s flavor. You’ll need two containers of the creamy variety, not the crunchy one, to achieve the desired smooth consistency in the filling and the luscious topping. Its concentrated Biscoff flavor is essential.
- Sour Cream: Full-fat sour cream contributes to the cheesecake’s tender crumb and characteristic tang, balancing the sweetness. Like cream cheese, ensure it’s at room temperature for optimal incorporation into the batter.
- Heavy Cream: This adds richness and contributes to the cheesecake’s wonderfully smooth and creamy texture. Again, make sure your heavy cream is at room temperature before mixing.
- Large Eggs: Eggs provide structure and help to set the cheesecake. Using large eggs is standard for most baking recipes. Crucially, let them come to room temperature for at least two hours before use. Cold eggs can cause the batter to curdle and affect the final texture.
Step-by-Step Instructions: Crafting Your Perfect Biscoff Cheesecake
Follow these detailed steps to create a flawless Biscoff cheesecake. This recipe is designed for ease of use with a stand mixer equipped with a paddle attachment, or a reliable electric hand mixer.
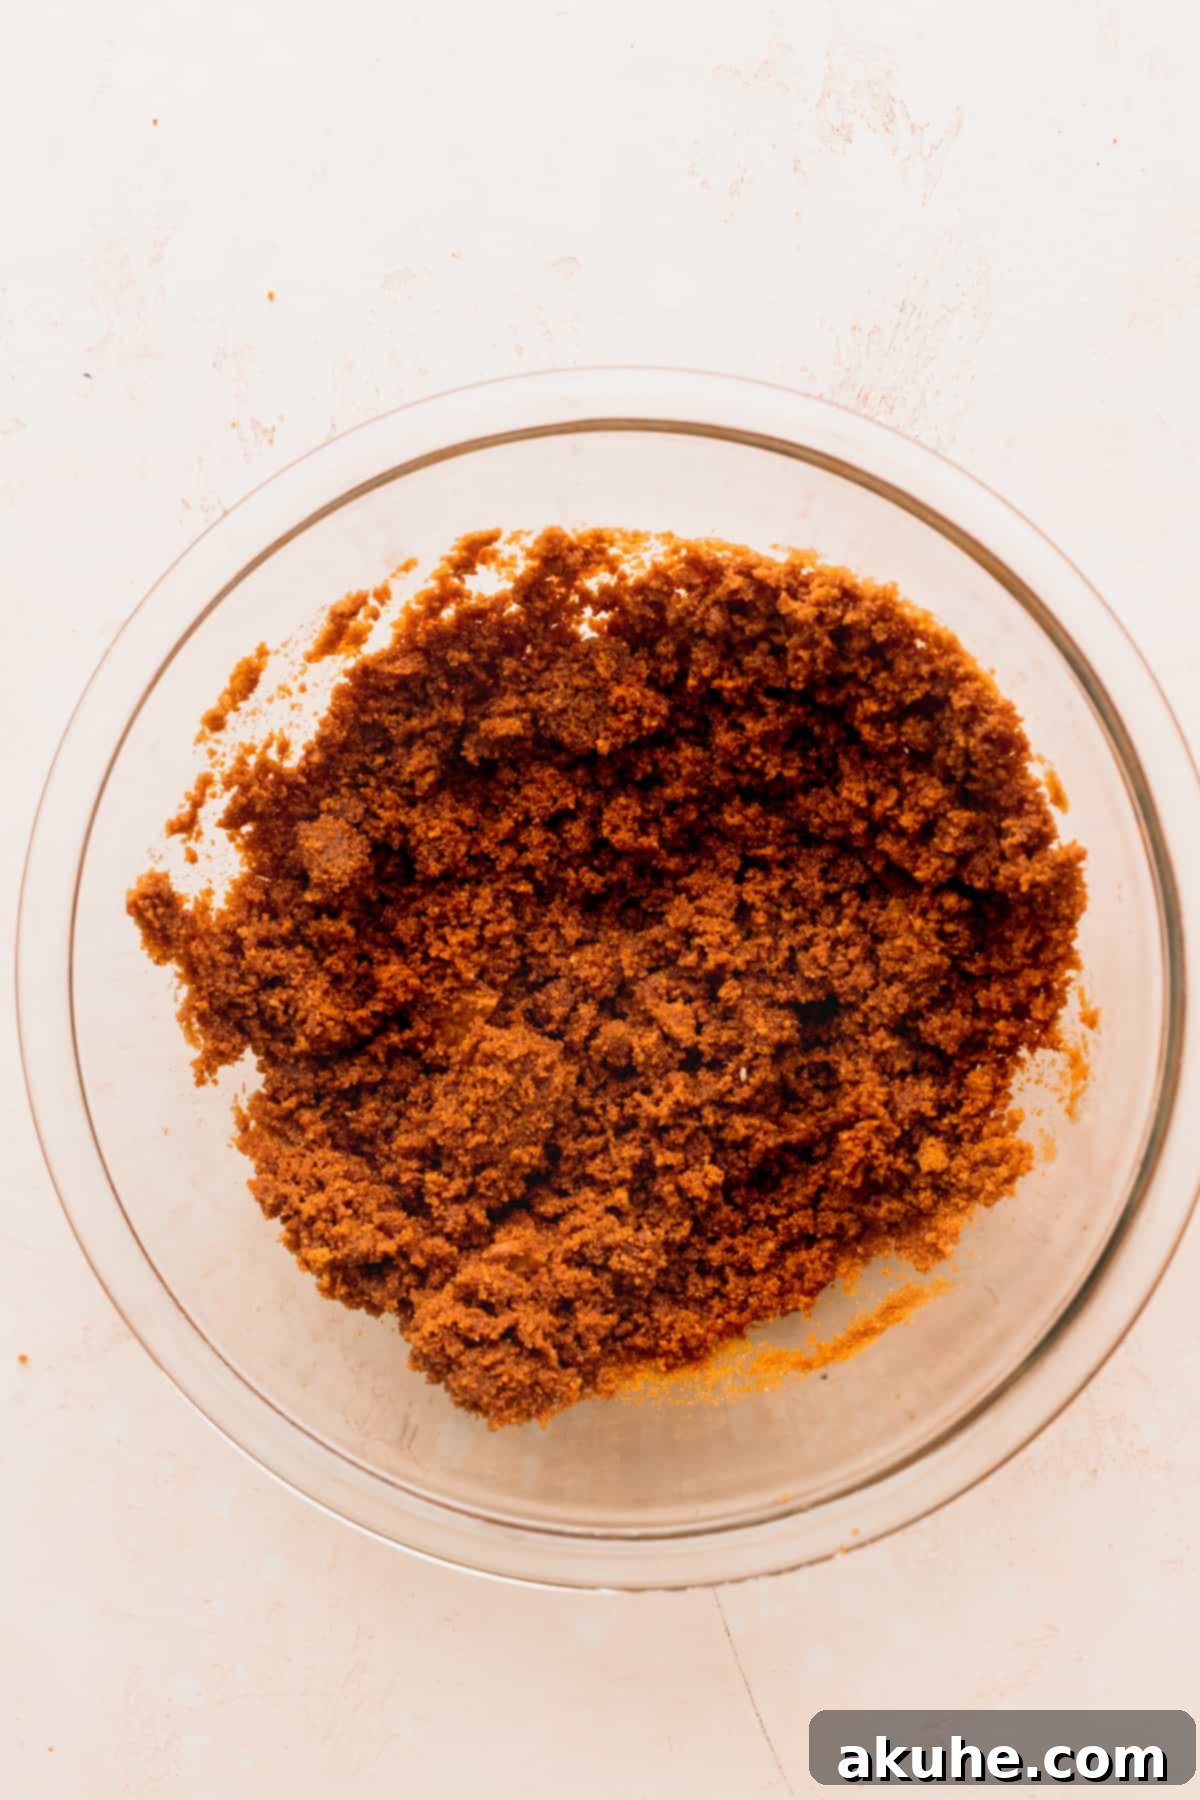
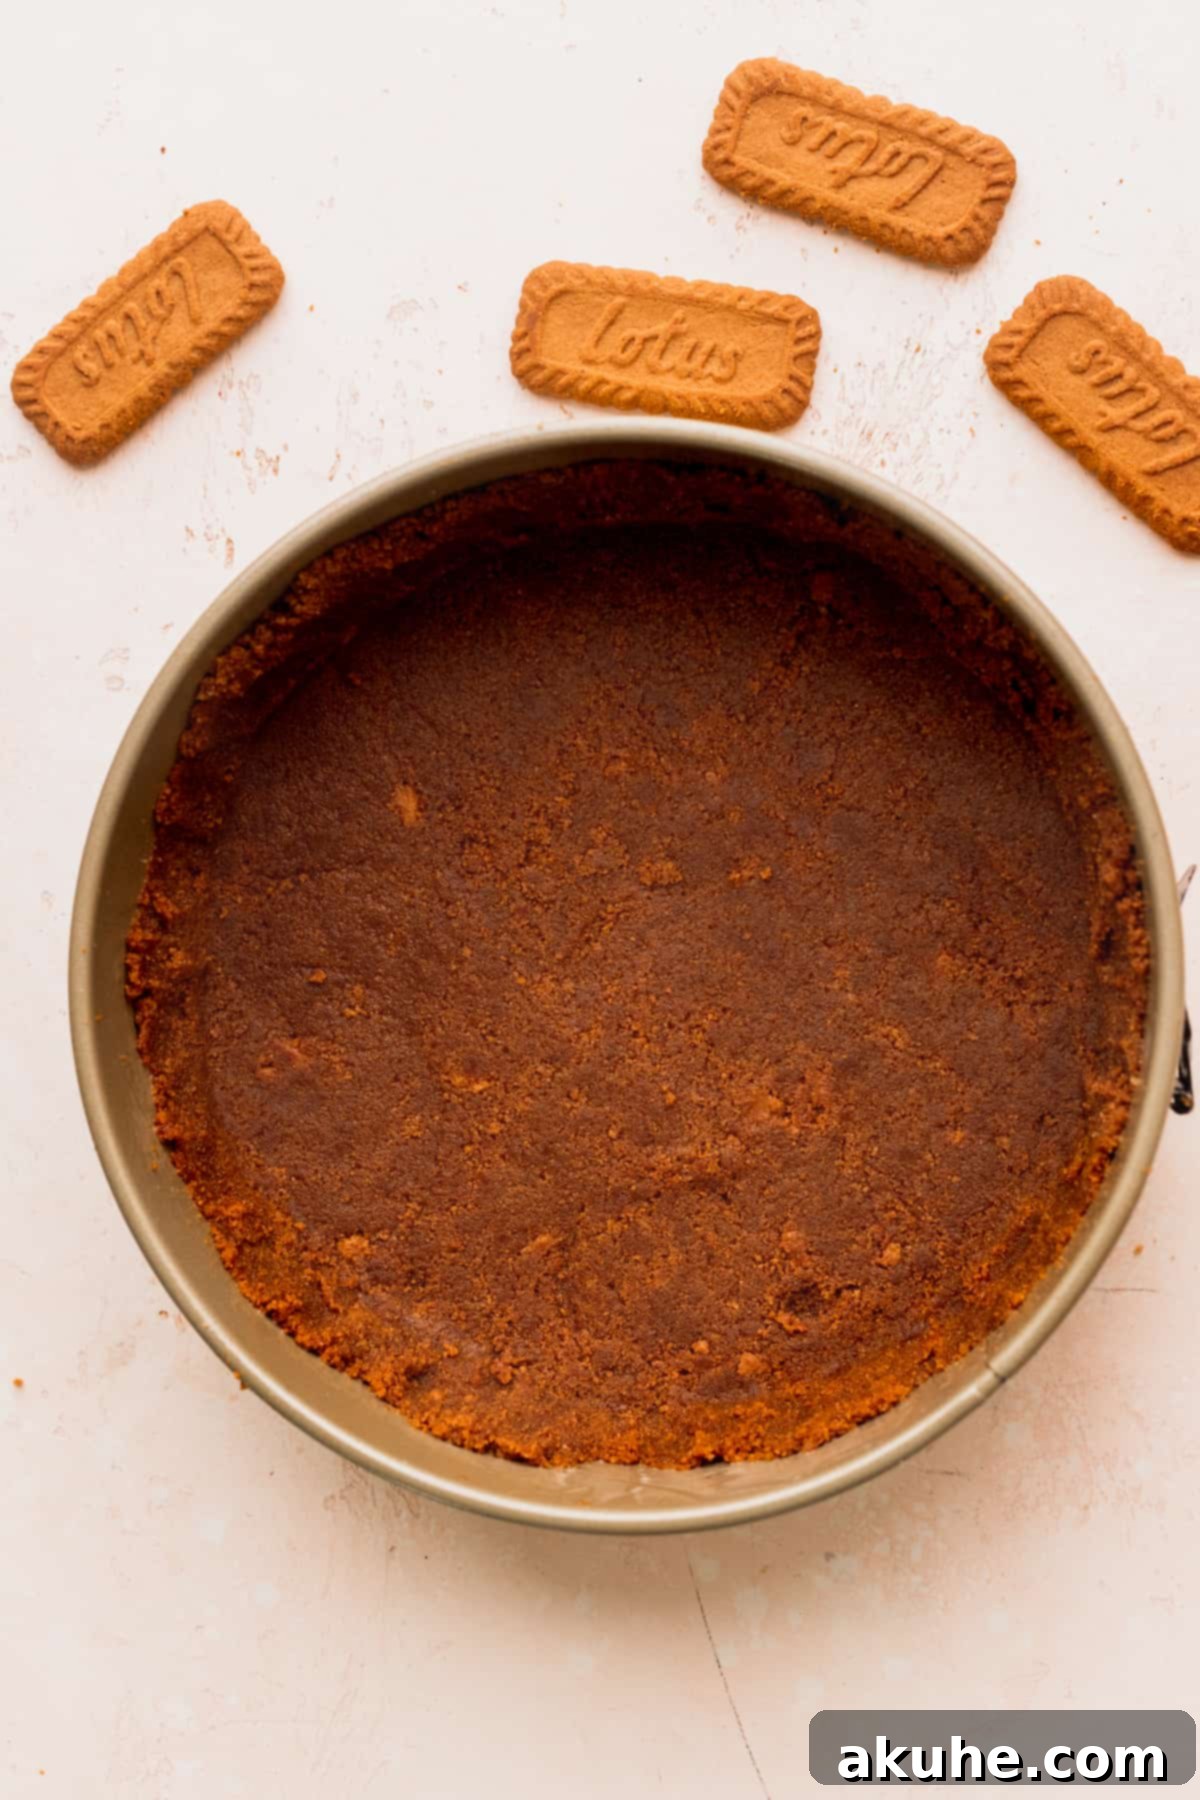
STEP 1: Prepare the Biscoff Cookie Crust. Begin by preheating your oven to 325°F (160°C). Take your Lotus Biscoff cookies and process them in a food processor until they form very fine crumbs, resembling sand. In a medium-sized mixing bowl, combine these Biscoff cookie crumbs with the brown sugar and the melted unsalted butter. Use a fork to thoroughly mix until all the crumbs are evenly moistened and resemble wet sand.
STEP 2: Form and Bake the Crust. Lightly spray a 9-inch springform pan with a non-stick baking spray. For easy removal later, line the bottom of the pan with a 9-inch parchment paper circle, then spray the parchment paper again. Pour the prepared cookie crumb mixture into the lined springform pan. Use your hands to gently press the crumbs firmly up the sides of the pan, aiming for about halfway up. Then, use the flat bottom of a measuring cup or a glass to compact the crumbs tightly on the bottom of the pan. This creates a dense, sturdy crust. Bake the crust in your preheated oven for 13 minutes, then remove and set aside to cool slightly while you prepare the filling.
STEP 3: Cream Cheese and Sugar Mixture. In a large mixing bowl, using your stand mixer or electric hand mixer, beat the room temperature full-fat cream cheese on high speed for approximately 1 minute. Stop the mixer, scrape down the sides of the bowl with a rubber spatula to ensure even mixing. Add in the white granulated sugar and beat again on high speed for another minute until the mixture is light, fluffy, and well combined. Scrape the bowl once more.
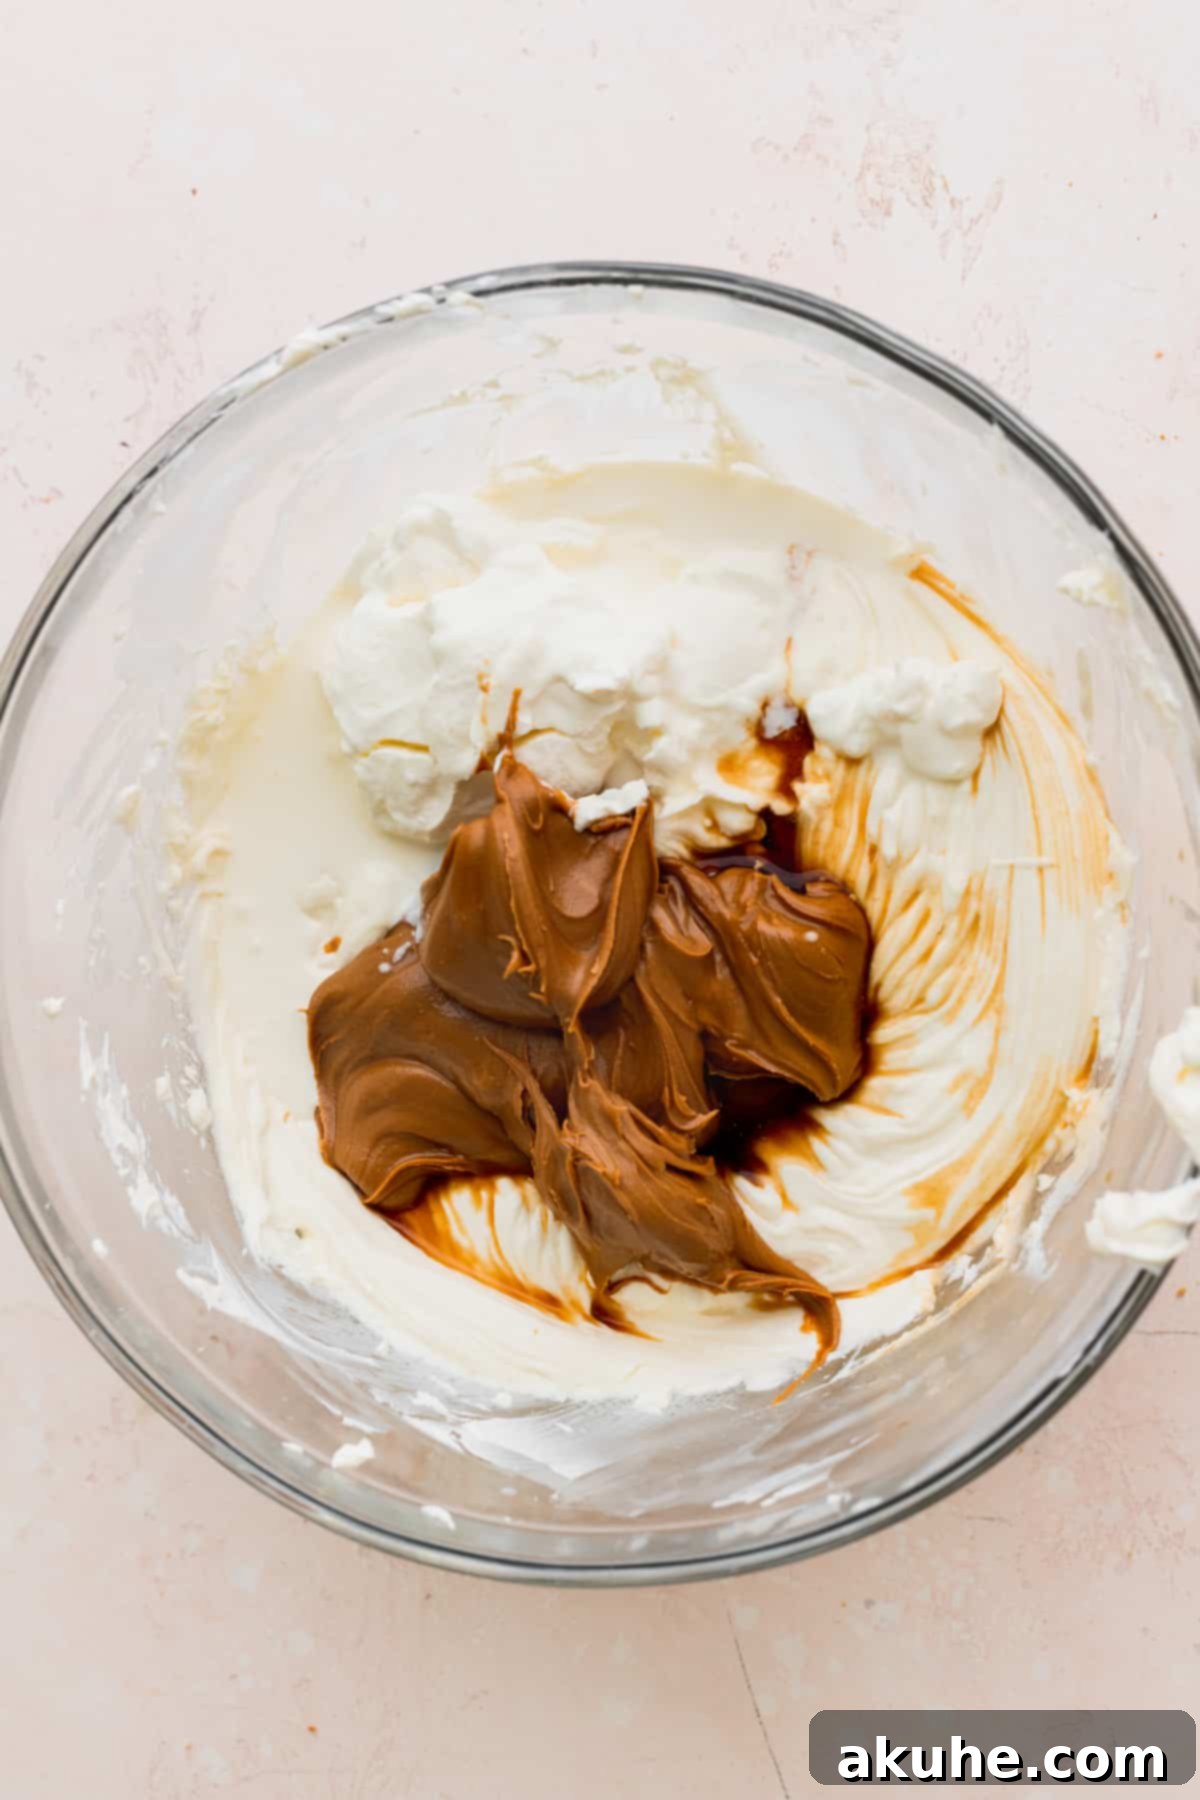
STEP 4: Incorporate Wet Ingredients. Next, add the room temperature sour cream, heavy cream, pure vanilla extract, and the creamy Lotus Biscoff spread into the cream cheese mixture. Beat on medium speed until the mixture is completely smooth and thoroughly combined, with no streaks of cookie butter remaining. Ensure you scrape down the sides of the bowl frequently to integrate all ingredients.
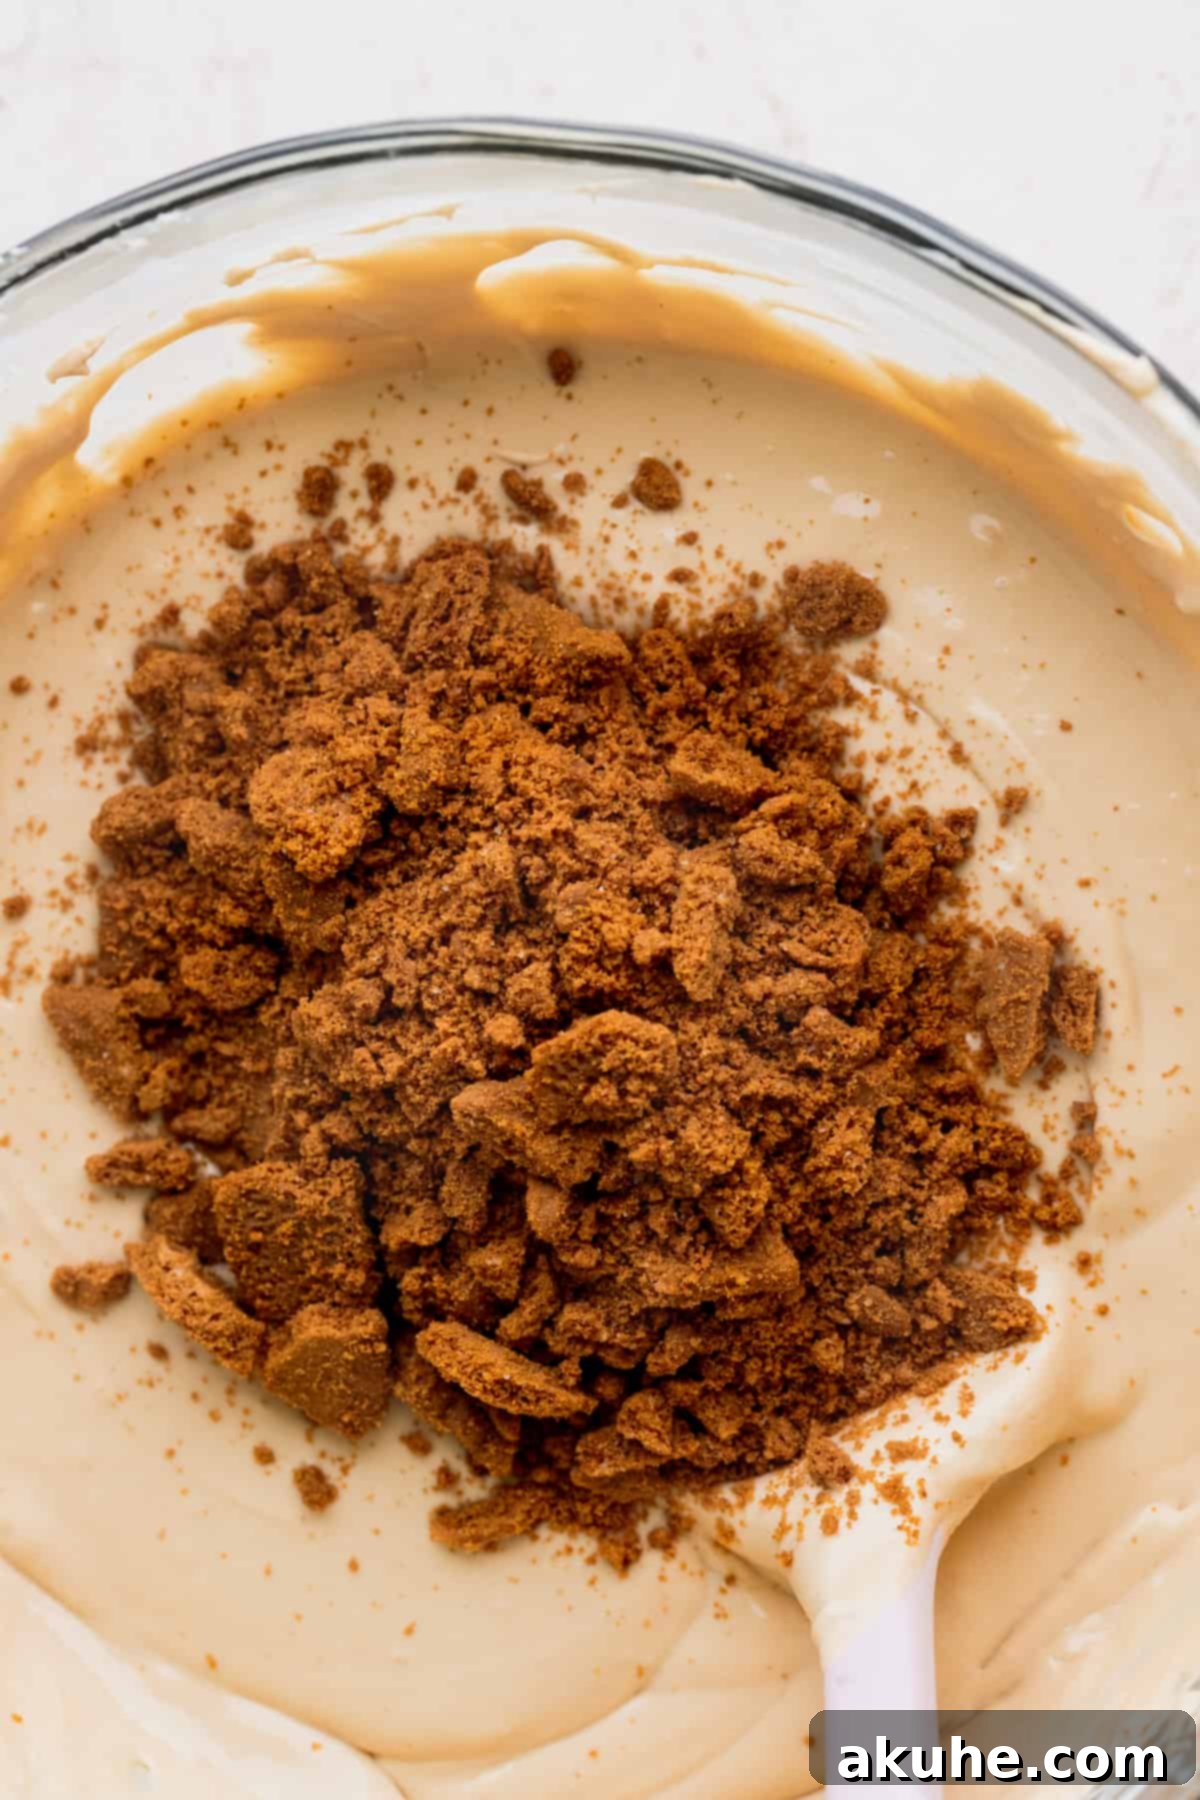
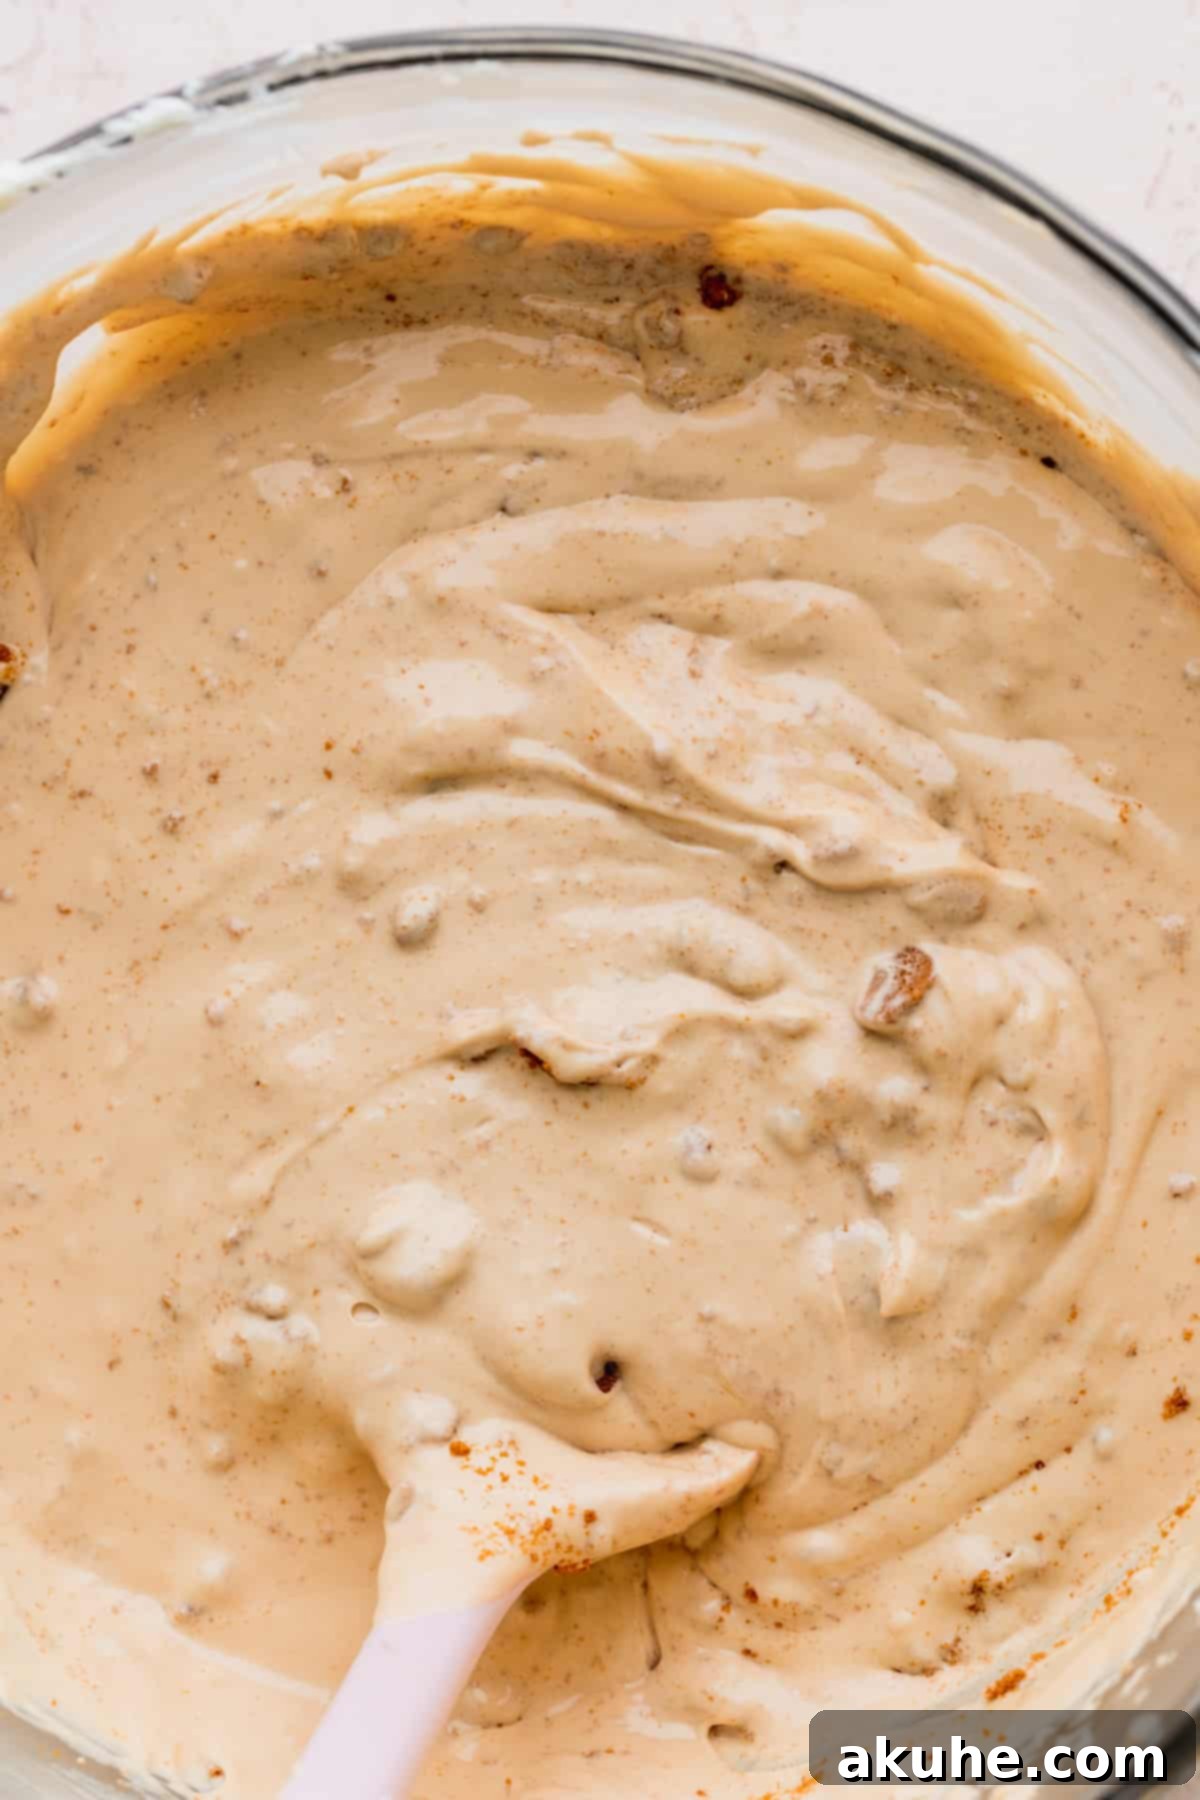
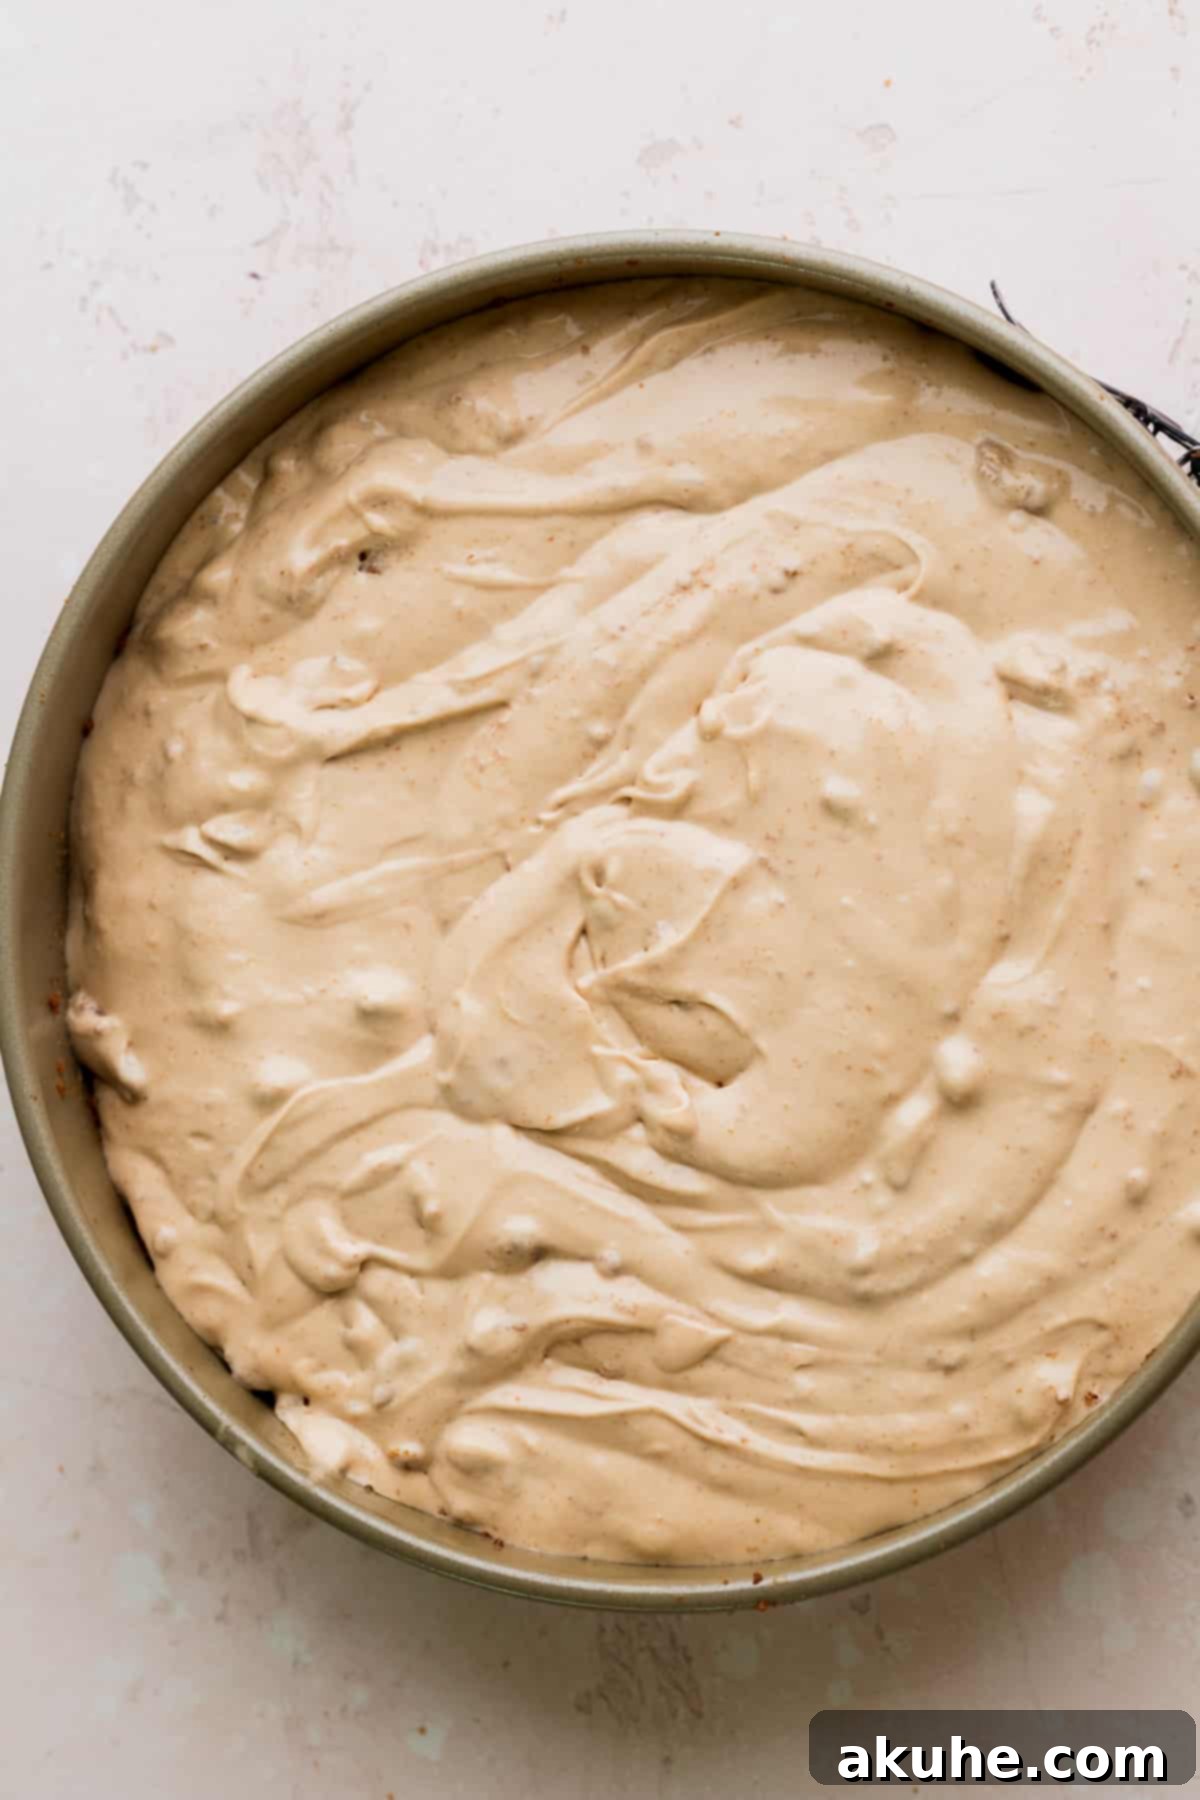
STEP 5: Add Eggs and Chopped Cookies. Reduce your mixer speed to low. Add the large eggs one at a time, mixing only until each egg is just combined into the batter. It is critically important not to overmix the eggs, as incorporating too much air can lead to cracks in your finished cheesecake. Once the eggs are just incorporated, remove the bowl from the mixer. Gently fold in the chopped Biscoff cookie pieces using a rubber spatula. Make sure to scrape the sides and bottom of the bowl to evenly distribute the cookie pieces throughout the batter.
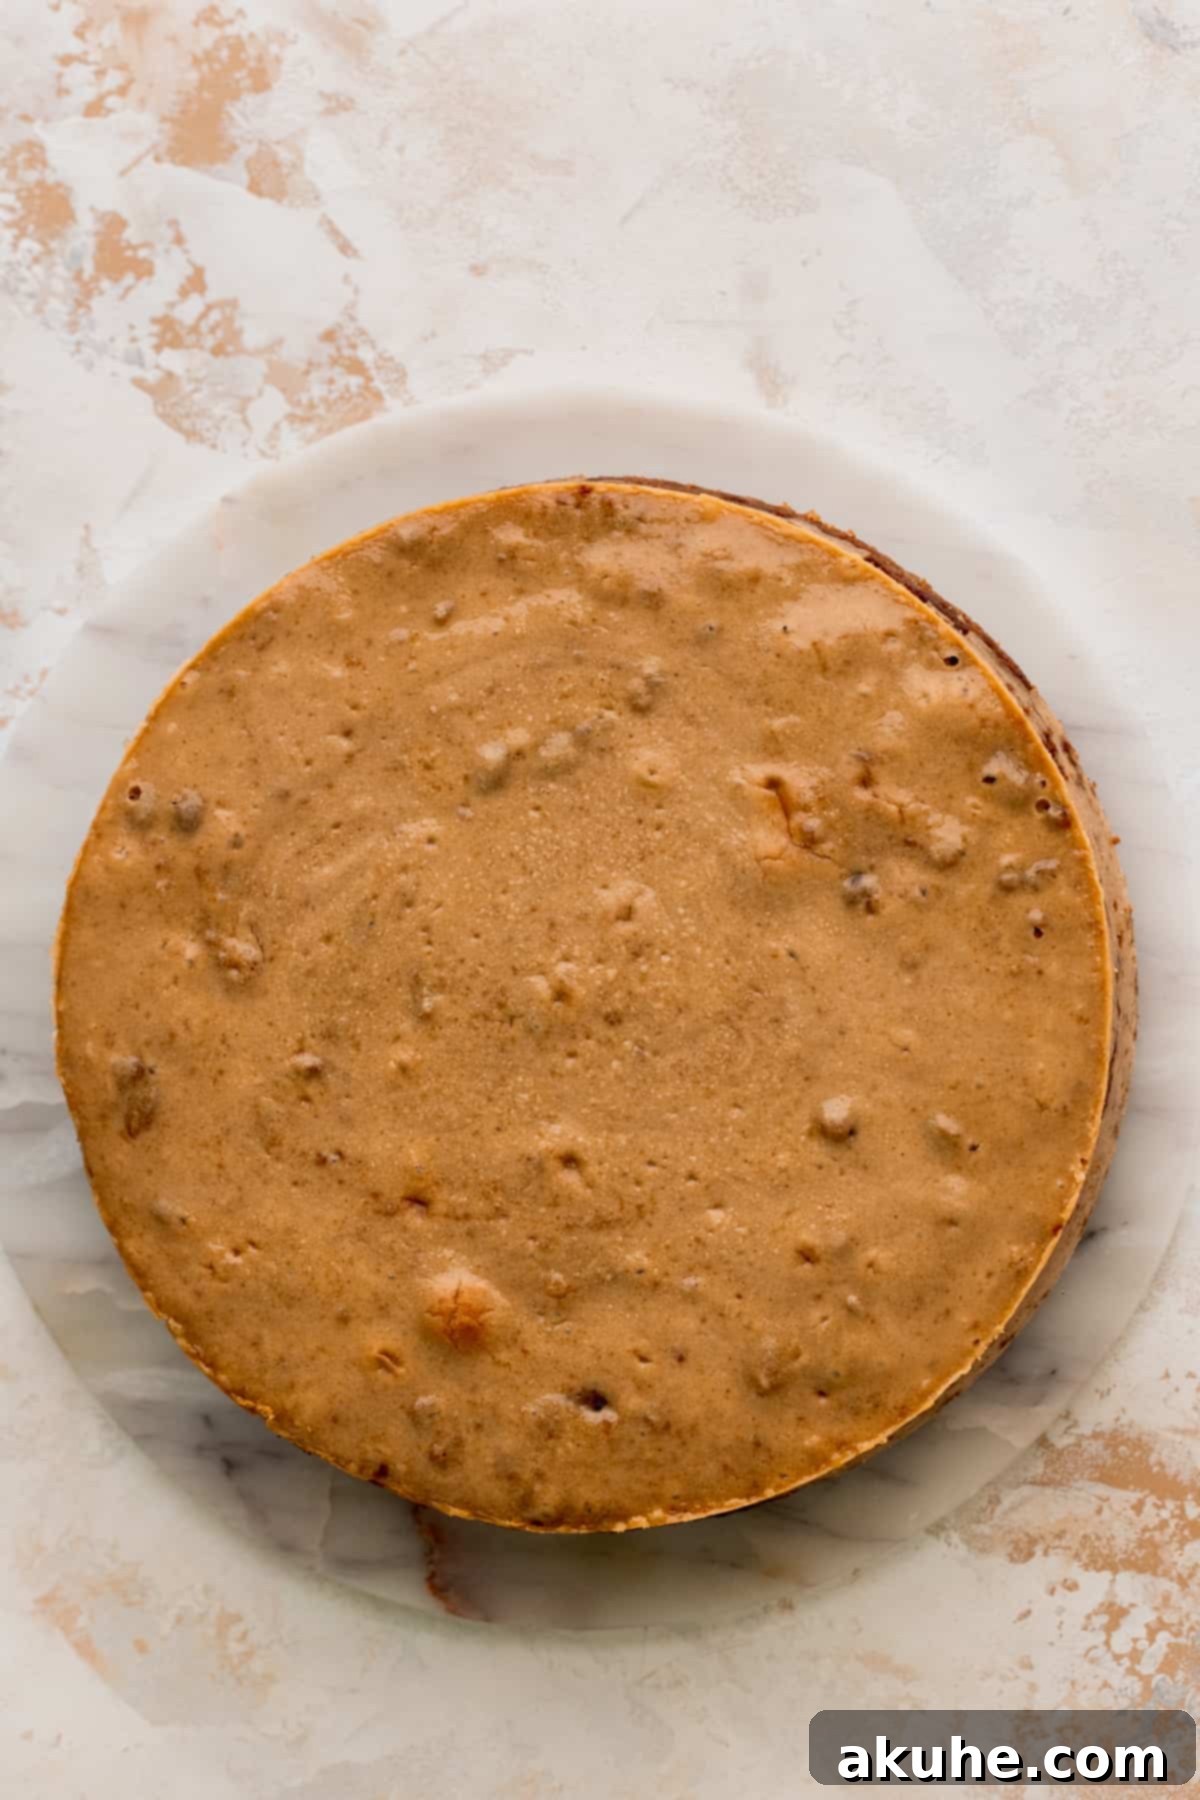
STEP 6: Bake the Cheesecake in a Water Bath. Carefully pour the Biscoff cheesecake batter into your pre-baked springform pan with the cookie crust. Prepare a water bath (see detailed tips below for guidance). Bake the cheesecake in the water bath for 60-75 minutes, or until the edges appear set, but the very center still has a slight, delicate jiggle when gently shaken. This slight jiggle indicates a perfectly baked, creamy cheesecake.
STEP 7: Gradual Cooling and Chilling. Once the cheesecake is baked, turn off the oven, but do not remove the cheesecake immediately. Instead, crack open the oven door slightly (about an inch) and allow the cheesecake to cool slowly inside the oven for 30 minutes. This gradual cooling process helps prevent cracks. After 30 minutes, remove the cheesecake from the oven and the water bath, transferring it to a wire cooling rack to cool completely at room temperature. Once fully cooled, cover the springform pan tightly with plastic wrap and chill the cheesecake in the refrigerator for at least 6 hours, or ideally overnight. Chilling is crucial for the cheesecake to fully set and develop its firm, creamy texture.
Effortless Decorating for Your Biscoff Cheesecake
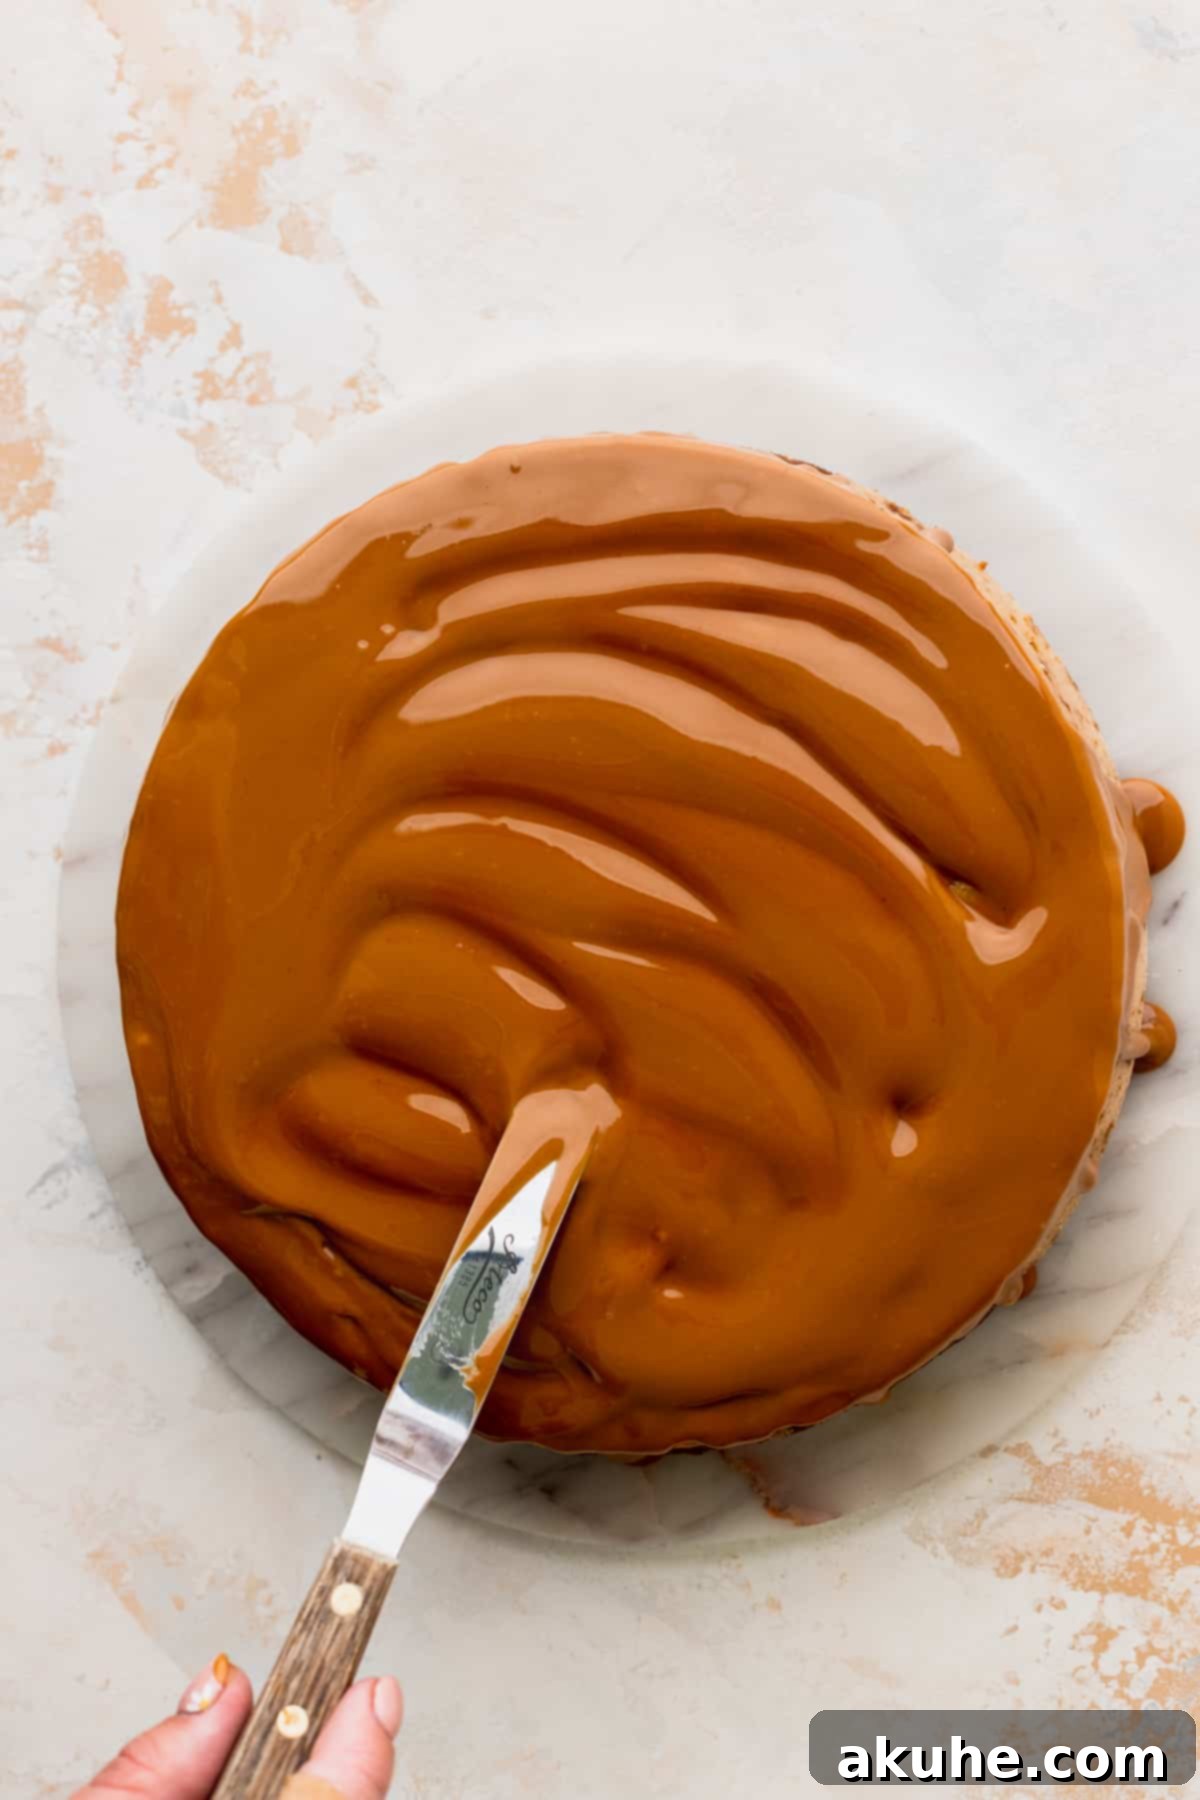
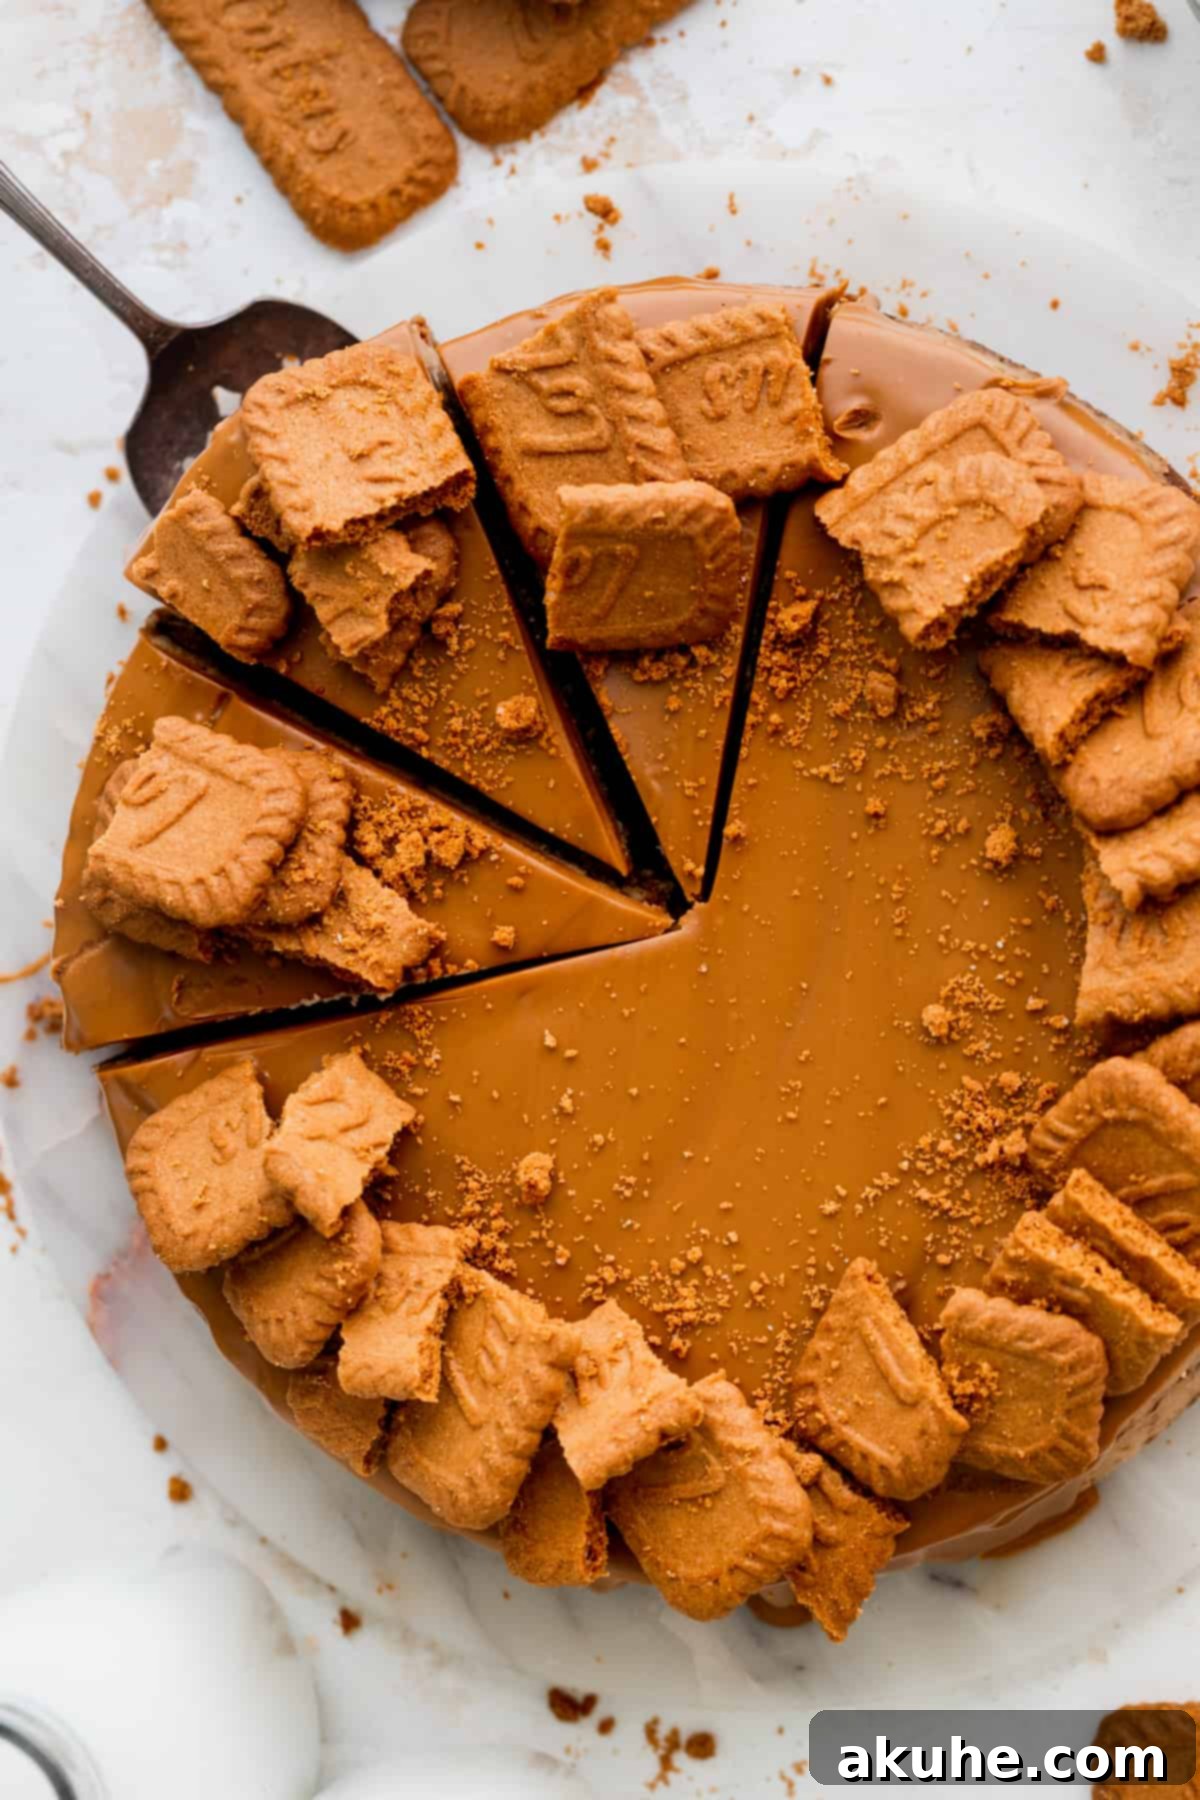
Once your Biscoff cheesecake is perfectly chilled and set, it’s time for the delightful decorating phase. Begin by carefully removing the cheesecake from its springform pan (refer to the tips below for easy removal). In a small microwave-safe bowl, gently heat the remaining Biscoff cookie butter until it’s smooth and pourable, but not boiling hot. Evenly pour this melted cookie butter over the top of the chilled cheesecake, allowing it to naturally drip and cascade down the sides for a beautiful, rustic look.
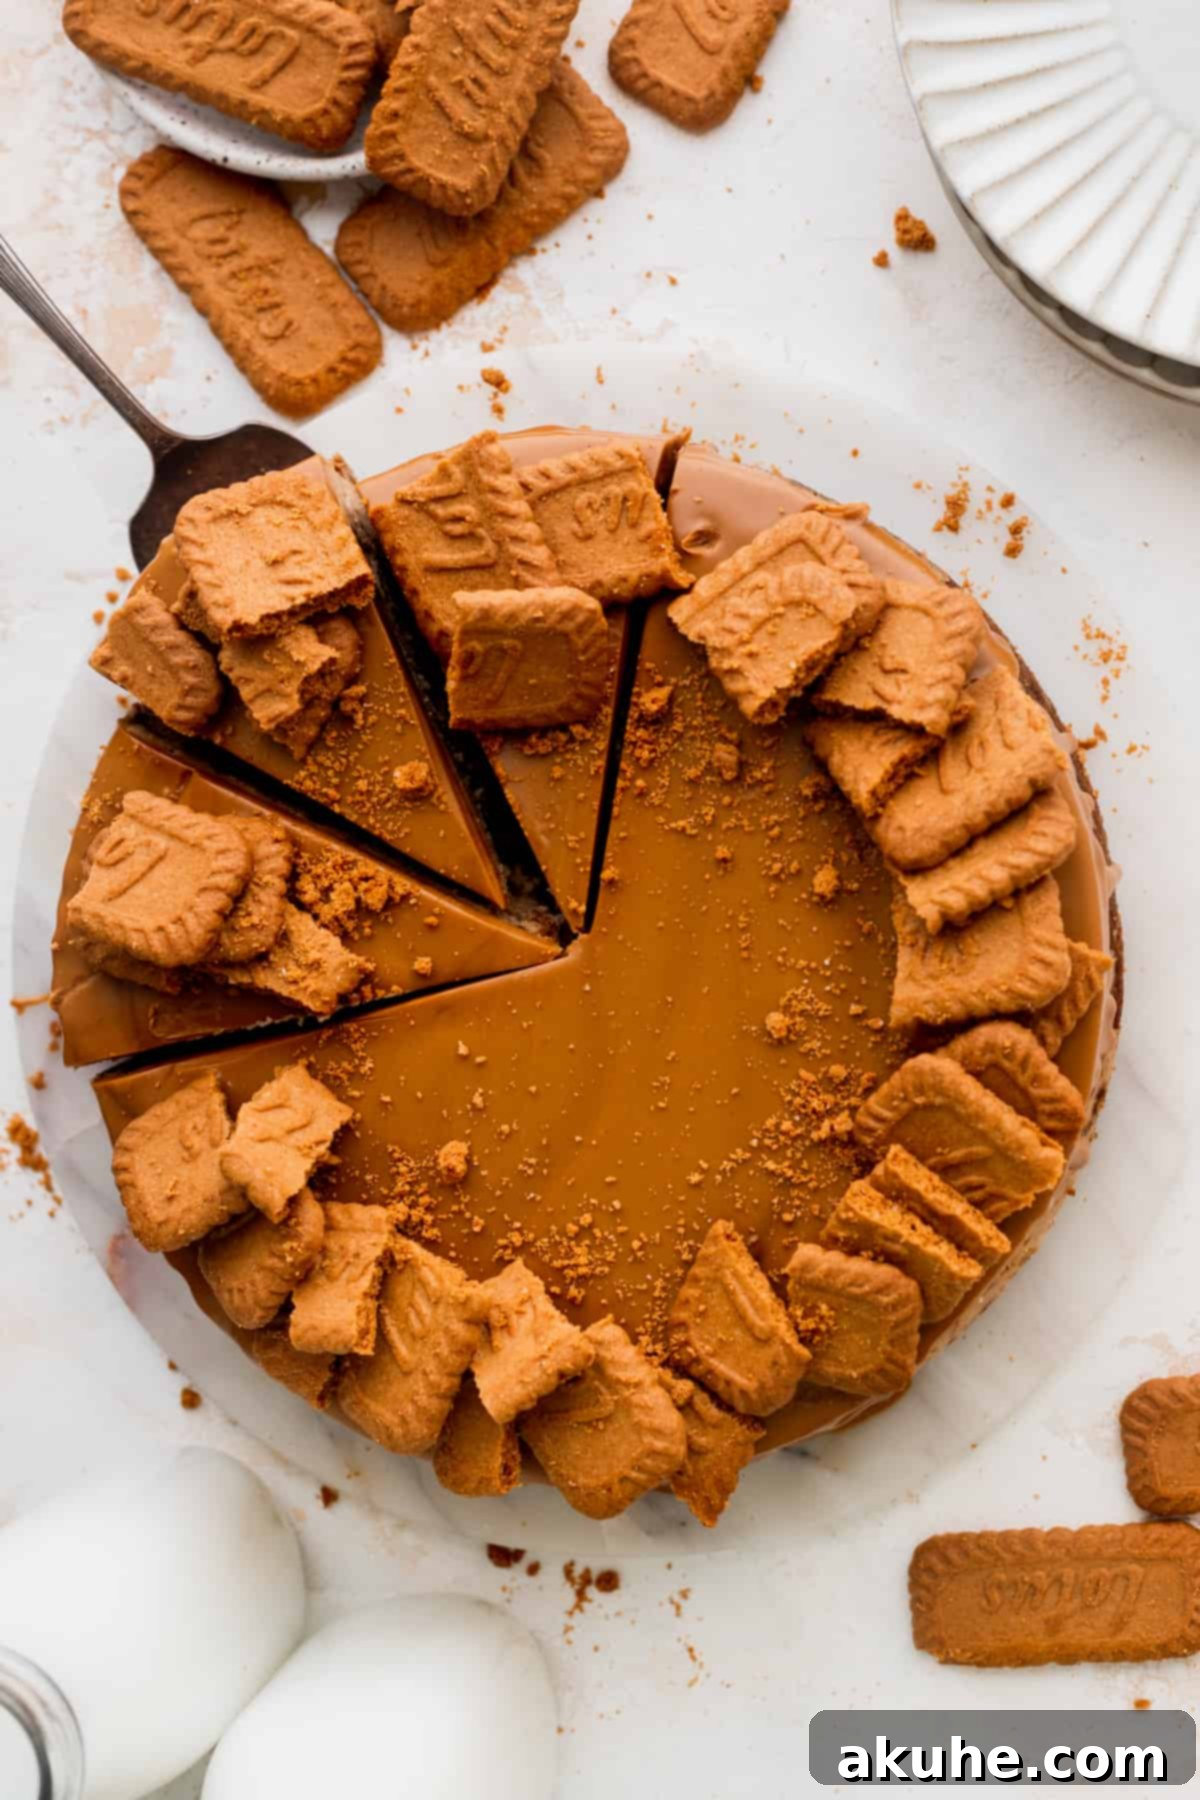
To set the cookie butter topping, place the decorated cheesecake back into the freezer for about 10 minutes. This quick chill will help the cookie butter firm up slightly, ensuring it stays in place. Finally, for an extra flourish and to emphasize the Biscoff theme, artfully arrange additional whole or crushed Lotus Biscoff cookies on top of the cheesecake. This adds both visual appeal and a final layer of crunchy texture.
Mastering the Water Bath Technique for Cheesecake
The water bath, often referred to as a “bain-marie,” is a vital technique for baking perfect cheesecakes. Its primary function is to create a moist, steamy environment in the oven, which helps the cheesecake bake evenly and gently. This moist heat prevents the top of the cheesecake from drying out and cracking, ensuring a beautifully smooth and luscious finish.
Here are two effective methods for preparing a water bath, both utilizing a large roasting pan filled with hot, steaming water:
- The Inner Pan Method (Recommended): Place your springform pan (containing the cheesecake batter) inside a slightly larger, solid 10-inch cake pan. Then, place this cake pan into your large roasting pan. Carefully fill the roasting pan with hot, steaming water, ensuring the water level comes about halfway up the sides of the 10-inch cake pan. This method provides an excellent barrier, absolutely preventing any water from seeping into your Biscoff cookie crust, guaranteeing a crisp, dry base. This is my preferred technique for effortless cheesecake baking.
- The Foil-Wrapped Springform Method: Tightly wrap the exterior of your springform pan with two layers of heavy-duty aluminum foil. Ensure there are no gaps or tears. Place the foil-wrapped springform pan directly into the large roasting pan. Fill the roasting pan halfway up the sides of the foil-wrapped springform pan with hot, steaming water. While this method can be effective, there’s a slight chance that water might still find its way past the foil and into the crust, potentially leading to a soggy bottom.
Choosing the first method ensures peace of mind and consistently perfect results, making your cheesecake baking experience much smoother.
Expert Tips for Preventing Cheesecake Cracks
Achieving a perfectly smooth, uncracked Biscoff cheesecake is a mark of baking prowess. Here’s how to master the art:
- Beat Cream Cheese and Sugar to Perfection: Ensure your cream cheese and sugar (and other wet ingredients excluding eggs) are beaten on high speed until the mixture is incredibly creamy and utterly smooth. Any small lumps of cream cheese can create structural weaknesses that lead to cracks during baking. Thoroughly scraping the bowl several times during this process is key.
- Integrate Eggs Gently and Slowly: When adding the eggs, switch your mixer to a very low speed and add them one at a time. Mix only until each egg is just combined into the batter. The goal is to incorporate as little air as possible. Excessive air whipped into the batter can create large air bubbles that expand rapidly during baking, causing the cheesecake to rise dramatically and then fall too quickly upon cooling, which inevitably results in unsightly cracks.
- The Indispensable Water Bath: As detailed above, a water bath is absolutely essential for creating a moist, even baking environment. This gentle heat minimizes temperature fluctuations and helps the cheesecake set without drying out, thereby preventing cracks. Do not skip this crucial step for best results!
- Crucial Slow Cooling Process: Once your cheesecake is done baking, resist the urge to pull it out of the oven immediately. Instead, turn off the oven, prop the door open slightly, and let the cheesecake sit in the gradually cooling oven for at least 30 minutes. This slow, controlled cooling prevents a sudden temperature shock, which is a common culprit for cracks.
- Avoid Abrupt Temperature Changes: If you were to take a hot cheesecake directly from the oven and place it on a cool countertop, the rapid change in temperature would stress the delicate structure of the cheesecake, almost certainly leading to cracks. Always allow for a gradual cooling period.
Effortless Removal of Your Biscoff Cheesecake from the Pan
A beautifully baked Biscoff cheesecake deserves a graceful exit from its pan. Here’s how to ensure a seamless release:
Firstly, prepare your 9-inch springform pan by spraying it generously with a non-stick baking spray. Next, line the bottom of the pan with a 9-inch parchment paper circle. This small addition makes a world of difference. After placing the parchment, spray the pan again, ensuring the sides are well coated.
After your cheesecake has been properly chilled in the refrigerator, ideally overnight, the sides of the springform pan should detach effortlessly. Simply unclip the latch and the ring should lift right off. If you encounter any resistance, very gently run a thin, sharp knife around the inner edge of the cheesecake before attempting to unclip the pan again. This will loosen any areas where the cheesecake might have adhered to the pan. Once the ring is removed, you can carefully lay the cheesecake on its side to easily slide off the bottom of the pan and peel away the parchment paper, revealing your flawless Biscoff cheesecake.
Frequently Asked Questions About Biscoff Cheesecake
What makes Biscoff cookies and spread so special?
The allure of Biscoff lies in its distinctive, addictive flavor profile. It’s a caramelized biscuit (cookie) with a unique blend of spices, often including cinnamon, nutmeg, and ginger. This combination creates a deeply warm, comforting, and subtly spicy sweetness that is unlike any other cookie or spread. Once you try it, it’s easy to see why it becomes a favorite!
Can I convert this recipe into mini cheesecakes?
Absolutely! This recipe is adaptable for mini cheesecakes. To make approximately 12 mini cheesecakes, divide the recipe ingredients by thirds. Bake these in a standard muffin pan lined with cupcake liners for about 18-20 minutes, or until set. For more detailed instructions on baking mini cheesecakes, you can refer to our Mini Oreo Cheesecakes recipe, which provides a comprehensive guide to portioning and baking smaller cheesecakes.
What other pan sizes can I use for this cheesecake recipe?
This recipe is quite versatile. You can halve the recipe to create delicious cheesecake bars, using an 8×8 inch or 9×9 inch baking pan (you would use 16 oz of cream cheese for a halved recipe). Alternatively, an 8-inch springform pan can be used with the full recipe, though baking time might vary slightly. If you prefer a smaller 6-inch springform pan, you should halve the recipe, but still use 16 oz of cream cheese to maintain proper consistency and height.
Storing and Freezing Your Biscoff Cheesecake
To maintain the freshness and exquisite flavor of your Biscoff cheesecake, proper storage is key. Store the cheesecake in an airtight container, such as a specialized cake carrier, in the refrigerator. When stored correctly, it will remain fresh and delicious for up to 5 days.
Freezing Instructions
Freezing your Biscoff cheesecake is a fantastic option for enjoying this treat over a longer period:
- Freezing Individual Slices: For convenient single servings, slice the cheesecake into individual portions. Place each slice in an airtight container or wrap them tightly in plastic wrap and then aluminum foil. These can be frozen for up to 30 days. When you’re ready to enjoy, thaw a slice at room temperature for 1-2 hours before serving.
- Freezing the Whole Cheesecake (Undecorated): You can also freeze the entire Lotus Biscoff cheesecake before adding the final decorations. First, ensure the cheesecake has been thoroughly chilled in the refrigerator overnight. Once firm, wrap the cooled cheesecake tightly in several layers of plastic wrap, followed by a layer of aluminum foil. This will protect it from freezer burn. It can be frozen for up to 30 days. When you plan to serve it, thaw the wrapped cheesecake in the refrigerator overnight, or at room temperature for 1-2 hours, before proceeding with the decorating steps.
Other Decadent Cheesecake Recipes To Try
If you’ve enjoyed mastering this Biscoff cheesecake, why not explore other delightful cheesecake creations? Our collection includes a variety of flavors and styles to satisfy every palate.
Did you absolutely adore this recipe? Please consider leaving a STAR REVIEW below! We love seeing your creations, so don’t forget to tag us on Instagram @stephaniesweettreats. For more inspiring dessert ideas and recipes, be sure to follow us on Pinterest.
Ultimate Biscoff Cheesecake
This Biscoff cheesecake features a buttery Lotus Biscoff cookie crust, a creamy baked cheesecake filled with Biscoff cookie butter and chopped cookies, and is generously topped with more melted cookie butter and extra Biscoff cookies for the ultimate indulgence.
Recipe Details
- Prep Time: 45 minutes
- Cook Time: 1 hour 5 minutes
- Chilling Time: 6 hours
- Total Time: 7 hours 50 minutes
- Servings: 16 slices
Ingredients
Biscoff Cookie Crust
- 2 ¼ cups Biscoff cookie crumbs (finely crushed)
- ⅛ cup Brown sugar (packed, light or dark)
- 7 TBSP Unsalted butter (melted)
Biscoff Cheesecake
- 24 oz Cream cheese (full-fat, room temperature)
- ¾ cup White granulated sugar
- 1 cup Biscoff cookie spread (creamy)
- ½ cup Sour cream (full-fat, room temperature)
- ¼ cup Heavy cream (room temperature)
- 1 tsp Pure vanilla extract
- 3 Large eggs (room temperature)
- 1 cup Biscoff cookie pieces (chopped)
- ¾ cup Biscoff cookie spread (for topping, melted)
- Extra Biscoff cookies (for decorating)
Instructions
Biscoff Cookie Crust
- Preheat your oven to 325°F (160°C). Spray a 9-inch springform pan with non-stick baking spray. Line the bottom with a 9-inch parchment paper circle and spray again.
- Using a food processor, blend approximately 40 Biscoff cookies into a fine crumb. In a medium bowl, combine the Biscoff cookie crumbs, brown sugar, and melted butter using a fork until well mixed.
- Press the crumb mixture evenly into the prepared springform pan. Use your hands to form the crust about halfway up the sides of the pan, and then use the bottom of a measuring cup to firmly compact the bottom crust.
- Bake for 13 minutes. Remove from oven and set aside.
Biscoff Cheesecake
- Using a mixer in a large bowl, beat the room temperature cream cheese on high speed for 1 minute. Scrape down the bowl. Add the white granulated sugar and beat for another 1 minute, scraping the bowl again with a rubber spatula.
- Add the Biscoff cookie spread, sour cream, heavy cream, and pure vanilla extract. Mix on medium speed until the batter is smooth and well combined, ensuring the cookie butter is fully incorporated.
- Add the large eggs one at a time, mixing on low speed until just combined after each addition. Avoid overmixing the eggs to prevent cracks.
- Remove the bowl from the mixer. Gently fold in the chopped Biscoff cookie pieces with a rubber spatula, scraping the sides of the bowl to ensure even distribution.
- Pour the cheesecake batter into the pre-baked Biscoff cookie crust in the springform pan. Prepare a water bath.
- Water Bath Setup: Choose one of the following methods using a large roasting pan and hot steaming water:
- Place the springform pan inside a 10-inch cake pan. Place the cake pan in the roasting pan and fill the roasting pan with hot water halfway up the cake pan. This method completely prevents water from seeping into the crust.
- Wrap the springform pan tightly twice in heavy-duty aluminum foil. Place the springform pan directly into the roasting pan and fill with hot water halfway up the springform pan. This method is generally effective, but there’s a slight risk of water leakage into the crust.
- Bake the cheesecake in the water bath for 60-70 minutes, or until the edges are set and the center has a slight jiggle.
- Once baked, turn off the oven, prop the door open slightly, and let the cheesecake cool slowly in the oven for 30 minutes.
- Transfer the pan to a wire cooling rack and allow it to cool completely at room temperature.
- Wrap the cooled cheesecake in plastic wrap and chill in the refrigerator for at least 6 hours, or preferably overnight, until fully set.
- Once chilled, remove the cheesecake from the pan and carefully peel off the parchment paper. Gently heat the ¾ cup Biscoff cookie spread in the microwave until melted and pourable. Pour it over the top of the cheesecake, allowing it to drip down the sides. Decorate with extra Biscoff cookies as desired.
Notes
For the best results, remember to pull all dairy ingredients (cream cheese, sour cream, heavy cream, and eggs) out of the refrigerator at least 2 hours before you plan to begin baking. This ensures they reach room temperature, which is critical for a smooth batter and a perfectly textured cheesecake.
Nutrition Information (per serving, estimated)
Calories: 263kcal, Carbohydrates: 14g, Protein: 3g, Fat: 22g, Saturated Fat: 13g, Polyunsaturated Fat: 1g, Monounsaturated Fat: 6g, Trans Fat: 1g, Cholesterol: 65mg, Sodium: 138mg, Potassium: 73mg, Sugar: 13g, Vitamin A: 824IU, Vitamin C: 1mg, Calcium: 54mg, Iron: 1mg
Did you make this recipe? Please leave a star rating and review below!
