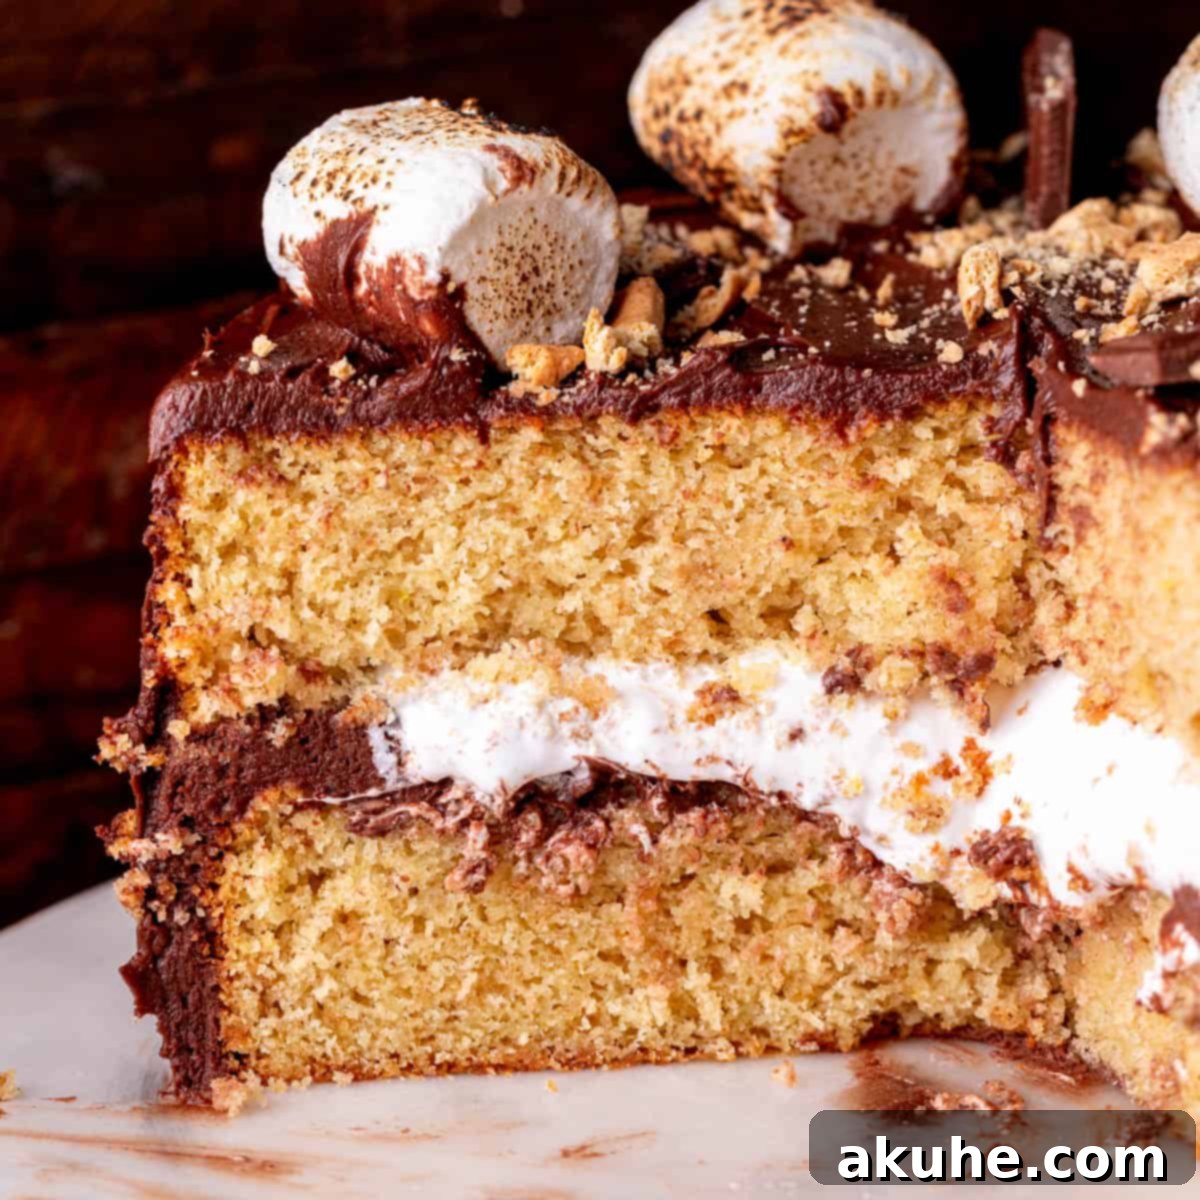
Step into a world of campfire nostalgia reimagined in cake form with this Ultimate S’mores Cake! Forget the mess of traditional s’mores; this dessert delivers all the beloved flavors—toasted marshmallow, rich chocolate, and classic graham cracker—in an elegant, two-layer masterpiece. Perfect for summer gatherings, birthday celebrations, or simply to satisfy a serious s’mores craving, this cake is designed to impress both visually and on the palate, combining a show-stopping marshmallow drip with an undeniably delicious taste experience.
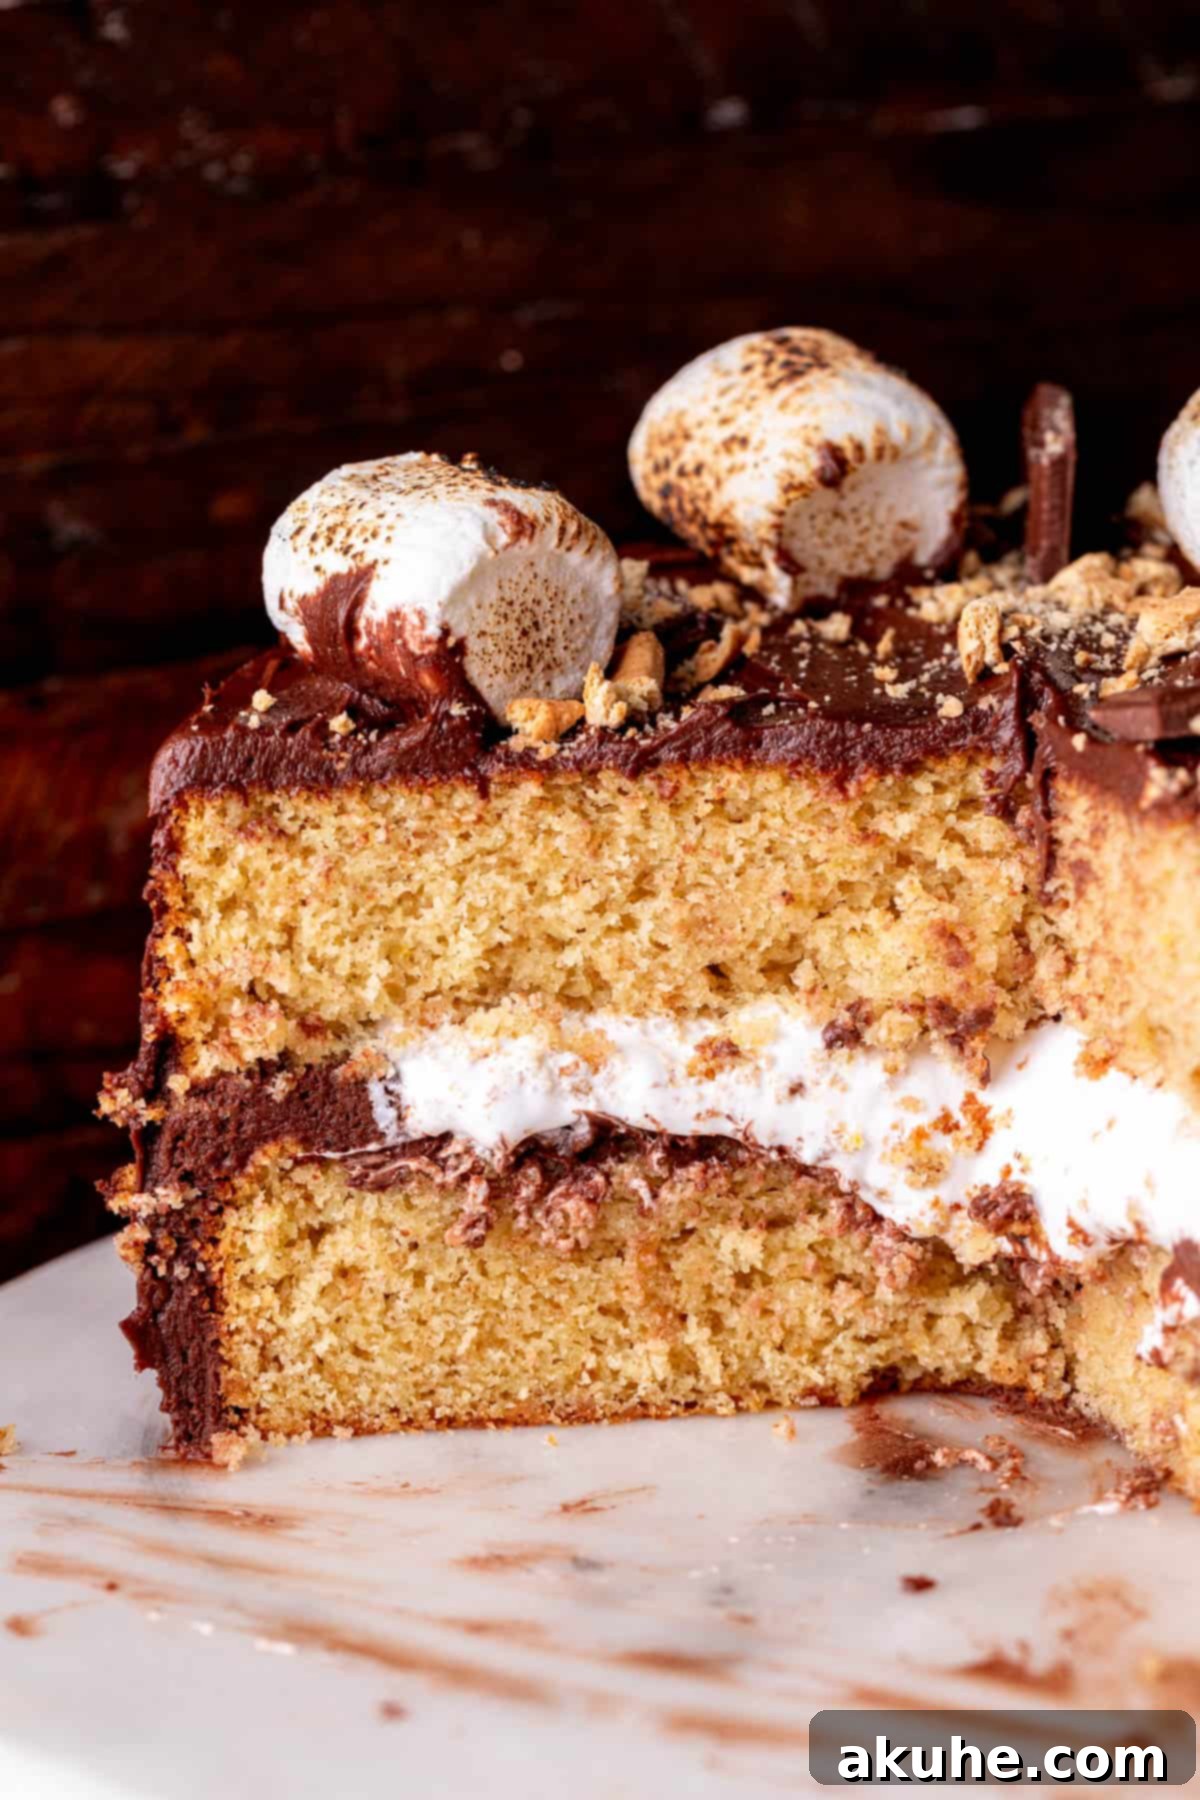
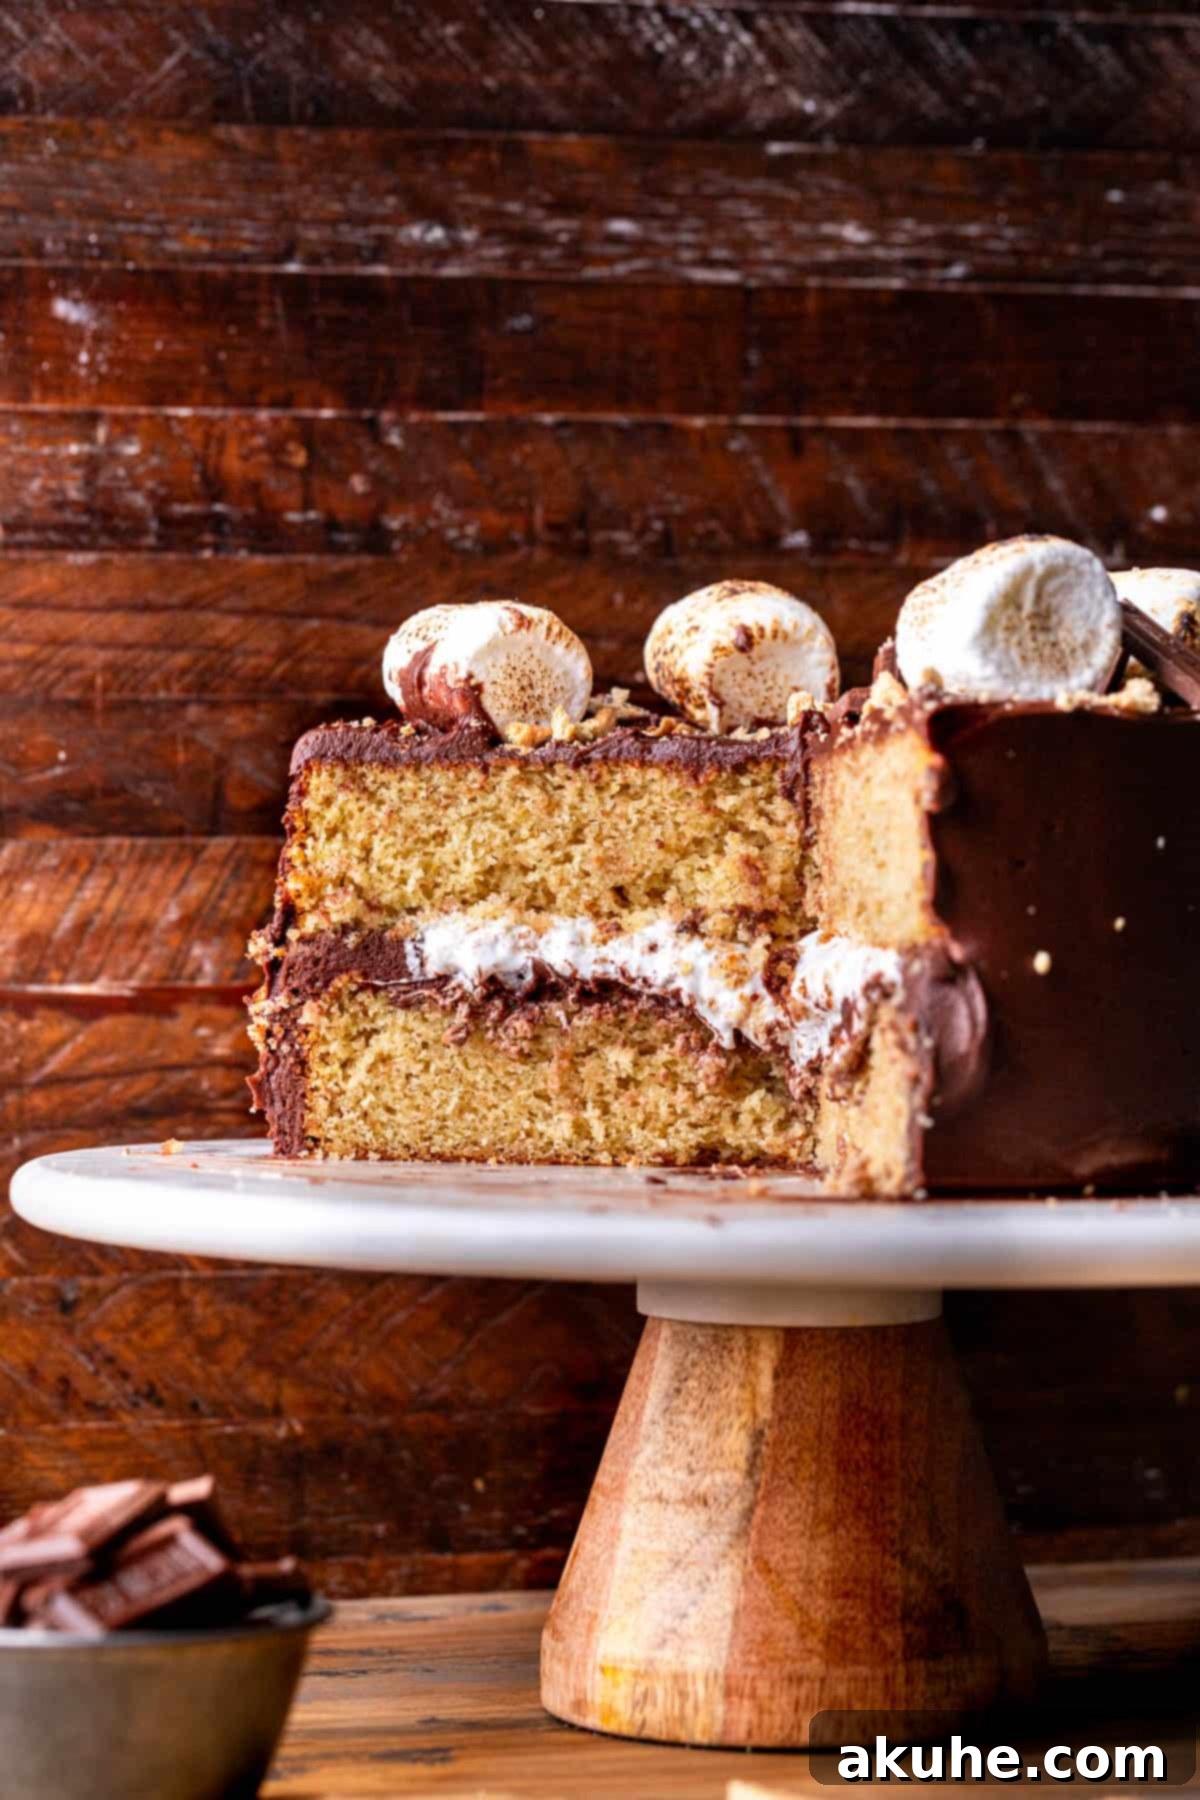
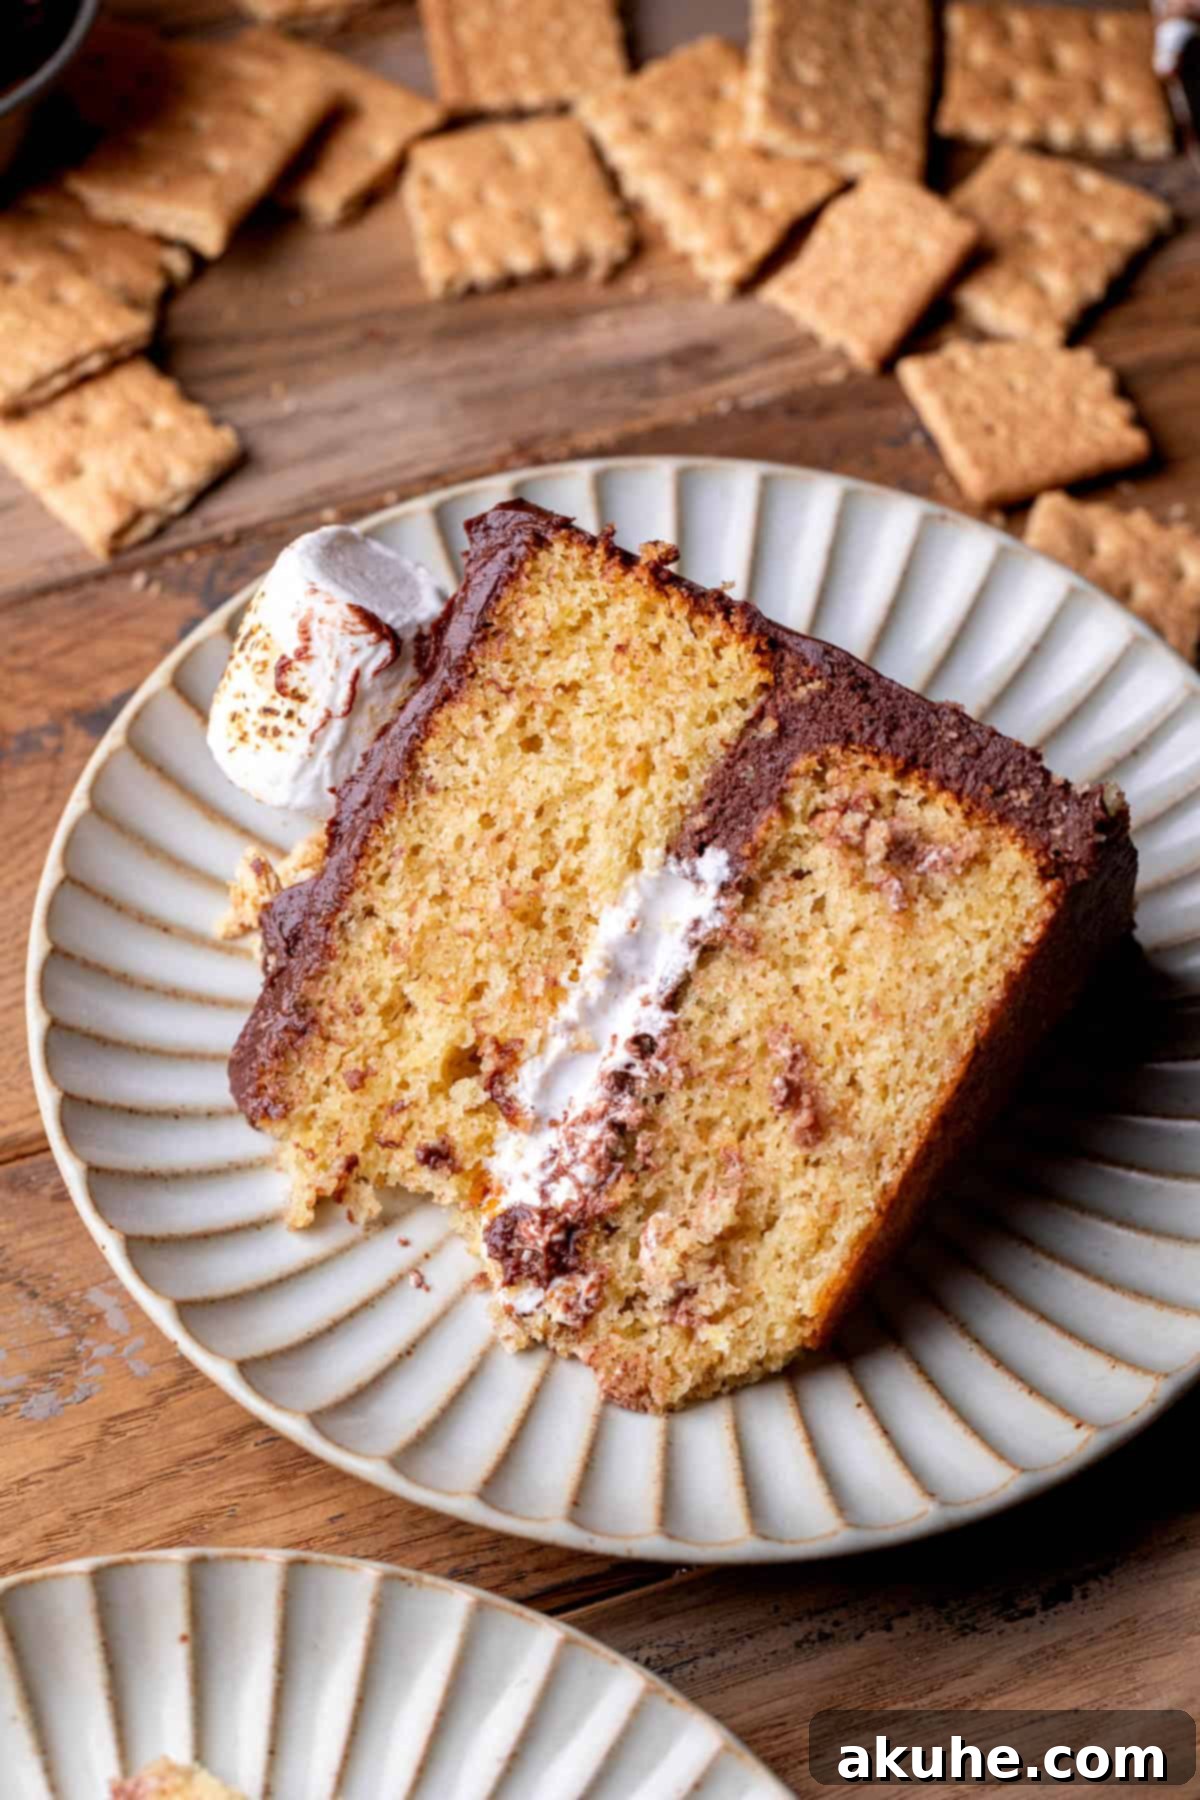
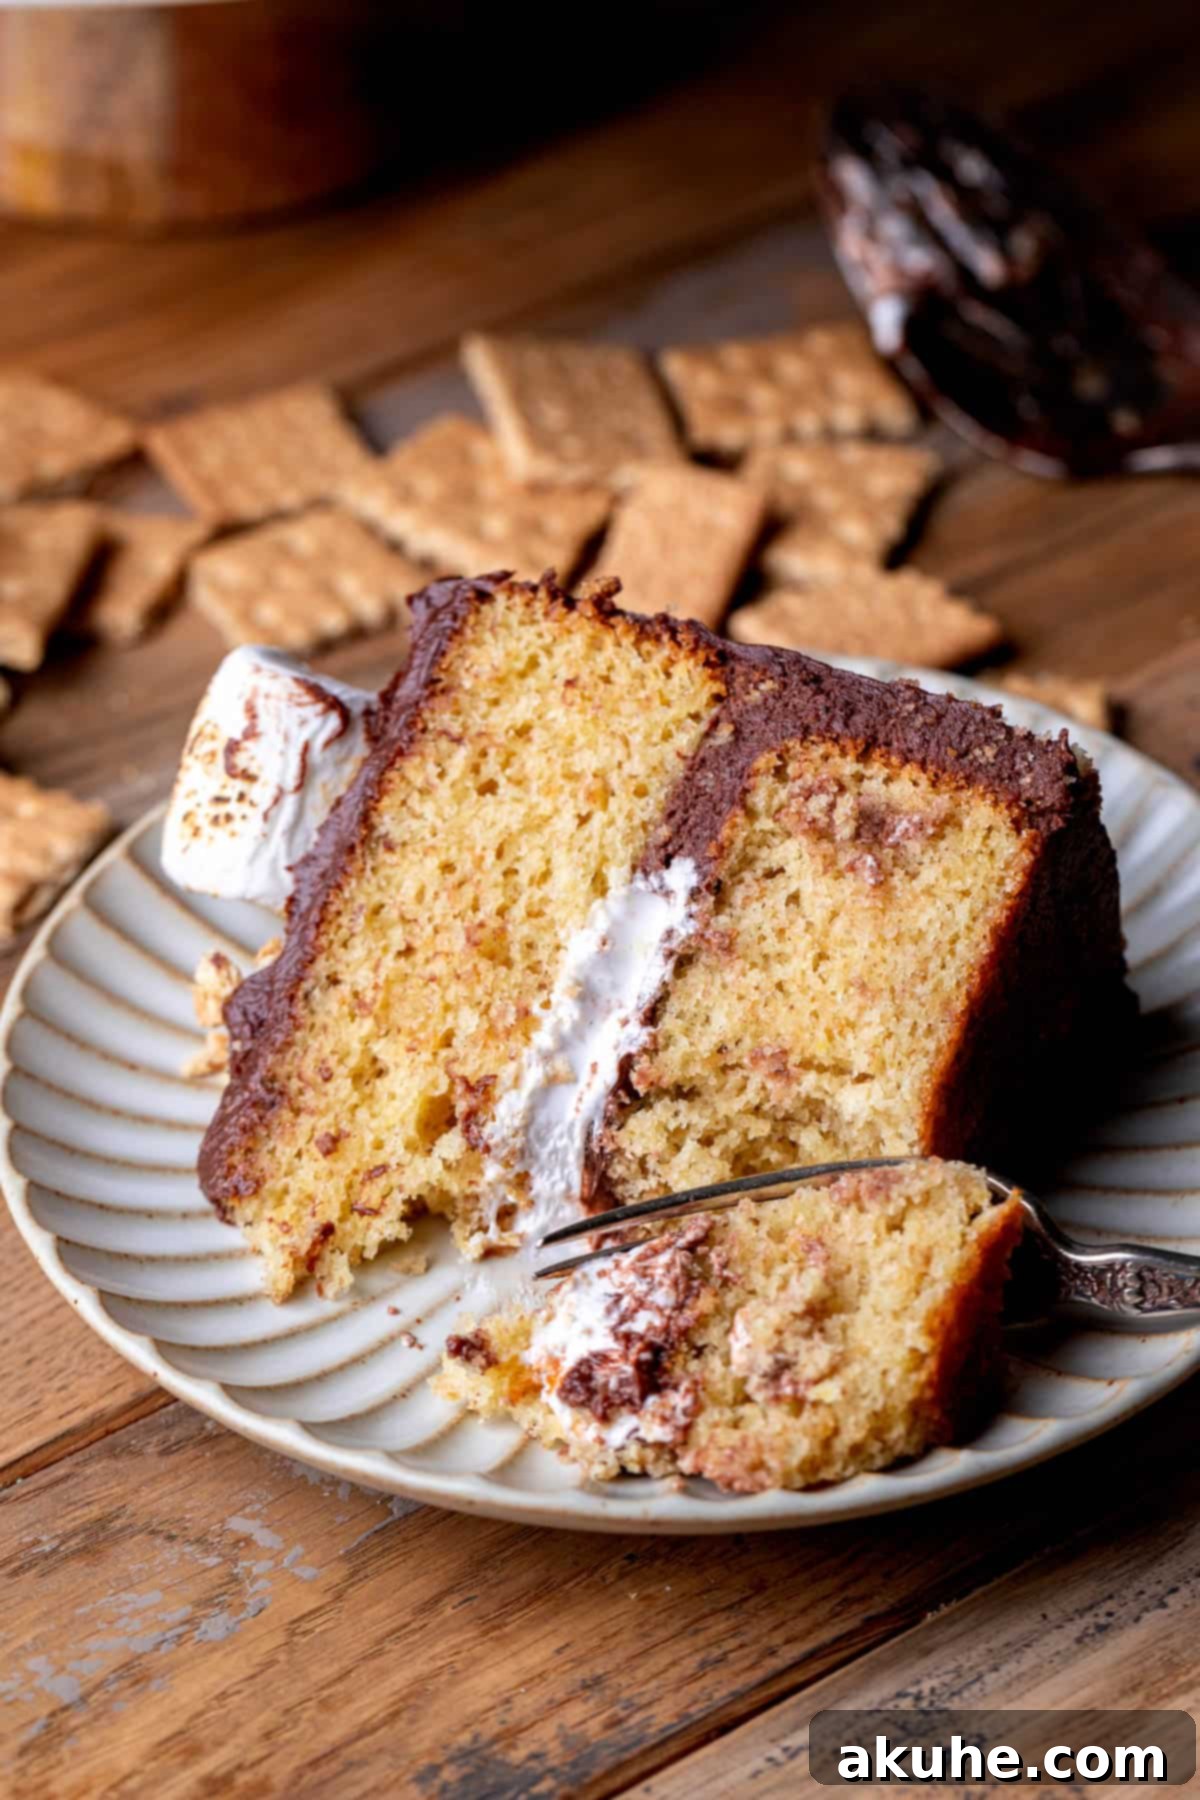
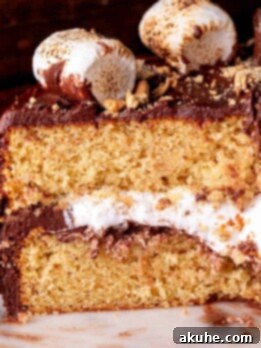
Our S’mores Cake features two irresistibly moist layers of golden graham cracker cake, each infused with finely crushed graham cracker crumbs for authentic flavor and subtle texture. Between these tender layers lies a generous filling of light, airy marshmallow fluff, complemented by a luscious chocolate cream cheese frosting that also generously coats the entire cake. The final touch, an effortlessly elegant marshmallow drip, ties the whole look together, making it a surprisingly easy yet stunning dessert to decorate. This isn’t just a cake; it’s a gourmet tribute to the classic s’more, elevated for any occasion.
If you’re as passionate about s’mores as we are, be sure to explore more delightful s’mores-inspired creations from our collection. Try our indulgent S’mores Cinnamon Rolls for a decadent breakfast treat, whip up some chewy S’mores Cookies, or bake a batch of adorable S’mores Cupcakes for individual servings.
Why This Ultimate S’mores Cake Recipe Works
- Authentic S’mores Flavor Profile: This cake perfectly captures the essence of a classic s’more. The harmonious blend of subtly sweet graham cracker cake, rich, deep chocolate cream cheese frosting, and fluffy, gooey marshmallow filling creates an irresistible flavor combination that will transport you straight to a cozy campfire. Each bite offers a nostalgic taste that’s both comforting and exciting.
- Incredibly Moist and Tender Cake: Achieving a moist cake is paramount, and this recipe delivers. By carefully balancing the wet and dry ingredients, including the use of sour cream and buttermilk, we ensure each graham cracker cake layer is wonderfully tender and never dry. The fine graham cracker crumbs also contribute to its delightful texture, making it melt in your mouth.
- Effortless Marshmallow Drip Decoration: You don’t need to be a professional baker to create a stunning cake. The marshmallow drip on top of this cake is not only visually appealing but also surprisingly simple to execute. This easy technique adds a professional finish, making your homemade s’mores cake look like it came from a high-end bakery without any complicated steps.
Step-by-Step Guide to Crafting the Graham Cracker Cake
Creating the foundation of this ultimate dessert, the graham cracker cake, is a straightforward process that yields incredibly delicious results. For best mixing, an electric mixer is recommended; either a stand mixer with a paddle attachment or a reliable hand mixer will work perfectly.
STEP 1: Prepare Your Baking Environment
Begin by preheating your oven to 350°F (175°C). This ensures the oven is at the correct temperature for even baking from the moment your cake pans go in. Next, generously spray two 8-inch round cake pans with a high-quality baking spray. To guarantee easy release and prevent sticking, line the bottoms of the pans with parchment paper circles. Spray these parchment paper circles again to ensure a flawless finish on your cake layers.
STEP 2: Combine Dry Ingredients
In a medium-sized bowl, use a fine-mesh sieve to sift together the all-purpose flour, baking powder, baking soda, and salt. Sifting is a crucial step that helps remove any lumps and aerates the dry ingredients, resulting in a lighter, fluffier cake. Once sifted, gently fold in the finely ground graham cracker crumbs. This ingredient is key to infusing the cake with that signature s’mores flavor. Set this bowl aside.
STEP 3: Cream Butter, Oil, and Sugar
In a large mixing bowl, using your electric mixer, combine the softened unsalted butter, vegetable oil, and white granulated sugar. Beat this mixture on high speed for at least 2 minutes. This “creaming” process is vital; it incorporates air into the mixture, which contributes to the cake’s light texture and ensures the sugar fully dissolves, preventing a gritty texture.
STEP 4: Incorporate Wet Ingredients
To the creamed butter and sugar mixture, add the sour cream, pure vanilla extract, and large eggs. Mix these ingredients on medium speed until they are just combined. It’s important not to overmix at this stage to avoid developing too much gluten, which can lead to a tough cake. Ensure all ingredients are at room temperature for a smooth, emulsified batter.
STEP 5: Alternate Dry and Wet Ingredients
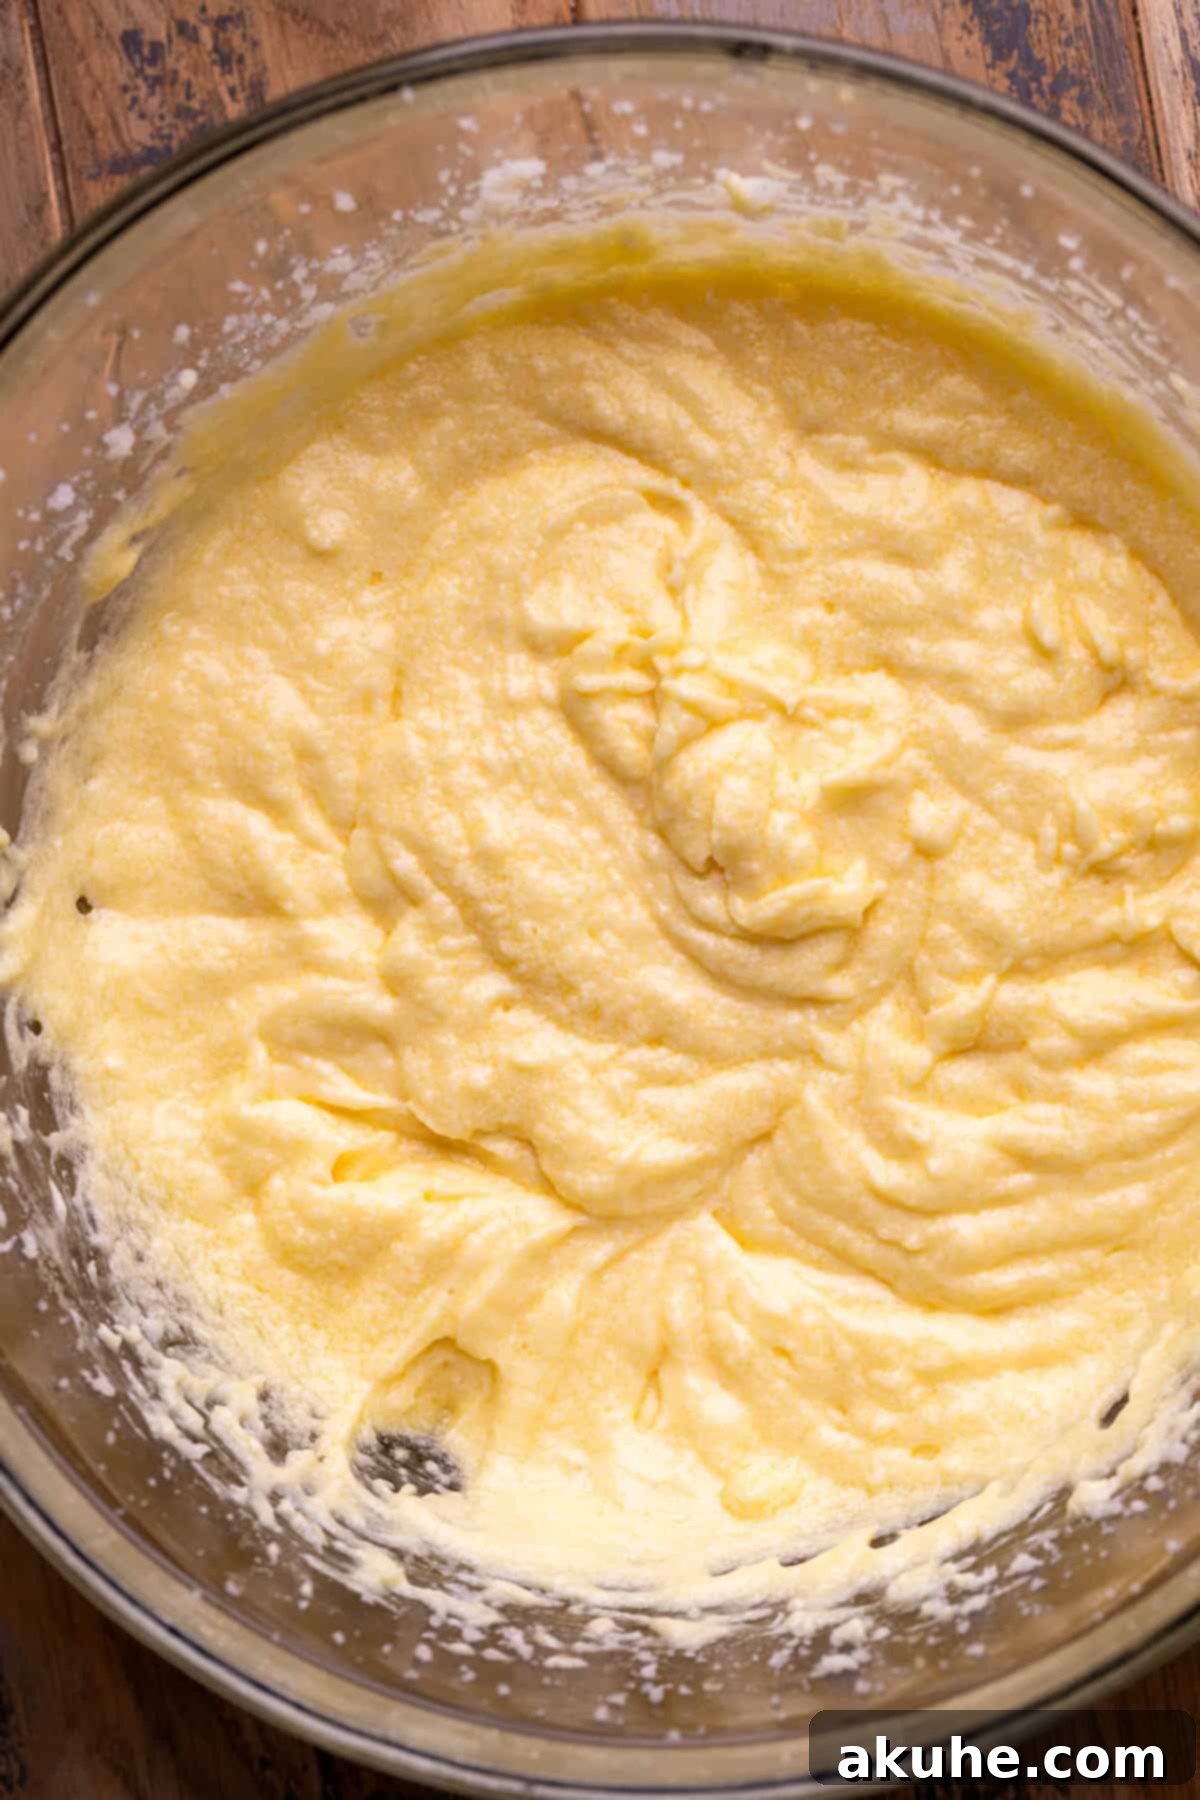
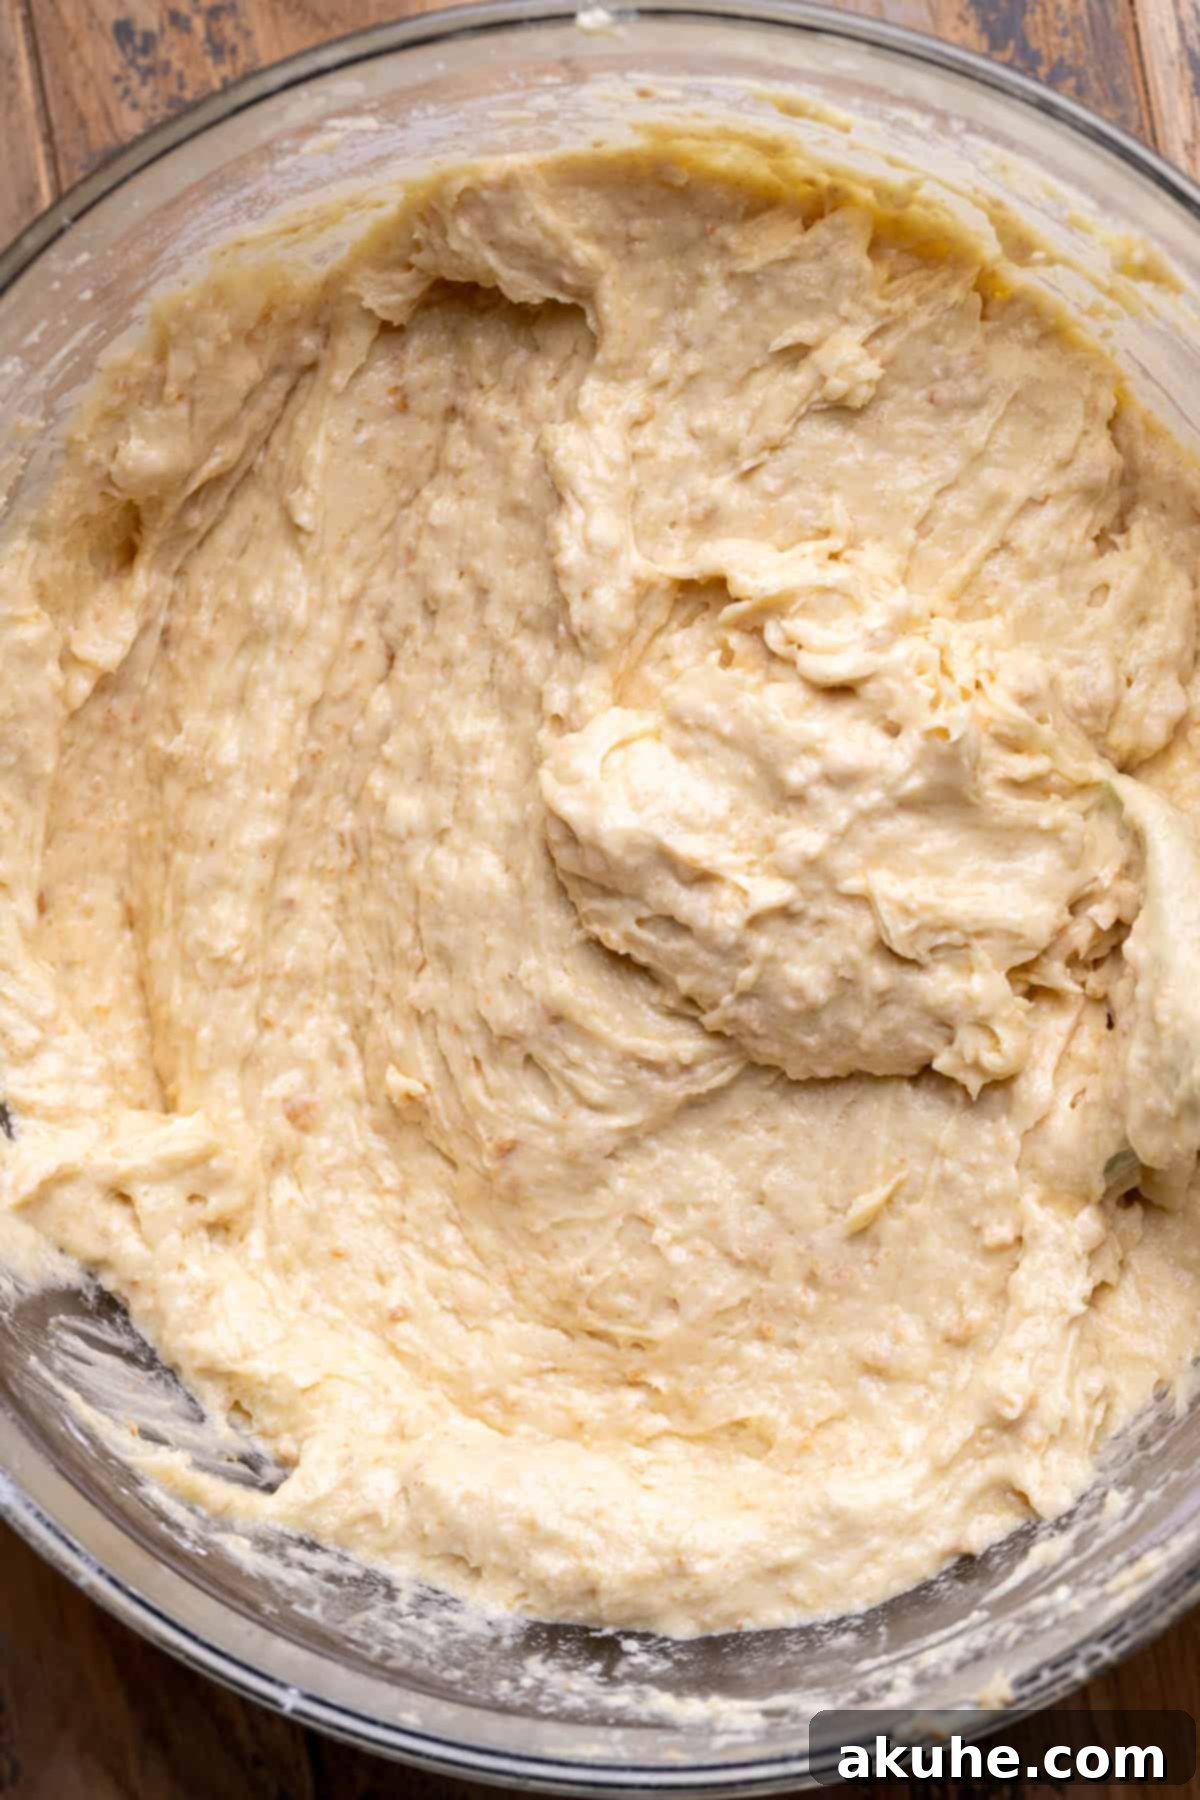
With your mixer on low speed, gradually add 1/3 of the dry ingredient mixture to the wet ingredients, mixing until just incorporated. Follow this with half of the buttermilk, mixing again on low speed. Repeat this process: add another 1/3 of the dry ingredients, then the remaining half of the buttermilk, mixing gently each time. Finish by adding the last 1/3 of the dry ingredients. Mix only until no streaks of flour remain. Overmixing here can result in a dense cake.
STEP 6: Prepare for Baking
Carefully divide the perfectly blended cake batter equally between your two prepared 8-inch cake pans. Use a spatula to ensure an even layer in each pan, which will promote uniform baking and create beautifully level cake layers.
STEP 7: Bake to Perfection
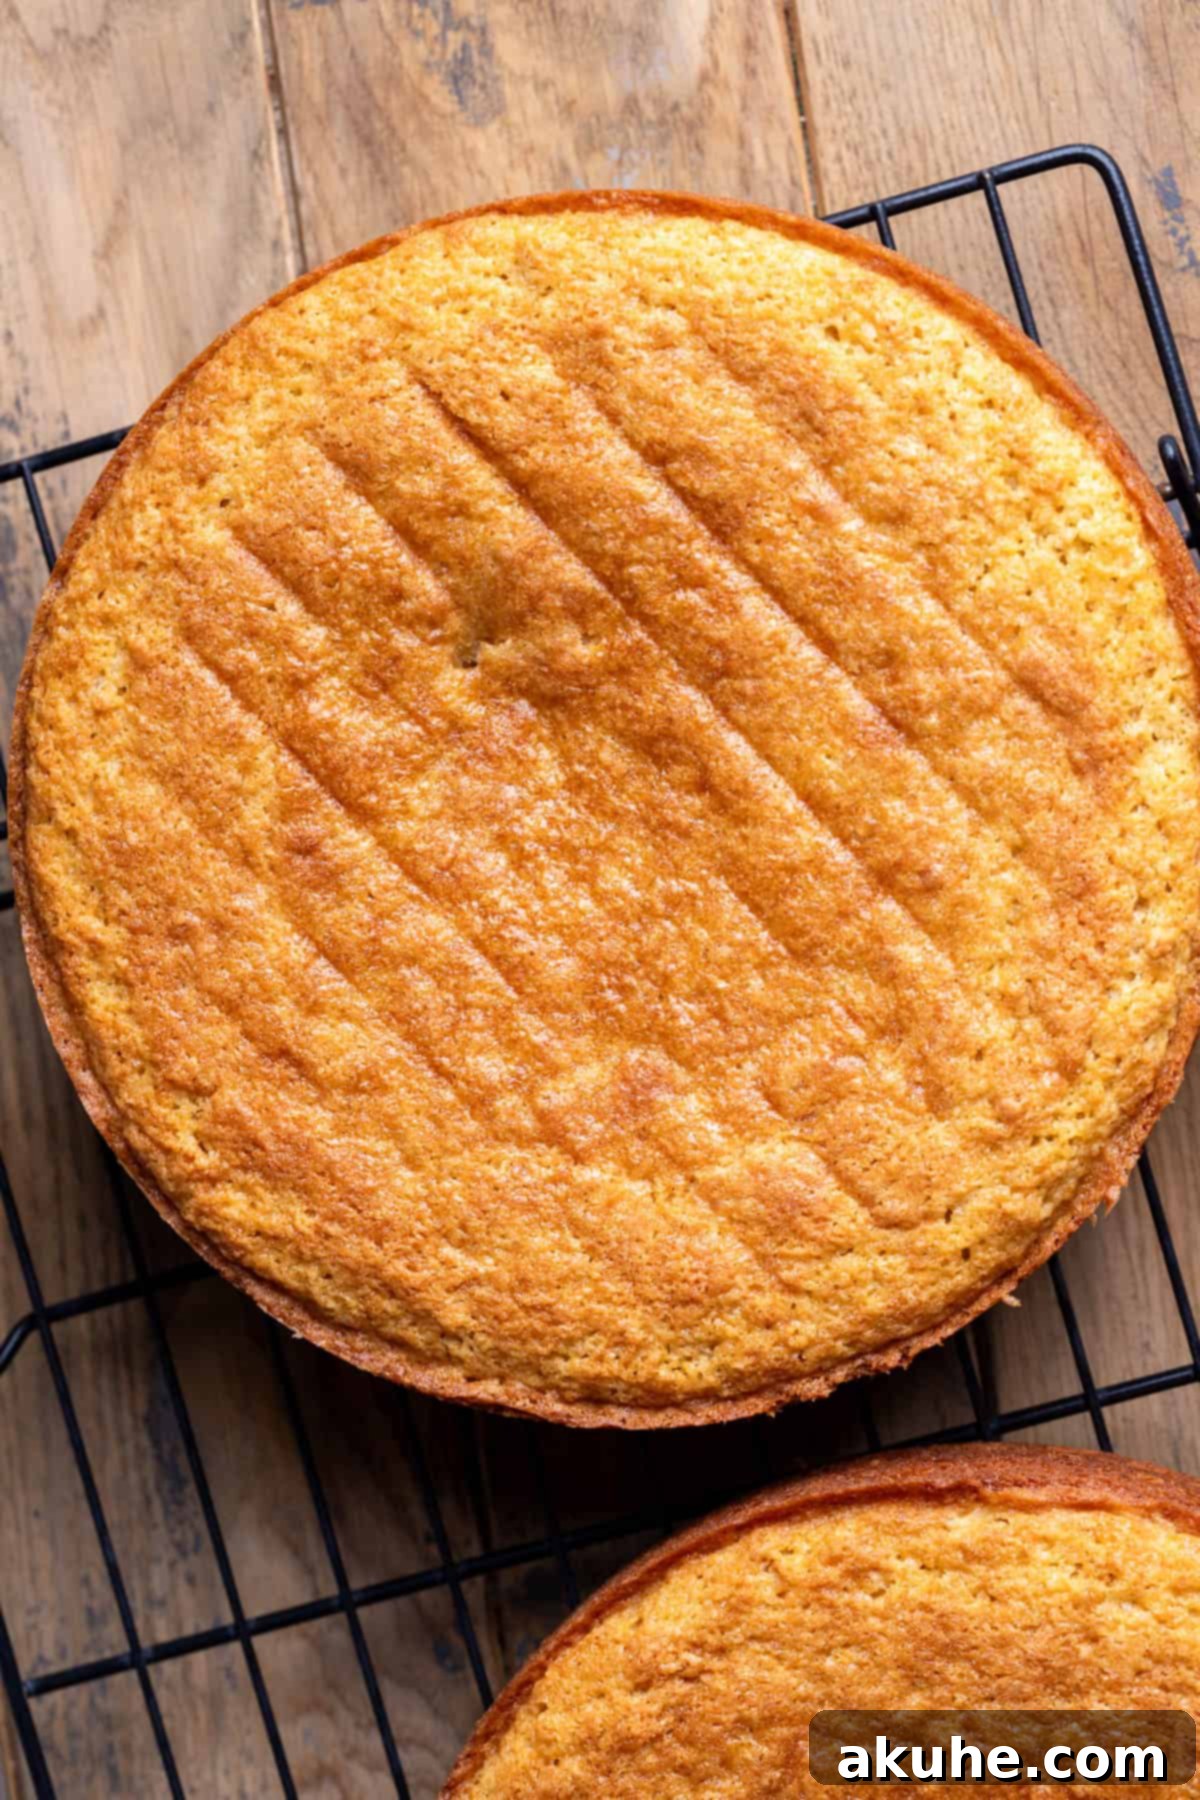
Place the cake pans into your preheated oven and bake for approximately 22-25 minutes. Baking times can vary slightly depending on your oven, so keep a close eye on them. The cakes are perfectly done when a wooden toothpick inserted into the center comes out clean, with no wet batter attached. Due to the graham cracker crumbs, the tops will develop a beautiful, slightly golden-brown hue.
STEP 8: Cool Completely
Once baked, allow the cakes to cool in their pans for about 10 minutes. This allows them to firm up slightly, making them less prone to breaking. After 10 minutes, carefully invert the cakes onto a wire cooling rack and remove the parchment paper. Let them cool completely at room temperature before attempting to frost or assemble, as a warm cake will melt the frosting.
Crafting the Decadent Chocolate Cream Cheese Frosting and Marshmallow Filling
The rich chocolate cream cheese frosting and the dreamy marshmallow filling are crucial components that elevate this s’mores cake to ultimate status. For additional tips on perfecting your chocolate cream cheese frosting, refer to my detailed chocolate cream cheese frosting post.
STEP 1: Prepare Frosting Dry Ingredients
In a large mixing bowl, sift together the powdered sugar and unsweetened cocoa powder. Sifting these dry ingredients is essential for achieving a silky-smooth, lump-free frosting. This step ensures an even distribution of cocoa powder for consistent chocolate flavor and color.
STEP 2: Cream Cream Cheese and Butter
Using an electric mixer, beat the softened cream cheese and unsalted butter on high speed for 2 minutes. Both ingredients should be at room temperature for optimal creaming, resulting in a smooth, well-combined base. This aeration process will contribute to the frosting’s light and fluffy texture.
STEP 3: Gradually Incorporate Sugar and Cocoa
Add half of the sifted cocoa powdered sugar mixture to the creamed butter and cream cheese. Mix on low speed until it is just combined. Gradually adding the sugar prevents a cloud of powdered sugar from enveloping your kitchen. Once incorporated, add the remaining cocoa powdered sugar and mix again on low speed until smooth. Scrape down the sides of the bowl as needed to ensure everything is fully combined.
STEP 4: Beat Frosting to Fluffy Perfection
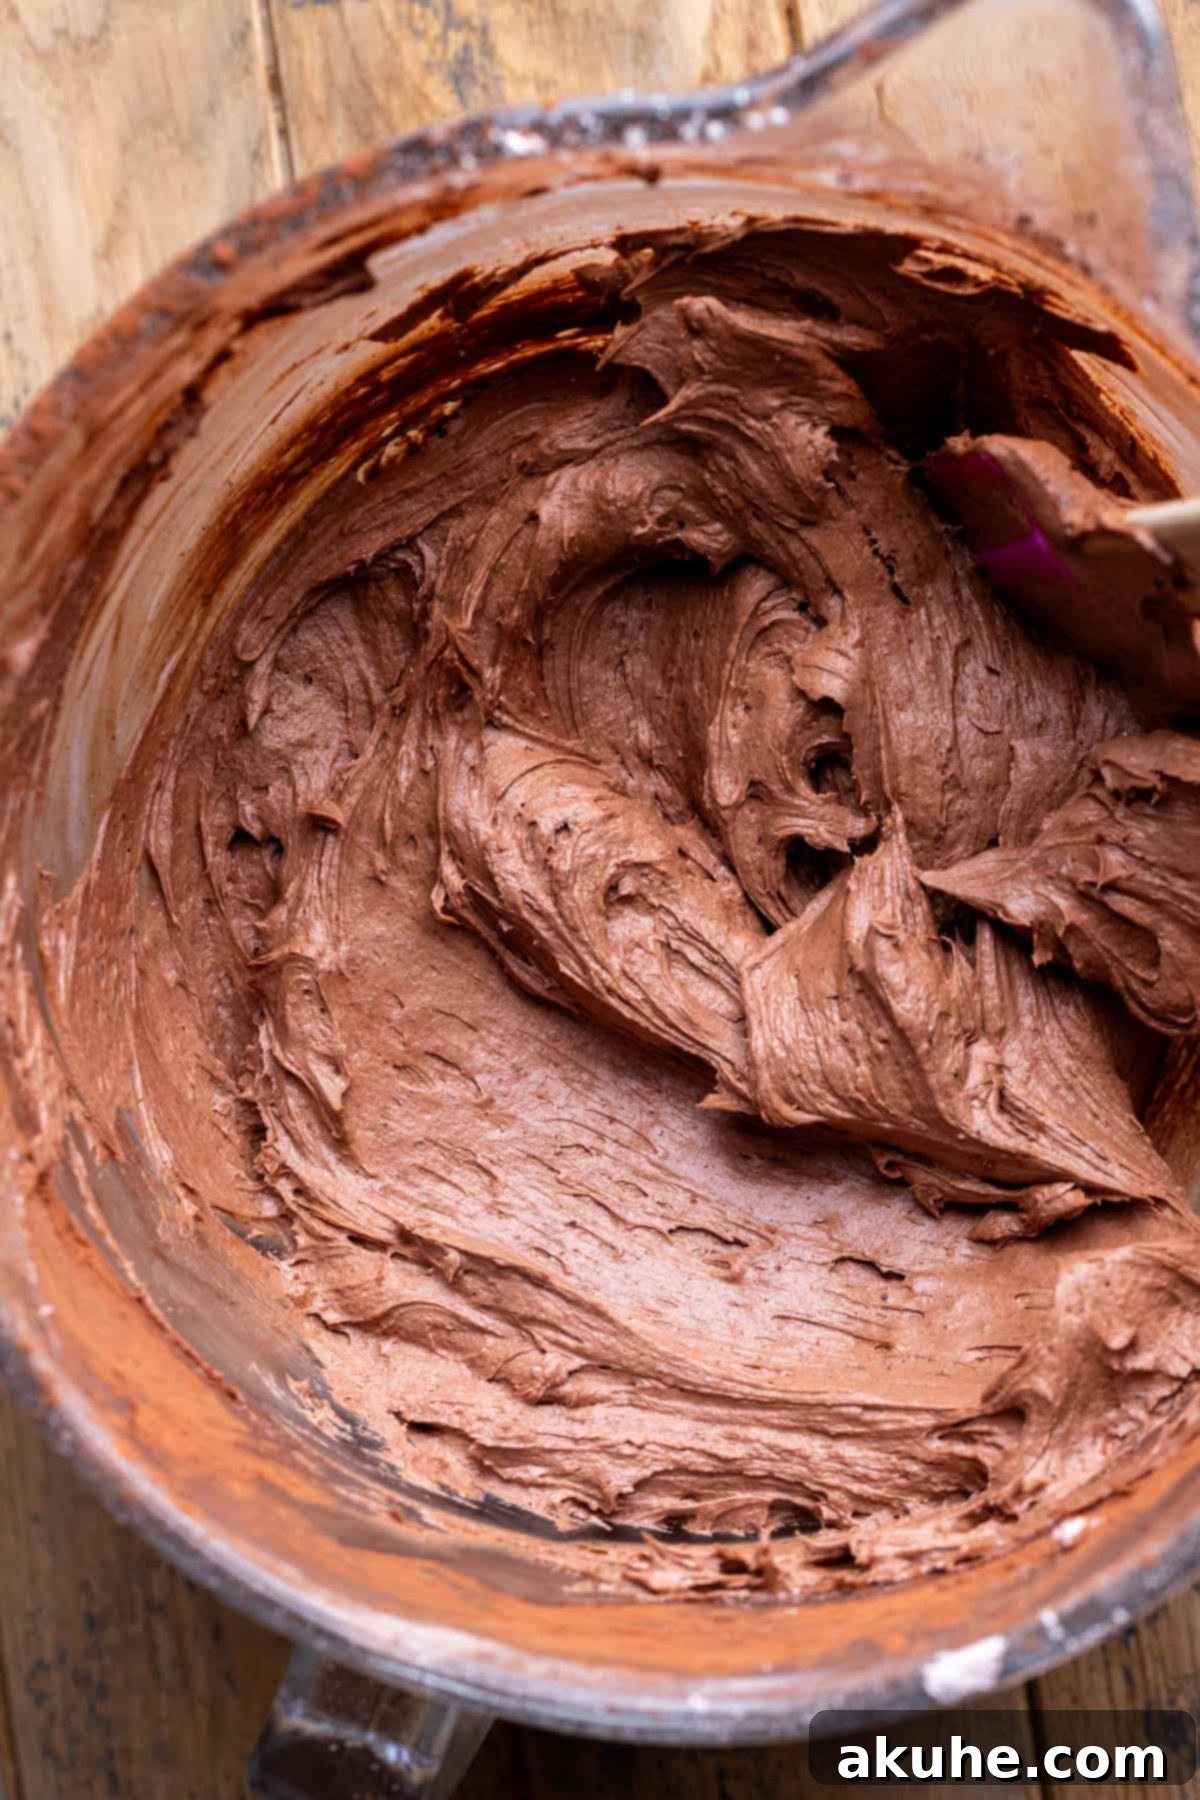
After incorporating all the powdered sugar and cocoa, scrape down the sides of the bowl once more. Add the pure vanilla extract and a pinch of salt. Increase the mixer speed to high and beat the frosting for several minutes until it becomes notably fluffy, light, and slightly pale in color. This whipping action creates that wonderfully airy, spreadable texture that’s characteristic of perfect cream cheese frosting.
STEP 5: Prepare the Marshmallow Creme Filling
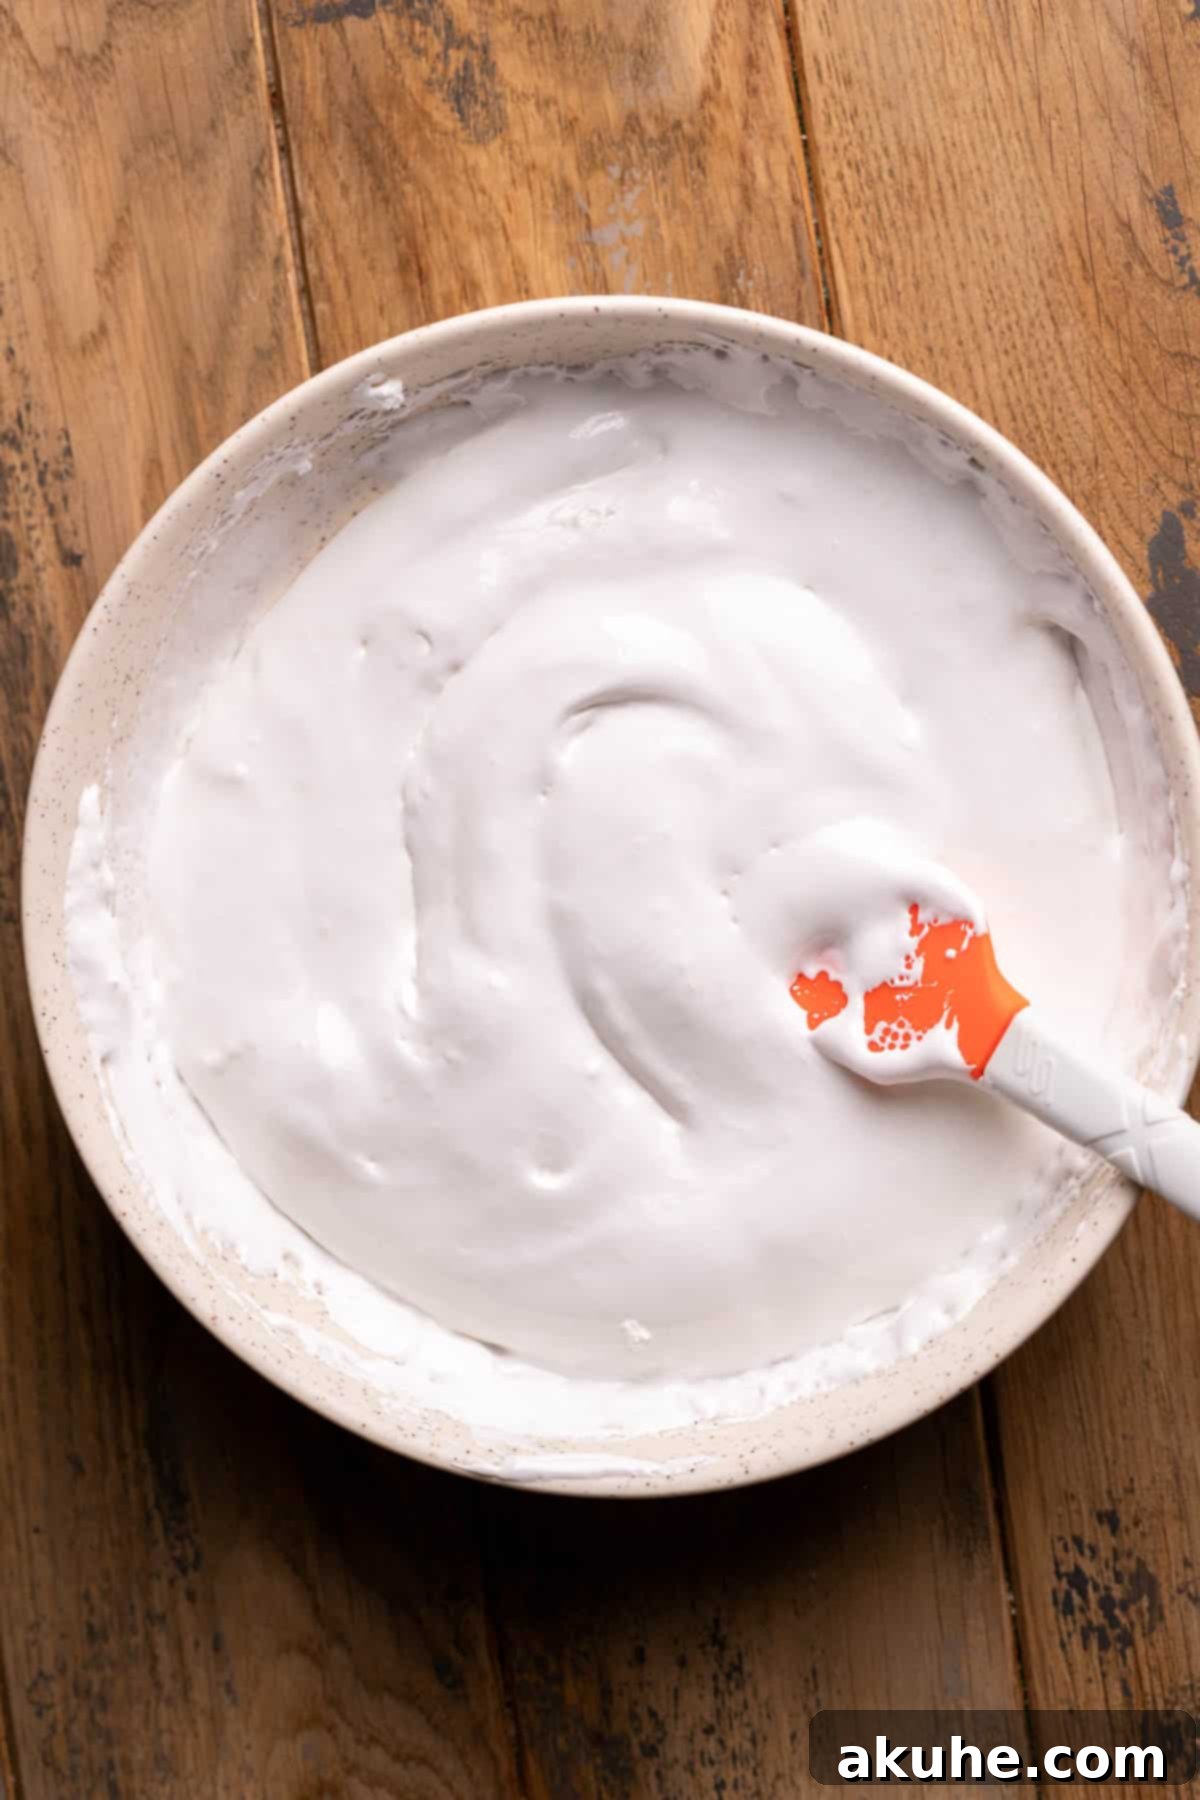
Place half of a jar of marshmallow creme into a small, microwave-safe bowl. Heat it in the microwave for approximately 30 seconds. This brief heating step will slightly loosen the marshmallow creme, making it much easier to spread smoothly as a cake filling and to create that perfect drip effect later.
Assembling Your Masterpiece: The Ultimate S’mores Cake
Bringing all the delightful components together is the final, exciting step in creating your ultimate s’mores cake. Follow these instructions carefully for a beautifully layered and decorated dessert.
STEP 1: Level the Cake Layers
To ensure a stable and professional-looking cake, use a serrated knife (like a bread knife) to carefully trim off any domed tops from your cooled cake layers. This creates flat, even surfaces that will stack neatly and prevent your cake from tilting.
STEP 2: Construct the First Layer
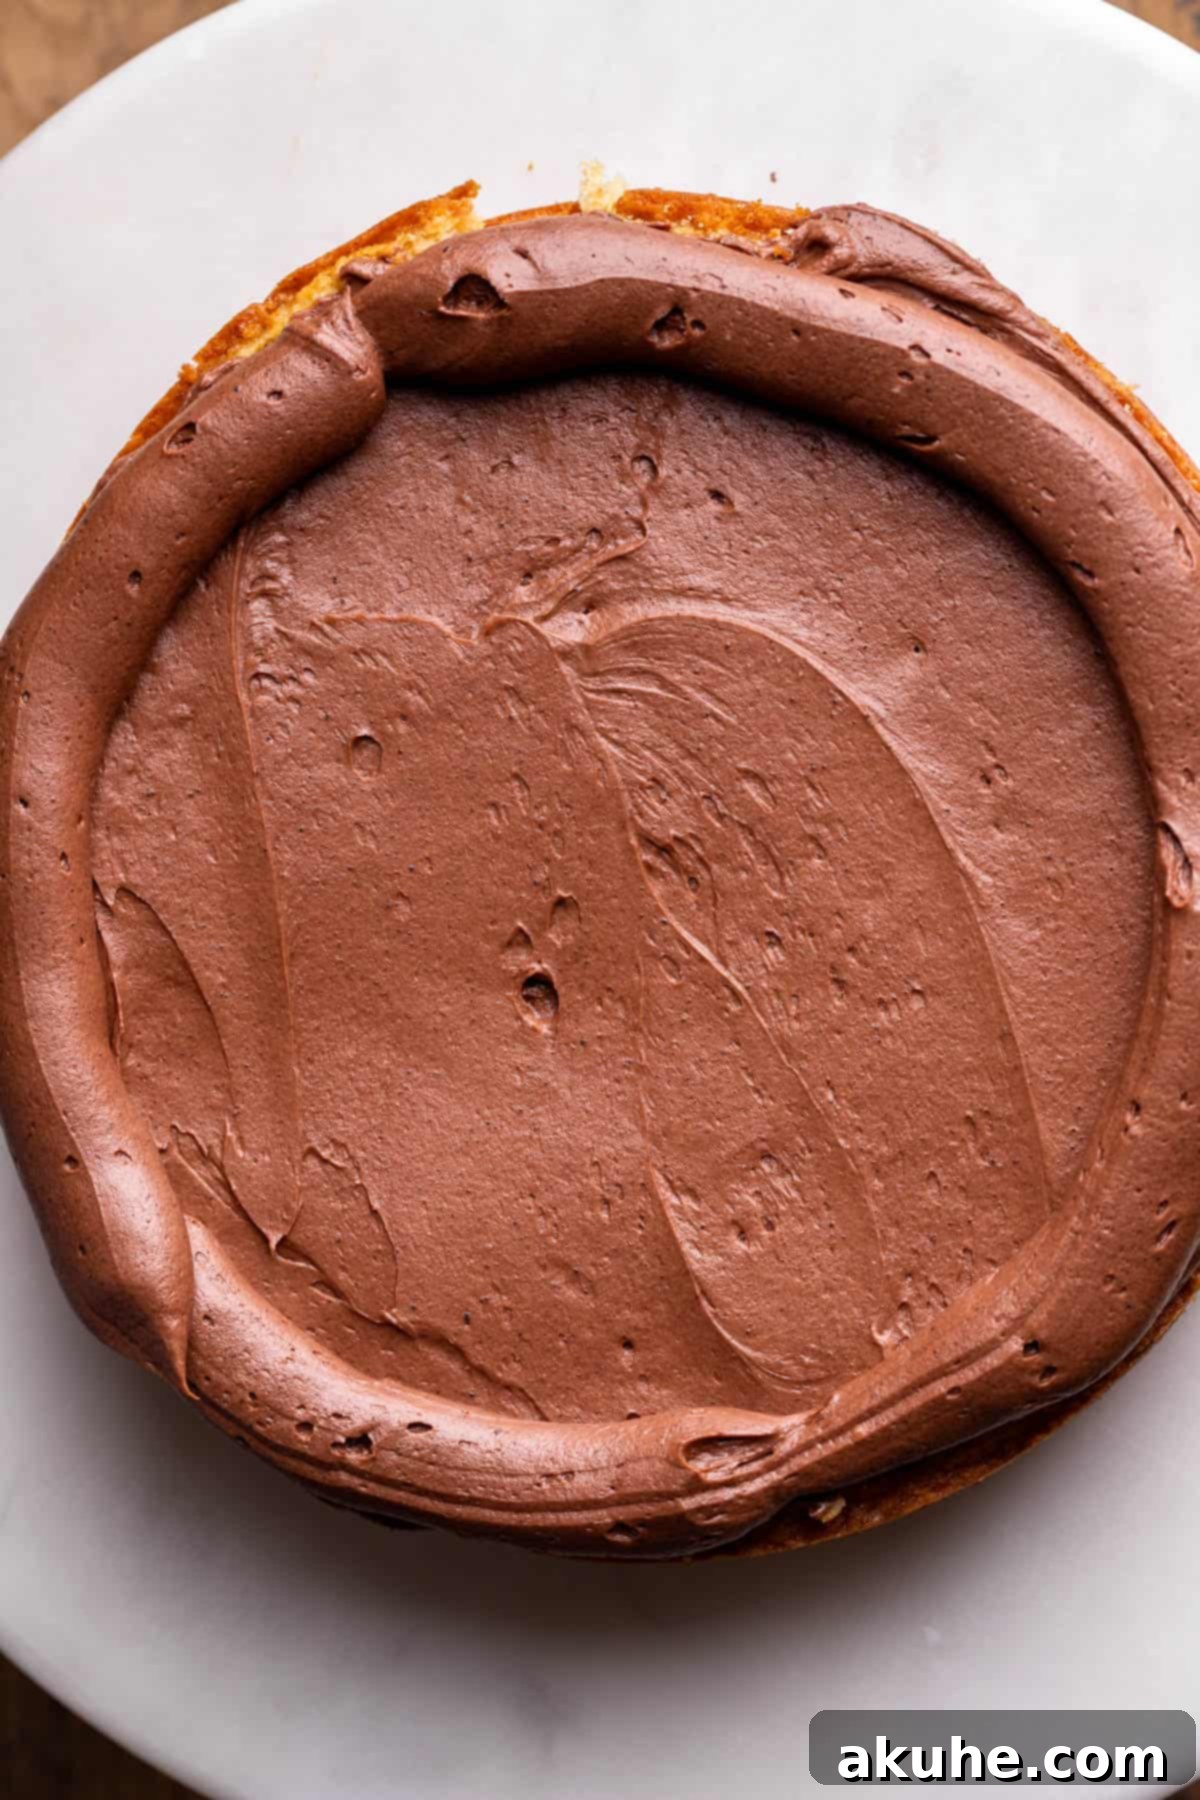
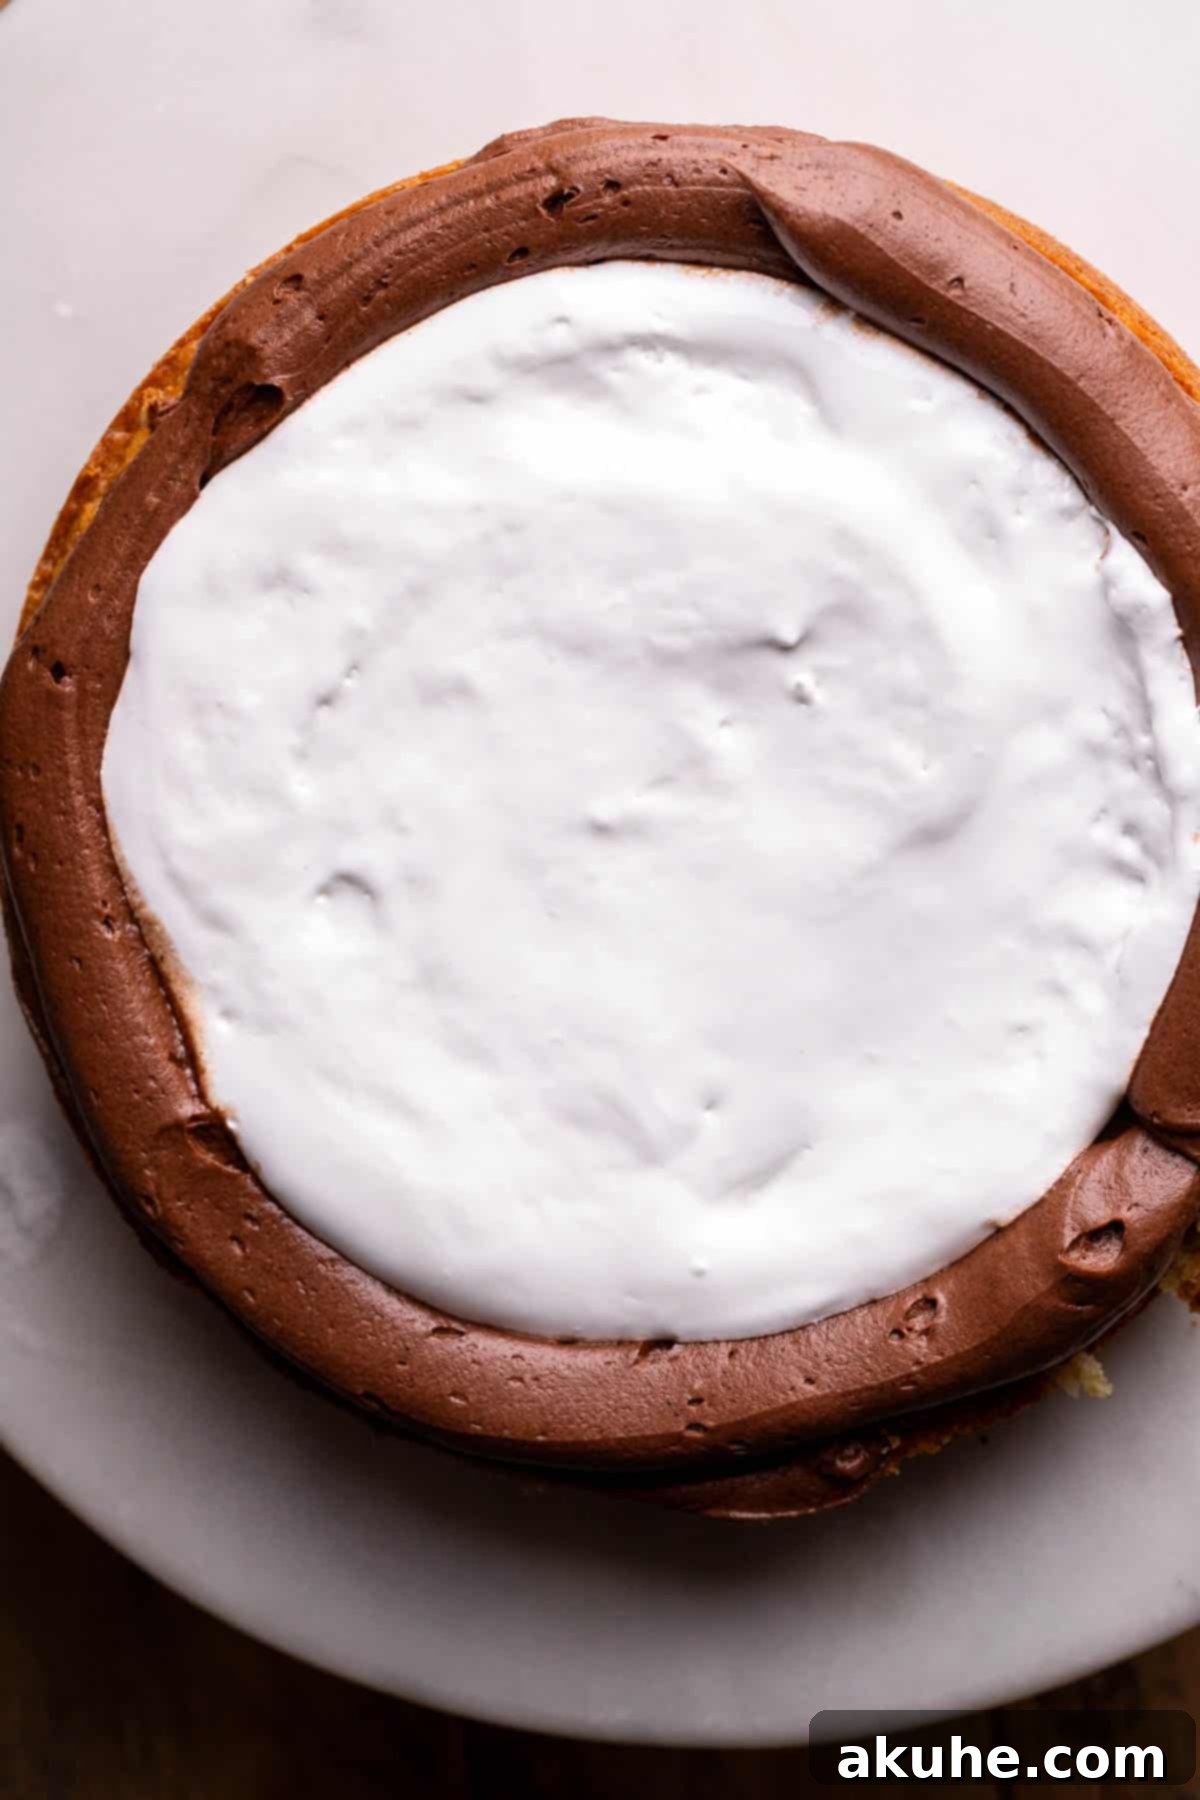
Place your first leveled cake layer onto your serving plate or cake stand. Spread about 1/2 cup of the prepared chocolate cream cheese frosting evenly over the top surface using an offset spatula. Next, pipe a small border (a “dam”) of frosting around the very edge of this layer. This border acts as a barrier, preventing the marshmallow filling from oozing out. Finally, spread 1/2 cup of the warmed marshmallow filling within the frosting dam in the center.
STEP 3: Add the Second Layer
Carefully place the second leveled cake layer directly on top of the marshmallow filling and frosting. Gently press down to ensure it’s secure and level.
STEP 4: Apply a Crumb Coat
Using an offset spatula, apply a very thin, light layer of chocolate frosting over the entire cake, both the top and the sides. This is known as a “crumb coat,” and its purpose is to trap any loose crumbs, preventing them from mixing into your final layer of frosting. Once applied, transfer the cake to the freezer for 15 minutes. This quick chill will solidify the crumb coat, effectively locking in all the crumbs and creating a firm surface for your final frosting layer.
STEP 5: Final Frosting Layer
Remove the cake from the freezer. Apply the remaining chocolate cream cheese frosting to the top and sides of the cake, spreading it smoothly and evenly for a polished finish. You can achieve a perfectly smooth surface with a bench scraper or create textured swirls with your spatula, depending on your preference. Once frosted, place the entire cake back into the freezer for another 10 minutes. This helps set the frosting and prepares the surface for the marshmallow drip.
STEP 6: Prepare the Marshmallow Drip
Take the remaining marshmallow filling (approximately 1/2 jar) and place it in a small microwave-safe bowl. If it has cooled and thickened, warm it briefly in the microwave for about 10-15 seconds until it’s pourable but not too hot or runny. Stir in 1 tablespoon of water to achieve the perfect drip consistency. The goal is a consistency that flows but isn’t watery.
STEP 7: Create the Signature Marshmallow Drip
Transfer the prepared, slightly thinned marshmallow filling into a piping bag (you can snip a small corner off a Ziploc bag if you don’t have a piping bag). Working quickly, pipe the marshmallow along the edge of the top cake layer, allowing it to gently cascade down the sides in beautiful drips. You can also create some swirls or dollops on top before serving for extra visual appeal. The chilled cake will help the marshmallow set quickly, creating defined drips.
Expert Baking Tips for a Flawless S’mores Cake
Achieving baking perfection is all about attention to detail. These expert tips will help you master this s’mores cake recipe and ensure a delicious outcome every time:
- Master Proper Flour Measurement: One of the most common baking errors is incorrectly measuring flour. Always use the “spoon and level” method: gently spoon flour into your measuring cup until it overflows, then level off the excess with the back of a knife. Never scoop directly from the flour bag, as this compacts the flour, leading to an excess amount. Too much flour results in a dry, dense cake, so precision here is key for a moist and tender crumb. Alternatively, for ultimate accuracy, use a kitchen scale to measure flour by weight.
- Effortless Cake Removal: To ensure your beautiful cake layers release from the pan without sticking or tearing, thorough preparation is crucial. Start by generously spraying your cake pans with a high-quality nonstick baking spray. Then, cut circles of parchment paper to fit the bottom of each pan and place them inside. Spray the parchment paper again, making sure to cover every inch. Don’t be shy with the spray; missing even small spots can cause the cake to stick and tear. This double-layer of protection guarantees a smooth release.
- Adjustments for High-Altitude Baking: Baking at high altitudes can affect how ingredients react, often causing cakes to rise too quickly and then collapse. To counteract this, add an extra 2 tablespoons of all-purpose flour to your cake batter. This slight increase in dry ingredients helps to stabilize the cake structure, allowing it to bake more successfully in higher elevations.
- Room Temperature Ingredients are Non-Negotiable: Always ensure your dairy ingredients (butter, cream cheese, sour cream, buttermilk) and eggs are at room temperature. This allows them to emulsify properly, creating a smoother, more uniform batter or frosting. Cold ingredients can lead to a lumpy mixture and affect the overall texture of your final product. Plan ahead and pull them out of the fridge at least 1-2 hours before you begin baking.
- Avoid Overmixing: Once you start incorporating the dry ingredients, mix only until just combined and no streaks of flour remain. Overmixing develops the gluten in the flour, which can lead to a tough, chewy cake. A light hand and gentle mixing will result in a tender, fluffy crumb.
Frequently Asked Questions (FAQ) About S’mores Cake
Can the cake layers be made ahead of time?
Absolutely! Preparing the cake layers in advance is a fantastic time-saver. Once your cake layers have completely cooled, wrap each one tightly in several layers of plastic wrap, then an additional layer of aluminum foil. You can then freeze them for up to 30 days. When you’re ready to decorate, simply remove them from the freezer about 1 hour before you plan to frost, allowing them to thaw partially. They will still be firm enough to handle easily, making assembly a breeze.
Can I use a different size cake pan?
Yes, you can adapt this recipe for other pan sizes. If you use two 9-inch cake pans, your cake layers will be thinner, and the baking time may be reduced by a few minutes (start checking at 18-20 minutes). Conversely, for a taller, three-layer cake, you can use three 6-inch cake pans. Keep in mind that for 6-inch pans, the baking time will likely increase, possibly to 28-32 minutes, so always rely on the toothpick test for doneness.
Can this recipe be made into cupcakes?
Yes, this versatile s’mores cake recipe is perfectly suited for making cupcakes! The batter yields approximately 24 standard-sized cupcakes. When baking as cupcakes, reduce the oven temperature slightly to 325°F (160°C) and bake for about 18-22 minutes, or until a toothpick inserted into the center of a cupcake comes out clean. Frost them with the chocolate cream cheese frosting and top with a dollop of marshmallow fluff for individual s’mores treats.
What if my marshmallow drip is too thick or too thin?
The consistency of the marshmallow drip is key for that perfect aesthetic. If your marshmallow is too thick after microwaving, add a very small amount of hot water (half a teaspoon at a time), stirring thoroughly until you reach a pourable, but not watery, consistency. If it’s too thin, you can try refrigerating it for a few minutes to thicken slightly, or stir in a tiny pinch of powdered sugar if absolutely necessary (though this can alter the texture). Always test a small amount on the back of a chilled spoon before applying to the cake.
Can I use store-bought graham cracker crumbs?
Absolutely! Using pre-made graham cracker crumbs is a convenient shortcut that won’t compromise the flavor of your cake. Just make sure they are finely ground to ensure a smooth cake batter texture. If you only have whole graham crackers, you can easily crush them in a food processor until they resemble fine crumbs.
Storing and Freezing Your S’mores Cake
To preserve the freshness and delectable taste of your s’mores cake, proper storage is essential. Store any leftover cake in an airtight container, such as a specialized cake carrier, to protect it from drying out and absorbing other refrigerator odors. This cake, with its cream cheese frosting, should always be stored in the refrigerator for up to 5 days. For optimal serving, allow slices to come to room temperature for about 15-20 minutes before enjoying, as this enhances the flavors and softens the frosting to its ideal consistency.
Freezing Your S’mores Cake for Later Enjoyment
This s’mores cake freezes beautifully, making it perfect for preparing ahead or enjoying individual slices over time. To freeze, we recommend cutting the cake into individual slices. Wrap each slice tightly in plastic wrap, then place them in an airtight freezer-safe container. This double-layer of protection helps prevent freezer burn. Frozen slices can be stored for up to 30 days. When you’re ready for a treat, simply remove a slice from the freezer and let it thaw at room temperature for about 30-60 minutes, or warm it gently in the microwave for a few seconds if you prefer a softer, gooey marshmallow.
Other Irresistible Cake Recipes to Explore
We love hearing from you! If you adored this recipe, please consider leaving a star review on the recipe card below. Share your delicious creations with us on Instagram by tagging @stephaniesweettreats. For more baking inspiration and sweet ideas, make sure to follow us on Pinterest!
S’mores Cake
Stephanie Rutherford
Print Recipe
Pin Recipe
45 minutes
23 minutes
1 hour
2 hours
8 minutes
16
slices
Ingredients
Graham Cracker Cake
- 2 3/4 cups All-purpose flour
- 1 cup Graham cracker crumbs, blended to a fine crumb
- 2 1/2 tsp Baking powder
- 1/2 tsp Baking soda
- 1 tsp Salt
- 1 cup Unsalted butter, room temperature
- 3 TBSP Oil
- 1 3/4 cup White granulated sugar
- 1/4 cup Sour cream, room temperature
- 1 tsp Pure vanilla extract
- 4 Large eggs, room temperature
- 1 cup Buttermilk, room temperature
Marshmallow Filling
- 1/2 jar Marshmallow creme
- 1/4 tsp Salt
Chocolate Cream Cheese Frosting
- 8 oz Cream cheese, room temperature
- 1 1/2 cups Unsalted butter, room temperature
- 4 cups Powdered sugar, sifted
- 3/4 cup Unsweetened cocoa powder, sifted
- 1 tsp Pure vanilla extract
- 1/4 tsp Salt
Instructions
Graham Cracker Cake
- Preheat the oven to 350℉ (175°C). Spray two 8-inch cake pans with baking spray. Line the bottoms with parchment paper circles, then spray again.
- In a medium bowl, sift together the all-purpose flour, baking powder, baking soda, and salt. Add in the graham cracker crumbs and gently combine. Set aside.2 3/4 cups All-purpose flour,
1 cup Graham cracker crumbs,
2 1/2 tsp Baking powder,
1/2 tsp Baking soda,
1 tsp Salt - Using an electric mixer in a large mixing bowl, beat the room temperature unsalted butter, oil, and granulated sugar on high speed for 2 minutes until light and fluffy.1 cup Unsalted butter,
3 TBSP Oil,
1 3/4 cup White granulated sugar - Add in the room temperature sour cream, pure vanilla extract, and large eggs. Mix on medium speed until just combined, scraping down the bowl as needed.1/4 cup Sour cream,
1 tsp Pure vanilla extract,
4 Large eggs - Alternate adding the dry ingredients and buttermilk to the wet mixture. Add 1/3 of the dry ingredients and mix on low speed until just combined. Then add half of the buttermilk and mix on low. Repeat with another 1/3 of the dry ingredients and the remaining buttermilk. Finish with the last 1/3 of the dry ingredients, mixing only until no flour streaks are visible. Do not overmix.1 cup Buttermilk
- Divide the cake batter evenly into the two prepared cake pans. Bake for 22-25 minutes, or until a toothpick inserted into the center comes out clean. The tops will be beautifully golden brown due to the graham crackers.
- Allow the cakes to cool in their hot pans for 10 minutes. Then, carefully transfer them to a wire cooling rack to cool completely before decorating.
Chocolate Cream Cheese Frosting
- In a large bowl, sift the powdered sugar and unsweetened cocoa powder together to remove any lumps. Set aside.4 cups Powdered sugar,
3/4 cup Unsweetened cocoa powder - Using an electric mixer, beat the room temperature cream cheese and unsalted butter on high speed for 2 minutes until smooth and well combined.8 oz Cream cheese,
1 1/2 cups Unsalted butter - Add in half of the sifted powdered sugar and cocoa mixture. Mix on low speed until just combined. Scrape down the sides of the bowl, then add the remaining powdered sugar mixture and mix on low until smooth.
- Scrape the bowl once more. Add in the pure vanilla extract and salt. Increase the mixer speed to high and beat the frosting until it becomes fluffy, light, and slightly pale in color (about 2-3 minutes).1 tsp Pure vanilla extract,
1/4 tsp Salt
Marshmallow Filling
- Place half a jar of marshmallow creme and the salt in a microwave-safe small bowl. Heat for 30 seconds in the microwave to loosen its consistency, making it easier to spread.1/2 jar Marshmallow creme,
1/4 tsp Salt
Assembly
- Using a serrated knife, carefully trim any domed tops off the cooled cake layers to create flat, even surfaces for stacking.
- Place the first leveled cake layer onto your serving plate. Spread 1/2 cup of the chocolate cream cheese frosting evenly over the top. Pipe a border of frosting around the outer edge to create a “dam.” Spread 1/2 cup of the warmed marshmallow filling within this border in the center.
- Carefully place the second cake layer directly on top. Apply a light layer of frosting (a crumb coat) over the entire cake to trap any loose crumbs. Freeze the cake for 15 minutes to solidify this layer.
- Remove the cake from the freezer and apply the remaining chocolate cream cheese frosting to the top and sides, smoothing it out for a beautiful finish. Place the frosted cake back in the freezer for 10 minutes to prepare for the marshmallow drip.
- While the cake chills, prepare the marshmallow drip. Take the remaining marshmallow filling and mix in 1 tablespoon of water. If necessary, microwave briefly (10-15 seconds) until it reaches a pourable, but not too thin, consistency. Transfer to a piping bag with a small snip at the end.
- Remove the chilled cake from the freezer. Pipe the marshmallow mixture along the top edge of the cake, allowing beautiful drips to cascade down the sides. You can also add swirls or dollops of marshmallow on top for extra decoration.
Notes
High Altitude Baking: For those baking at higher elevations, add an extra 2 tablespoons of all-purpose flour to the cake batter to stabilize the structure.
Room Temperature Ingredients: For the best results in both cake and frosting, ensure all dairy ingredients (butter, cream cheese, sour cream, buttermilk) and eggs are at room temperature. Take them out of the refrigerator at least 2 hours before you plan to start baking.
Calories:
549
kcal
,
Carbohydrates:
81
g
,
Protein:
5
g
,
Fat:
39
g
,
Saturated Fat:
22
g
,
Polyunsaturated Fat:
2
g
,
Monounsaturated Fat:
11
g
,
Trans Fat:
1
g
,
Cholesterol:
94
mg
,
Sodium:
420
mg
,
Potassium:
124
mg
,
Fiber:
2
g
,
Sugar:
29
g
,
Vitamin A:
1124
IU
,
Vitamin C:
0.03
mg
,
Calcium:
91
mg
,
Iron:
2
mg
Did you make this recipe?
We’d love to hear from you! Please consider leaving a star rating and review above.
